필요한 것
-
-
Apply pressure and slide upward to remove back cover.
-
Lift the back cover up away from the phone.
 FixBot에 문의하기
-
-
-
Lift battery upward on the upper right-hand side to remove it.
-
Check the battery to make sure there's no bent corners.
-
-
-
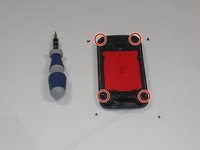
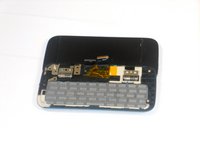
Using a T5 screwdriver, remove the four screws in corners as shown.
-
Lift the top portion of the rear case.
-
-
-
-
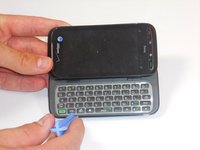
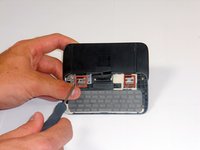
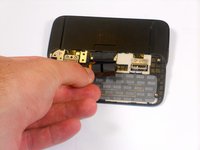
Using an IfixIt Plastic Tool, detach the plastic casing from the keyboard. This may require some force.
-
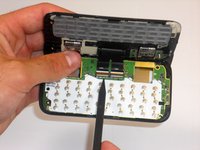
Using a spudger or other thin tool, carefully pry up ZIF connectors as shown. This will allow the black ribbons to detach from the keyboard.
-
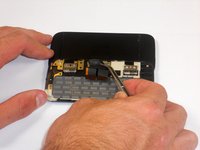
Slide the two parts away from each other so that the black ribbons slide through the slots and you will now have housing into two parts.
-
-
-
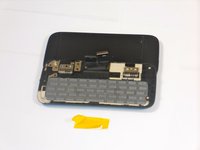
Peel off the yellow ribbon shown slowly.
-
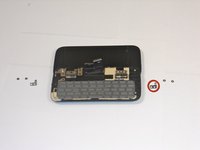
Unscrew the fours screws shown in red squares (two in each square) using a 00 screwdriver.
-
After the screws are out, you will be able to easily take off the small metal pieces circled in red.
-
-
이 단계에 사용된 도구:Tweezers$4.99
-
Slowly pull dual black strip off using force.
-
Behind the dual black strip is very sticky piece of grey tape. Use tweezers (preferably ones with ridges) to peel off the tape. Be careful not to rip it.
-
-
-
Lift ZIF connectors up.
-
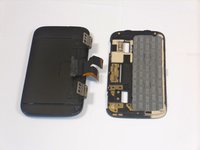
Carefully lift keyboard frame away from display screen.
-
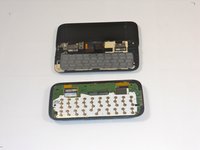
You now have the keyboard detached.
-


To reassemble your device, follow these instructions in reverse order.
다른 한 분이 해당 안내서를 완성하였습니다.
팀

Cal Poly, Team 9-64, Walters Spring 2011 Cal Poly, Team 9-64, Walters Spring 2011 회원
CPSU-WALTERS-S11S9G64
5 회원들
안내서 18개를 작성함