소개
Use this guide to remove the compartment cover assembly on an HTC Vive.
필요한 것
-
-
Pull the hook-and-loop (Velcro) closure at the top of the head strap apart to release the top of the head strap.
-
-
-
Slide the top part of the head strap through its metal loop on the headset to remove it.
-
-
-
-
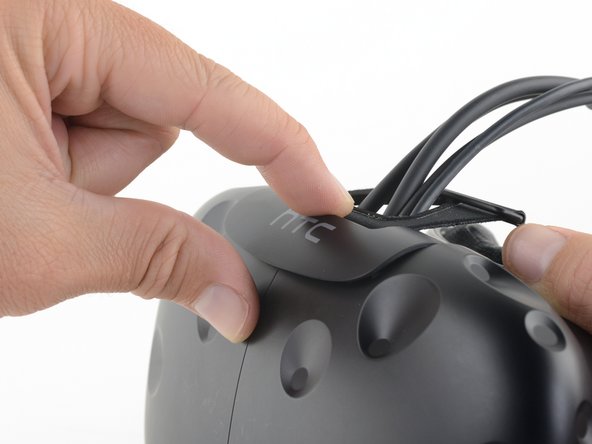
Place a finger on the top edge of the compartment cover assembly and slide the assembly toward the front of the Vive until it comes loose from the headset.
-
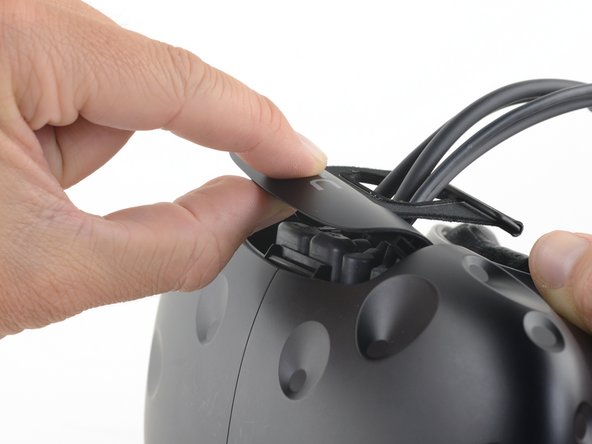
Lift the cover away from the headset and slide it up the cables until it's out of the way.
-
-
-
Repeat the lifting and unplugging process with the remaining USB, power, and audio cables.
-
-
-
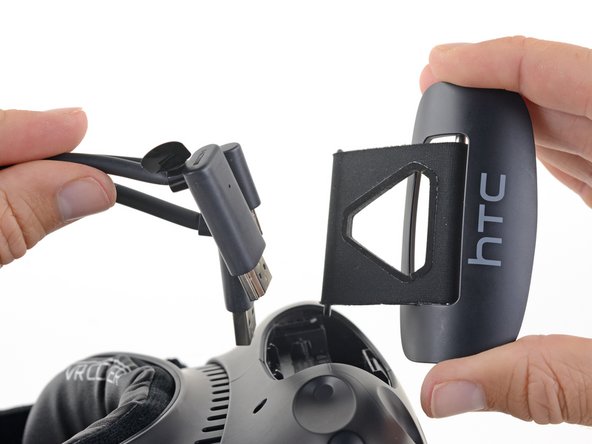
Carefully slide the compartment cover assembly over the plugs and remove it.
-


Compare your new replacement part to the original part—you may need to transfer remaining components or remove adhesive backings from the new part before installing.
To reassemble your device, follow the above steps in reverse order.
Take your e-waste to an R2 or e-Stewards certified recycler.
Repair didn’t go as planned? Check out our Answers community for troubleshooting help.
