이 버전에는 잘못된 편집 사항이 있을 수 있습니다. 최신 확인된 스냅샷으로 전환하십시오.
필요한 것
-
-
이 단계는 번역되지 않았습니다. 번역을 도와주십시오
-
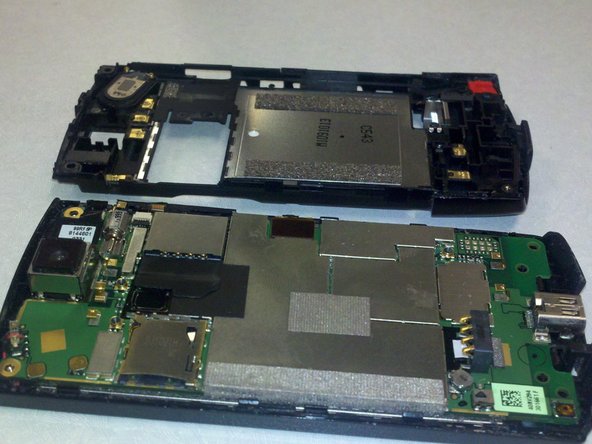
Take the SL#2.5 screwdriver and pry off the back cover
-
The phone should now look like the second picture
-
-
이 단계는 번역되지 않았습니다. 번역을 도와주십시오
-
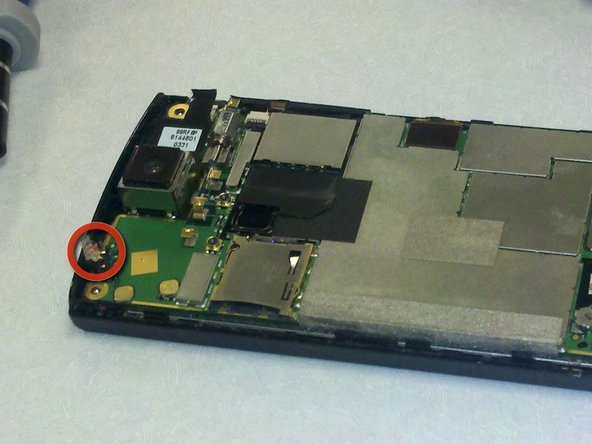
Next lift up the camera lens from the board.
-
Then pry off the circuit circled in red on the second picture
-
-
이 단계는 번역되지 않았습니다. 번역을 도와주십시오
-
Take the SL#2.5 screwdriver and pry off the volume buttons on the side of the phone
-
The circuit board should now be detached from the LCD part of the phone
-
-
이 단계는 번역되지 않았습니다. 번역을 도와주십시오
-
Next take the SL#2.5 screwdriver and pry the grey fabric sticker off on the LCD side of the phone
-
-
이 단계는 번역되지 않았습니다. 번역을 도와주십시오
-
Next take the SL#2.5 screwdriver and pry the screen from the front plastic cover
-
The screen should come out with ease and be completely detached from the rest of the cover.
-


팀

UW Stout, Team 5-3, Zhou Fall 2011 UW Stout, Team 5-3, Zhou Fall 2011 회원
UWSTOUT-ZHOU-F11S5G3
4 회원들
안내서 6개 작성하였습니다