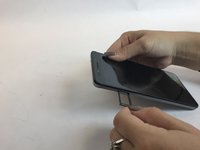
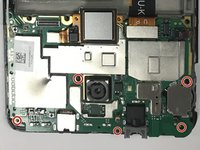
주요 콘텐츠로 건너뛰기

HUAWEI HONOR 5X Front And Back Camera Replacement

필요한 것

  1. HUAWEI HONOR 5X Front And Back Camera Replacement, HUAWEI HONOR 5X Disassembly: 1 단계, 이미지 1/1
    • Turn off your cell phone before disassembling.

  2. HUAWEI HONOR 5X Front And Back Camera Replacement: 2 단계, 이미지 1/1
    • Remove the two 1.17mm Torx T3 screws from the bottom of the phone.

  3. HUAWEI HONOR 5X Front And Back Camera Replacement: 3 단계, 이미지 1/2 HUAWEI HONOR 5X Front And Back Camera Replacement: 3 단계, 이미지 2/2
    • Use the Sim card ejection tool to remove both the sim card trays.

  4. HUAWEI HONOR 5X Front And Back Camera Replacement: 4 단계, 이미지 1/1
    • To prepare the iOpener insert it in the microwave for 30 seconds and apply it on the side edges of the phone so that the glue underneath will soften.

  5. HUAWEI HONOR 5X Front And Back Camera Replacement: 5 단계, 이미지 1/2 HUAWEI HONOR 5X Front And Back Camera Replacement: 5 단계, 이미지 2/2
    • Pry off the back with a plastic opening tool.

  6. HUAWEI HONOR 5X Front And Back Camera Replacement, Motherboard: 6 단계, 이미지 1/2 HUAWEI HONOR 5X Front And Back Camera Replacement, Motherboard: 6 단계, 이미지 2/2
    • Remove the five 1.5mm Phillips #000 screws from the motherboard.

  7. HUAWEI HONOR 5X Front And Back Camera Replacement: 7 단계, 이미지 1/2 HUAWEI HONOR 5X Front And Back Camera Replacement: 7 단계, 이미지 2/2
    • Use a plastic opening tool to pry up and disconnect the display cable from the motherboard.

    • Use tweezers to disconnect the white coax cable.

    • Use tweezers to disconnect the power and volume cable.

  8. HUAWEI HONOR 5X Front And Back Camera Replacement: 8 단계, 이미지 1/3 HUAWEI HONOR 5X Front And Back Camera Replacement: 8 단계, 이미지 2/3 HUAWEI HONOR 5X Front And Back Camera Replacement: 8 단계, 이미지 3/3
    • Remove the motherboard.

  9. HUAWEI HONOR 5X Front And Back Camera Replacement, Front And Back Camera: 9 단계, 이미지 1/1
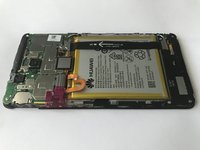
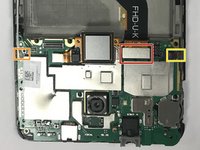
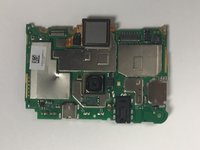
    • Use a plastic opening tool to pry up and disconnect the camera from the motherboard.

  10. HUAWEI HONOR 5X Front And Back Camera Replacement: 10 단계, 이미지 1/1
    • Use a plastic opening tool to pry the front camera connector from its socket on the motherboard.

결론

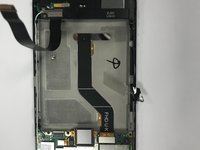
To reassemble your device, follow these instructions in reverse order.

Klara Asllani

회원 가입일: 01/25/18

788 평판

안내서 5개 작성하였습니다

USF Tampa, Team S7-G6, Passmore Spring 2018 USF Tampa, Team S7-G6, Passmore Spring 2018 회원

USFT-PASSMORE-S18S7G6

3 회원들

안내서 12개 작성하였습니다

댓글 0개

댓글 쓰기

조회 통계:

24 시간 전: 0

7일 전: 1

30일 전: 4

전체 시간: 342