주요 콘텐츠로 건너뛰기

Hamilton G5 Ventilation Unit Motherboard Replacement

의료 장비
iFixit과 이 수리 안내서는 의료 기기 제조업체가 보증하지 않으며 제휴 관계가 없습니다.

필요한 것

  1. Hamilton G5 Ventilation Unit Motherboard Replacement, Rail: 1 단계, 이미지 1/1
    • Remove 4 Hex Allen screws (A) from the Rail surrounding the Ventilation Unit.

  2. Hamilton G5 Ventilation Unit Motherboard Replacement: 2 단계, 이미지 1/1
    • Remove the Rail (B).

  3. Hamilton G5 Ventilation Unit Motherboard Replacement: 3 단계, 이미지 1/1
    • The Standoff Brackets (C) remain with the Main Cover.

    • Place aside in a safe location.

  4. Hamilton G5 Ventilation Unit Motherboard Replacement, Main Cover: 5 단계, 이미지 1/1
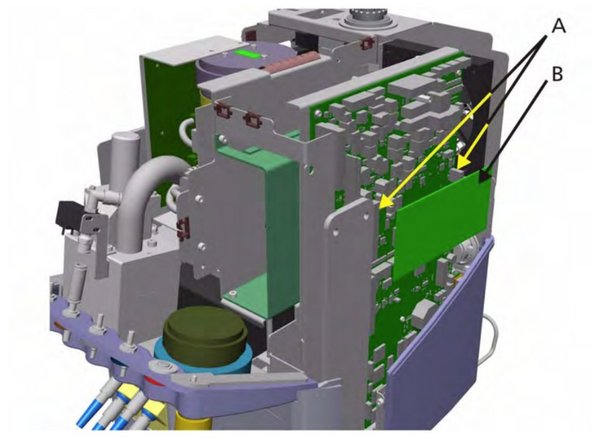
    • Lift the Main Cover (A) from the Ventilation Unit using the Standoff Brackets (B) attached to the Main Cover.

    • Place aside in a safe location.

  5. Hamilton G5 Ventilation Unit Motherboard Replacement, Ventilation Unit Motherboard: 7 단계, 이미지 1/1
    • First, we need to remove the ESM module. It is connected to 2 connector sockets. Disconnect and remove.

    • Take out the Ventilation Real-time Controller (VRC) SW chip

  6. Hamilton G5 Ventilation Unit Motherboard Replacement: 9 단계, 이미지 1/1
    • Install the ESM Module, by connecting the connectors (A), and the VRC SW chip on the new board.

  7. Hamilton G5 Ventilation Unit Motherboard Replacement: 10 단계, 이미지 1/1
    • Disconnect all cables and connections from the board to the unit.

  8. Hamilton G5 Ventilation Unit Motherboard Replacement: 11 단계, 이미지 1/1
    • Remove the three Hex screws (B).

  9. Hamilton G5 Ventilation Unit Motherboard Replacement: 12 단계, 이미지 1/1
    • Move the motherboard out then up away from the ventilation unit (C).

결론

To reassemble your device, follow these instructions in reverse order.

Dane Dormedy

회원 가입일: 04/08/20

349 평판

안내서 3개 작성하였습니다

Cal Poly, Team S7-G25, Paton Spring 2020 Cal Poly, Team S7-G25, Paton Spring 2020 회원

CPSU-PATON-S20S7G25

6 회원들

안내서 11개 작성하였습니다

댓글 0개

댓글 쓰기

조회 통계:

24 시간 전: 0

7일 전: 0

30일 전: 8

전체 시간: 262