주요 콘텐츠로 건너뛰기

Handset Microphone Replacement

필요한 것

  1. Handset Microphone Replacement, Handset: 1 단계, 이미지 1/1
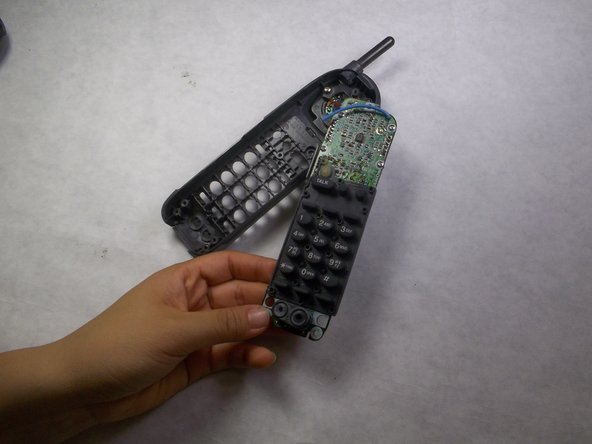
    • After removing the BP-T18 battery pack, you will see two 11mm Phillips #0 screws located at the bottom of the phone. Remove both screws with a screwdriver.

    • Product is made of brittle plastic.

  2. Handset Microphone Replacement: 2 단계, 이미지 1/2 Handset Microphone Replacement: 2 단계, 이미지 2/2
    • Locate an easy point of access for a spudger, and then slowly insert it into the gap and pry it open.

    • The opening should become bigger if you exert force at a 30 degrees angle.

    • Increase the degree of slant until the back cover is completely removed.

  3. Handset Microphone Replacement: 3 단계, 이미지 1/2 Handset Microphone Replacement: 3 단계, 이미지 2/2
    • After removing the back cover, you will see 3 screws: one 7mm Phillips #0 screw at the top and two 11mm Phillips #0 screws at the bottom.

    • Use a screwdriver to remove all 3 screws.

  4. Handset Microphone Replacement, Handset Microphone: 4 단계, 이미지 1/2 Handset Microphone Replacement, Handset Microphone: 4 단계, 이미지 2/2
    • After disassembling the handset, you will see the inner components of the handset.

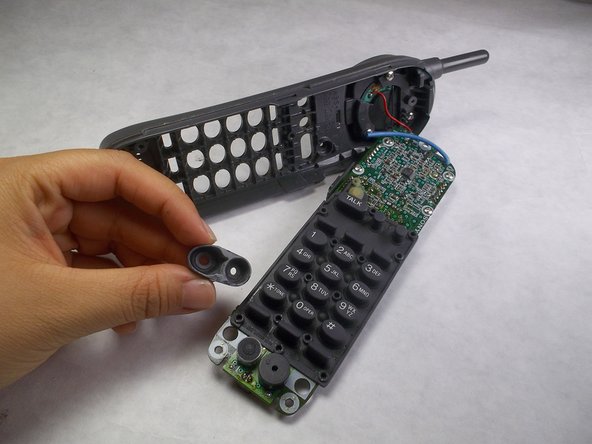
    • Locate the rubber part towards the very bottom of the handset. This is the microphone with protective rubber cover.

    • Remove the protective rubber cover. This may require a spudger.

    • The microphone is exposed upon removal of the protective rubber cover. Avoid contact with water.

결론

To reassemble your device, follow these instructions in reverse order.

다른 2명이 해당 안내서를 완성하였습니다.

Han Shih

회원 가입일: 09/29/16

361 평판

안내서 4개 작성하였습니다

IUPUI, Team 3-3, Harley Fall 2016 IUPUI, Team 3-3, Harley Fall 2016 회원

IUPUI-HARLEY-F16S3G3

4 회원들

안내서 17개 작성하였습니다

댓글 0개

댓글 쓰기

조회 통계:

24 시간 전: 1

7일 전: 5

30일 전: 13

전체 시간: 415