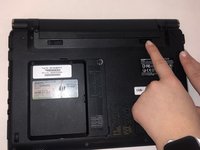
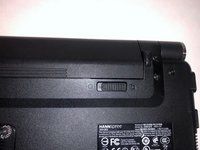
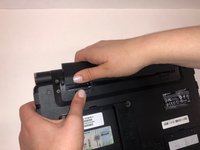
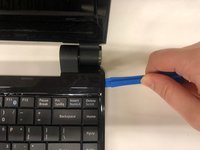
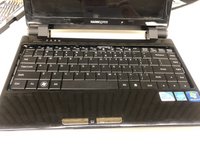
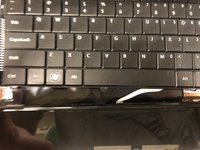
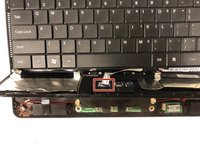
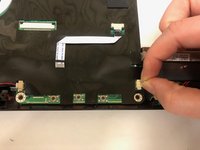
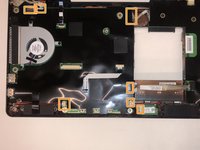
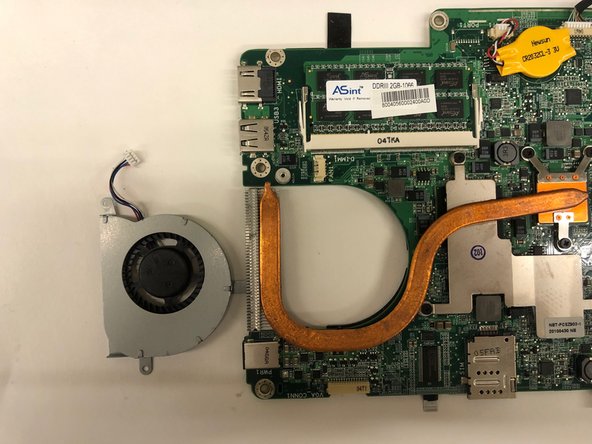
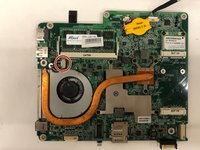
주요 콘텐츠로 건너뛰기

Hannspree SN12E2 Fan/Motherboard Replacement

필요한 것

  1. Hannspree SN12E2 Fan/Motherboard Replacement, Battery: 1 단계, 이미지 1개 중 1개
    • Unplug and power off your laptop.

  2. Hannspree SN12E2 Fan/Motherboard Replacement: 2 단계, 이미지 1개 중 1개
    • Close your laptop .

    • Place your laptop face down on a flat surface.

  3. Hannspree SN12E2 Fan/Motherboard Replacement: 3 단계, 이미지 3개 중 1개 Hannspree SN12E2 Fan/Motherboard Replacement: 3 단계, 이미지 3개 중 2개 Hannspree SN12E2 Fan/Motherboard Replacement: 3 단계, 이미지 3개 중 3개
    • Unlatch the lock on the top right of your laptop first.

    • You will need to pull on the lock on the left side and remove the battery at the same time

    • The left lock is a spring lock and needs constant pressure applied in order to stay open.

  4. Hannspree SN12E2 Fan/Motherboard Replacement, Touchpad Plane/Keyboard: 4 단계, 이미지 1개 중 1개
    • Remove all the 5mm PH0 screws on the back cover

  5. Hannspree SN12E2 Fan/Motherboard Replacement: 5 단계, 이미지 3개 중 1개 Hannspree SN12E2 Fan/Motherboard Replacement: 5 단계, 이미지 3개 중 2개 Hannspree SN12E2 Fan/Motherboard Replacement: 5 단계, 이미지 3개 중 3개
    • Gently pry the case apart starting at the lower right corner using the small spudger

    • Move around the case gently prying until the touchpad plane is free from the rest of the case

  6. Hannspree SN12E2 Fan/Motherboard Replacement: 6 단계, 이미지 2개 중 1개 Hannspree SN12E2 Fan/Motherboard Replacement: 6 단계, 이미지 2개 중 2개
    • Gently lift up on the touchpad portion of the touchpad plane

    • Unplug the ZIFF connector by pulling gently on the black retaining blade and removing the white flat flex cable

    • Pull the touchpad away from the rest of the case

  7. Hannspree SN12E2 Fan/Motherboard Replacement: 7 단계, 이미지 1개 중 1개
    • Gently lift up on the loose keyboard to expose the ZIFF connector.

    • Unplug the keyboard ZIFF following the same instructions as the touchpad ZIFF

  8. Hannspree SN12E2 Fan/Motherboard Replacement, Fan/Motherboard: 8 단계, 이미지 1개 중 1개
    • Remove 3.4mm PH0 retaining screws as well as the three 3mm PH0 fan screws

  9. Hannspree SN12E2 Fan/Motherboard Replacement: 9 단계, 이미지 2개 중 1개 Hannspree SN12E2 Fan/Motherboard Replacement: 9 단계, 이미지 2개 중 2개
    • Unplug all pictured connectors

  10. Hannspree SN12E2 Fan/Motherboard Replacement: 10 단계, 이미지 2개 중 1개 Hannspree SN12E2 Fan/Motherboard Replacement: 10 단계, 이미지 2개 중 2개
    • Remove the motherboard from the housing place it on a flat surface.

    • Flip over the motherboard so that the heat pipes ae face up.and disconnect fan JST Connector, pictured in red

결론

To reassemble your device, follow these instructions in reverse order.

다른 한 분이 해당 안내서를 완성하였습니다.

작성자

3다른 기여자 명과 함께

Brianna Johnson

회원 가입일: 03/21/19

443 평판

안내서 3개를 작성함

UMass Dartmouth, Team S2-G2, Simcock Spring 2019 UMass Dartmouth, Team S2-G2, Simcock Spring 2019 회원

UMASSD-SIMCOCK-S19S2G2

4 회원들

안내서 9개를 작성함

0가이드 댓글

댓글 쓰기

조회 통계:

지난 24시간: 1

지난 7일: 1

지난 30일: 13

전체 시간: 539