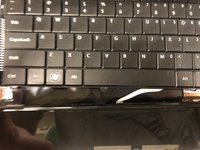
주요 콘텐츠로 건너뛰기

Hannspree SN12E2 Speaker Replacement

필요한 것

  1. Hannspree SN12E2 Speaker Replacement, Battery: 1 단계, 이미지 1개 중 1개
    • Unplug and power off your laptop.

  2. Hannspree SN12E2 Speaker Replacement: 2 단계, 이미지 1개 중 1개
    • Close your laptop .

    • Place your laptop face down on a flat surface.

  3. Hannspree SN12E2 Speaker Replacement: 3 단계, 이미지 3개 중 1개 Hannspree SN12E2 Speaker Replacement: 3 단계, 이미지 3개 중 2개 Hannspree SN12E2 Speaker Replacement: 3 단계, 이미지 3개 중 3개
    • Unlatch the lock on the top right of your laptop first.

    • You will need to pull on the lock on the left side and remove the battery at the same time

    • The left lock is a spring lock and needs constant pressure applied in order to stay open.

  4. Hannspree SN12E2 Speaker Replacement, Touchpad Plane/Keyboard: 4 단계, 이미지 1개 중 1개
    • Remove all the 5mm PH0 screws on the back cover

  5. Hannspree SN12E2 Speaker Replacement: 5 단계, 이미지 3개 중 1개 Hannspree SN12E2 Speaker Replacement: 5 단계, 이미지 3개 중 2개 Hannspree SN12E2 Speaker Replacement: 5 단계, 이미지 3개 중 3개
    • Gently pry the case apart starting at the lower right corner using the small spudger

    • Move around the case gently prying until the touchpad plane is free from the rest of the case

  6. Hannspree SN12E2 Speaker Replacement: 6 단계, 이미지 2개 중 1개 Hannspree SN12E2 Speaker Replacement: 6 단계, 이미지 2개 중 2개
    • Gently lift up on the touchpad portion of the touchpad plane

    • Unplug the ZIFF connector by pulling gently on the black retaining blade and removing the white flat flex cable

    • Pull the touchpad away from the rest of the case

  7. Hannspree SN12E2 Speaker Replacement: 7 단계, 이미지 1개 중 1개
    • Gently lift up on the loose keyboard to expose the ZIFF connector.

    • Unplug the keyboard ZIFF following the same instructions as the touchpad ZIFF

  8. Hannspree SN12E2 Speaker Replacement, Speaker: 8 단계, 이미지 2개 중 1개 Hannspree SN12E2 Speaker Replacement, Speaker: 8 단계, 이미지 2개 중 2개
    • Remove the two screws on the speakers.

  9. Hannspree SN12E2 Speaker Replacement: 9 단계, 이미지 1개 중 1개
    • Gently remove the JST connector by pulling parallel to the housing .

    • When replacing the connectors ensure that they are oriented correctly. The housing is keyed to prevent the connectors from being plugged in backwards.

  10. Hannspree SN12E2 Speaker Replacement: 10 단계, 이미지 1개 중 1개
    • Repeat same steps for other speaker if necessary.

결론

To reassemble your device, follow these instructions in reverse order.

작성자

4다른 기여자 명과 함께

Tim Chase

회원 가입일: 03/25/19

363 평판

안내서 3개를 작성함

UMass Dartmouth, Team S2-G2, Simcock Spring 2019 UMass Dartmouth, Team S2-G2, Simcock Spring 2019 회원

UMASSD-SIMCOCK-S19S2G2

4 회원들

안내서 9개를 작성함

0가이드 댓글

댓글 쓰기

조회 통계:

지난 24시간: 1

지난 7일: 2

지난 30일: 7

전체 시간: 219