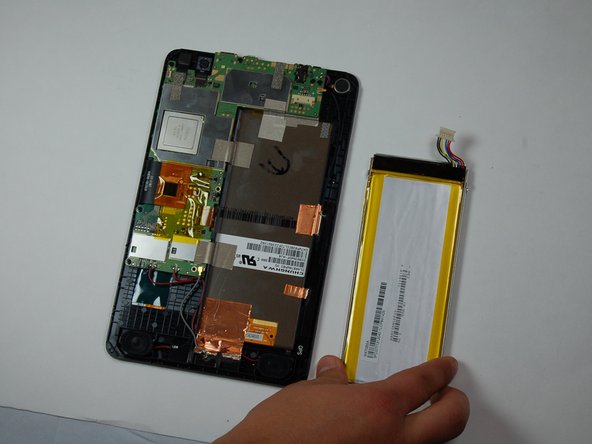
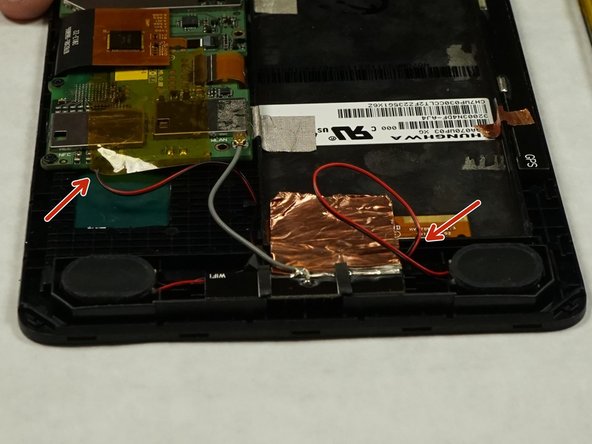
주요 콘텐츠로 건너뛰기

Hisense Sero 7 Pro Speakers Replacement

필요한 것

  1. Hisense Sero 7 Pro Speakers Replacement, Battery: 1 단계, 이미지 1/2 Hisense Sero 7 Pro Speakers Replacement, Battery: 1 단계, 이미지 2/2
    • Turn tablet off before dissembling it.

    • Use caution when handling device if screen is cracked.

    • Using a plastic opening tool, pry open the back cover from the tablet.

    • An extra set of hands may be required.

  2. Hisense Sero 7 Pro Speakers Replacement: 2 단계, 이미지 1/2 Hisense Sero 7 Pro Speakers Replacement: 2 단계, 이미지 2/2
    • Use a spudger to disconnect the battery from the motherboard.

  3. Hisense Sero 7 Pro Speakers Replacement: 3 단계, 이미지 1/2 Hisense Sero 7 Pro Speakers Replacement: 3 단계, 이미지 2/2
    • Using a plastic opening tool, carefully place under one corner of the battery.

    • Move around edges of the battery to lift it off of the tablet.

    • Remove battery from tablet.

  4. Hisense Sero 7 Pro Speakers Replacement, Speakers: 4 단계, 이미지 1/3 Hisense Sero 7 Pro Speakers Replacement, Speakers: 4 단계, 이미지 2/3 Hisense Sero 7 Pro Speakers Replacement, Speakers: 4 단계, 이미지 3/3
    • Peel back the film holding the speaker wire in place

    • Detach both wire connectors

  5. Hisense Sero 7 Pro Speakers Replacement: 5 단계, 이미지 1/1
    • Using a plastic opening tool, carefully place under one corner of each speaker

    • Remove both speakers

결론

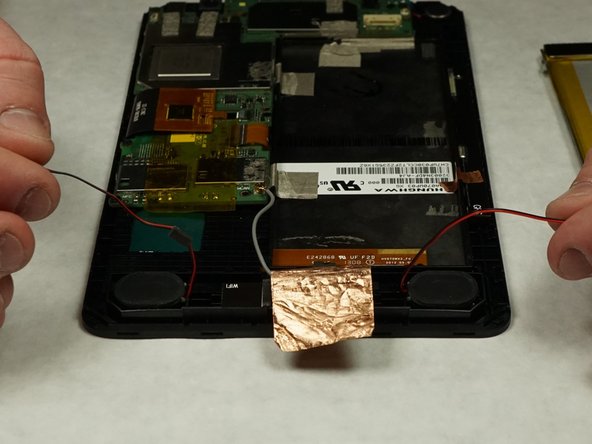
To reassemble your device, follow these instructions in reverse order.

Logan Phillips

회원 가입일: 05/09/17

101 평판

안내서 1개 작성함

IUPUI, Team S4-G1, Harley Spring 2017 IUPUI, Team S4-G1, Harley Spring 2017 회원

IUPUI-HARLEY-S17S4G1

4 회원들

안내서 4개 작성하였습니다

댓글 0개

댓글 쓰기

조회 통계:

24 시간 전: 0

7일 전: 0

30일 전: 2

전체 시간: 145