주요 콘텐츠로 건너뛰기

Holmes Blizzard Fan Oscillation Gear Replacement

필요한 것

  1. Holmes Blizzard Fan Oscillation Gear Replacement, Front Cage Removal: 1 단계, 이미지 1/3 Holmes Blizzard Fan Oscillation Gear Replacement, Front Cage Removal: 1 단계, 이미지 2/3 Holmes Blizzard Fan Oscillation Gear Replacement, Front Cage Removal: 1 단계, 이미지 3/3
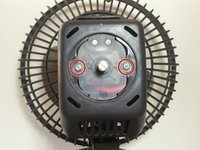
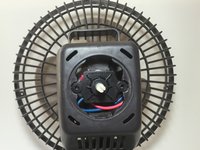
    • Using a Phillips #2 Screwdriver, remove the 3 screws located on the back of the fan cage.

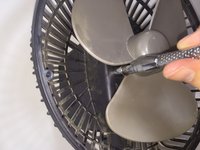
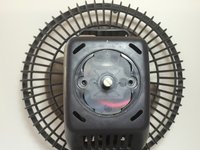
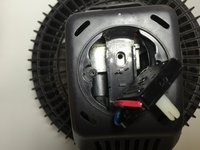
    • Next, loosen the screw located on the bottom of the fan.

    • The bottom screw does not need to be removed, but only loosened about 3 or 4 turns.

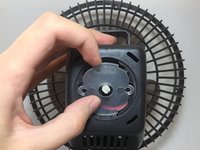
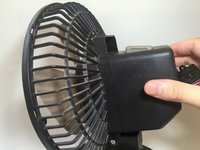
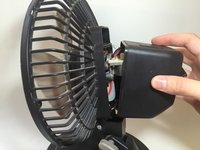
    • The front of the fan's cage is now able to be removed by prying the front away from the back.

  2. Holmes Blizzard Fan Oscillation Gear Replacement: 2 단계, 이미지 1/3 Holmes Blizzard Fan Oscillation Gear Replacement: 2 단계, 이미지 2/3 Holmes Blizzard Fan Oscillation Gear Replacement: 2 단계, 이미지 3/3
    • Using a 7 mm socket and wrench, remove the 2 nuts that are behind the fan blades.

    • There is a washer located behind each nut. Be sure not to lose these.

  3. Holmes Blizzard Fan Oscillation Gear Replacement, Remove the Oscillation Button Screw: 3 단계, 이미지 1/2 Holmes Blizzard Fan Oscillation Gear Replacement, Remove the Oscillation Button Screw: 3 단계, 이미지 2/2
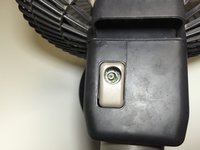
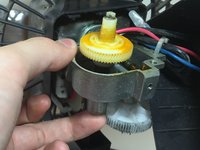
    • On the top of the fan, there is a screw fastening the oscillation button to the gear train within the housing. Remove this screw with the Phillips #0 Screwdriver.

  4. Holmes Blizzard Fan Oscillation Gear Replacement, Housing Assembly Removal: 4 단계, 이미지 1/2 Holmes Blizzard Fan Oscillation Gear Replacement, Housing Assembly Removal: 4 단계, 이미지 2/2
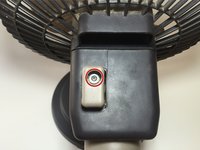
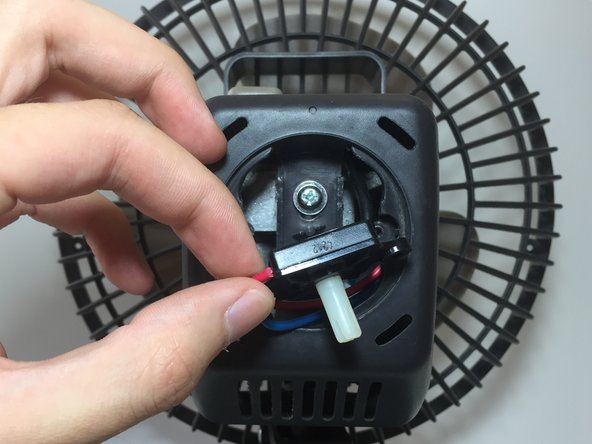
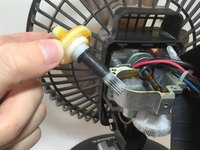
    • The on/off and fan speed nob can be removed by simply pulling it away from the main housing.

  5. Holmes Blizzard Fan Oscillation Gear Replacement: 5 단계, 이미지 1/3 Holmes Blizzard Fan Oscillation Gear Replacement: 5 단계, 이미지 2/3 Holmes Blizzard Fan Oscillation Gear Replacement: 5 단계, 이미지 3/3
    • Remove the 2 screws holding the clear plastic plate in place with a Phillips #2 Screwdriver.

    • The plate is now free and can be taken out by hand.

  6. Holmes Blizzard Fan Oscillation Gear Replacement: 6 단계, 이미지 1/2 Holmes Blizzard Fan Oscillation Gear Replacement: 6 단계, 이미지 2/2
    • The motor switch is also free and can be removed by hand to reveal a screw holding the housing assembly in place.

    • Be sure not to damage the wires on the switch during removal. While you do not need to be overly gentle during this step, excessive force could cause the wires to be pulled out.

  7. Holmes Blizzard Fan Oscillation Gear Replacement: 7 단계, 이미지 1/2 Holmes Blizzard Fan Oscillation Gear Replacement: 7 단계, 이미지 2/2
    • Remove the screw that holds the housing assembly in place by using a Phillips #2 Screwdriver.

  8. Holmes Blizzard Fan Oscillation Gear Replacement: 8 단계, 이미지 1/3 Holmes Blizzard Fan Oscillation Gear Replacement: 8 단계, 이미지 2/3 Holmes Blizzard Fan Oscillation Gear Replacement: 8 단계, 이미지 3/3
    • The housing assembly can now be pulled off and pushed to the side to reveal the fan motor and gear train.

    • The oscillation button the was unscrewed earlier will fall out of the housing assembly.

  9. Holmes Blizzard Fan Oscillation Gear Replacement, Oscillation Gear Removal: 9 단계, 이미지 1/2 Holmes Blizzard Fan Oscillation Gear Replacement, Oscillation Gear Removal: 9 단계, 이미지 2/2
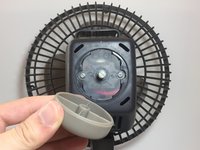
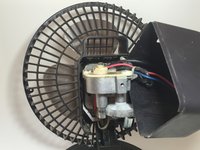
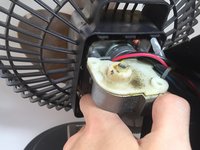
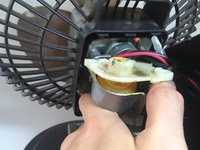
    • Remove the 2 screws fastening the lid on the oscillation gear housing with a Flathead Screwdriver.

  10. Holmes Blizzard Fan Oscillation Gear Replacement: 10 단계, 이미지 1/3 Holmes Blizzard Fan Oscillation Gear Replacement: 10 단계, 이미지 2/3 Holmes Blizzard Fan Oscillation Gear Replacement: 10 단계, 이미지 3/3
    • Using your thumb, the lid can easily be popped off to reveal the oscillation gear.

  11. Holmes Blizzard Fan Oscillation Gear Replacement: 11 단계, 이미지 1/3 Holmes Blizzard Fan Oscillation Gear Replacement: 11 단계, 이미지 2/3 Holmes Blizzard Fan Oscillation Gear Replacement: 11 단계, 이미지 3/3
    • The oscillation gear is removed by pressing it up from the bottom.

  12. Holmes Blizzard Fan Oscillation Gear Replacement: 12 단계, 이미지 1/1
    • The oscillation gear has been removed and fresh grease can be applied or it can be replaced.

결론

To reassemble your device, follow these instructions in reverse order.

다른 3명이 해당 안내서를 완성하였습니다.

Mike Bolton

회원 가입일: 07/17/16

531 평판

안내서 2개 작성하였습니다

댓글 한 개

Do you know where the oscillation gear can be purchased?

Keith Beba - 답글

댓글 쓰기

조회 통계:

24 시간 전: 1

7일 전: 17

30일 전: 36

전체 시간: 2,927