주요 콘텐츠로 건너뛰기

Honeywell HY-204 Rotation Button Replacement

필요한 것

  1. Honeywell HY-204 Rotation Button Replacement, Case: 1 단계, 이미지 1/2 Honeywell HY-204 Rotation Button Replacement, Case: 1 단계, 이미지 2/2
    • Before you begin, be sure to unplug the fan.

    • Remove the four 14 mm screws from the back of the device using the Phillips #0 Screwdriver.

  2. Honeywell HY-204 Rotation Button Replacement: 2 단계, 이미지 1/2 Honeywell HY-204 Rotation Button Replacement: 2 단계, 이미지 2/2
    • Pull the front and back parts of the case away from each other until the back is free from the front. This may require a large amount of force.

  3. Honeywell HY-204 Rotation Button Replacement, Control Panel: 3 단계, 이미지 1/2 Honeywell HY-204 Rotation Button Replacement, Control Panel: 3 단계, 이미지 2/2
    • Remove the two 3mm screws found just below the top of the device using the Phillips #0 Screwdriver.

  4. Honeywell HY-204 Rotation Button Replacement: 4 단계, 이미지 1/1
    • Pry off the control panel by forcefully lifting the tab located inside the front of the fan with the plastic opening tool.

  5. Honeywell HY-204 Rotation Button Replacement, Rotation Button: 5 단계, 이미지 1/2 Honeywell HY-204 Rotation Button Replacement, Rotation Button: 5 단계, 이미지 2/2
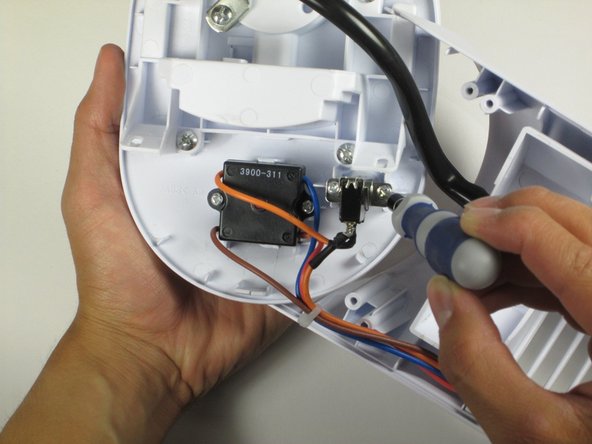
    • Remove the two 10mm Phillips #0 screws that are located next to the rotation button.

  6. Honeywell HY-204 Rotation Button Replacement: 6 단계, 이미지 1/1
    • Peel back the heat shrink tubing on both wires connecting to the button.

  7. Honeywell HY-204 Rotation Button Replacement: 7 단계, 이미지 1/1
    • Caution The soldering iron is very hot, be careful to avoid burns.

    • Desolder the two wires connected to the button and remove the button.

결론

To reassemble your device, follow these instructions in reverse order.

Nolan Ernotte

회원 가입일: 10/14/14

366 평판

안내서 3개 작성하였습니다

Cal Poly, Team 10-40, Amido Fall 2014 Cal Poly, Team 10-40, Amido Fall 2014 회원

CPSU-AMIDO-F14S10G40

3 회원들

안내서 7개 작성하였습니다

댓글 0개

댓글 쓰기

조회 통계:

24 시간 전: 0

7일 전: 0

30일 전: 1

전체 시간: 941