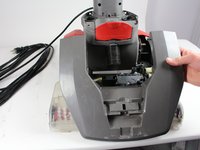
주요 콘텐츠로 건너뛰기

Hoover Power Path Pro Advanced Suction Motor Replacement

필요한 것

  1. Hoover Power Path Pro Advanced Suction Motor Replacement, Brush Roller: 1 단계, 이미지 2개 중 1개 Hoover Power Path Pro Advanced Suction Motor Replacement, Brush Roller: 1 단계, 이미지 2개 중 2개
    • Unplug the vacuum cleaner from the wall outlet before starting. Make sure the water tanks are empty.

    • Lay the cleaner down horizontally with its wheels closest to the floor.

  2. Hoover Power Path Pro Advanced Suction Motor Replacement: 2 단계, 이미지 2개 중 1개 Hoover Power Path Pro Advanced Suction Motor Replacement: 2 단계, 이미지 2개 중 2개
    • Hold the lower brush roll with both hands and pull outwards until it is detached.

  3. Hoover Power Path Pro Advanced Suction Motor Replacement: 3 단계, 이미지 1개 중 1개
    • Unscrew the 6 marked screws using a Phillips #2 head screwdriver.

    • Remove the brush roller.

  4. Hoover Power Path Pro Advanced Suction Motor Replacement, Belt: 4 단계, 이미지 1개 중 1개
    • Use a long #2 Philips head screwdriver to remove the 8 numbered screws on the bottom of the cleaner.

  5. Hoover Power Path Pro Advanced Suction Motor Replacement: 5 단계, 이미지 2개 중 1개 Hoover Power Path Pro Advanced Suction Motor Replacement: 5 단계, 이미지 2개 중 2개
    • Pull the red handle shown to remove the front suction unit from the cleaner.

  6. Hoover Power Path Pro Advanced Suction Motor Replacement: 6 단계, 이미지 1개 중 1개
    • Unscrew the Phillips #2 screw at the bottom of the hose.

  7. Hoover Power Path Pro Advanced Suction Motor Replacement: 7 단계, 이미지 2개 중 1개 Hoover Power Path Pro Advanced Suction Motor Replacement: 7 단계, 이미지 2개 중 2개
    • Push down on the handle release button. Pull and disconnect the edge of the top cover on the side of the handle release button.

    • Repeat the above step for the "On/Off" button.

    • When pulling the handle release button, make sure the top of the cleaner does not fall.

  8. Hoover Power Path Pro Advanced Suction Motor Replacement: 8 단계, 이미지 1개 중 1개
    • Gently grab the belt and pry it off from the rollers.

  9. Hoover Power Path Pro Advanced Suction Motor Replacement, Suction Motor: 9 단계, 이미지 2개 중 1개 Hoover Power Path Pro Advanced Suction Motor Replacement, Suction Motor: 9 단계, 이미지 2개 중 2개
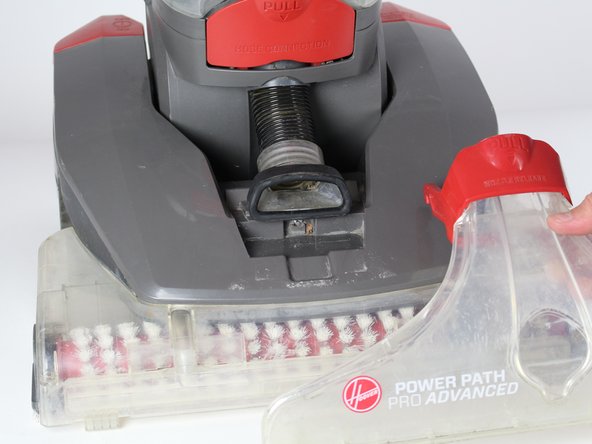
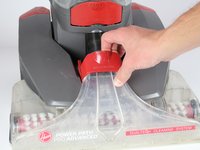
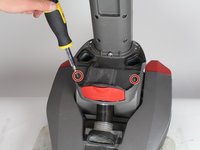
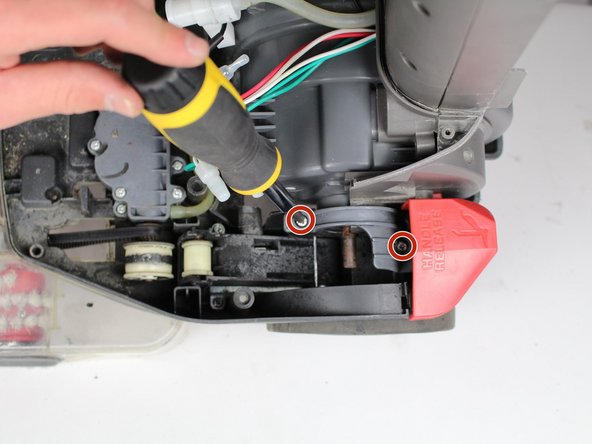
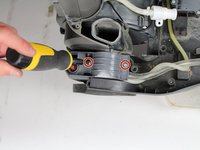
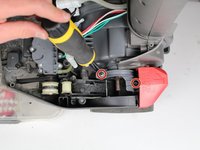
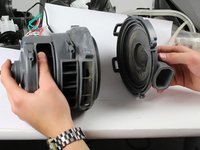
    • Unscrew two screws using Phillips #2 screwdriver.

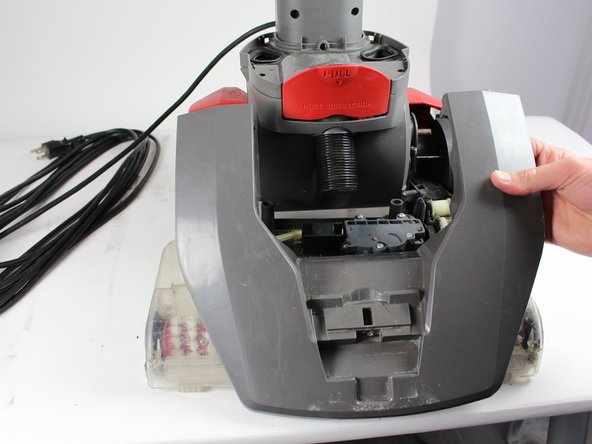
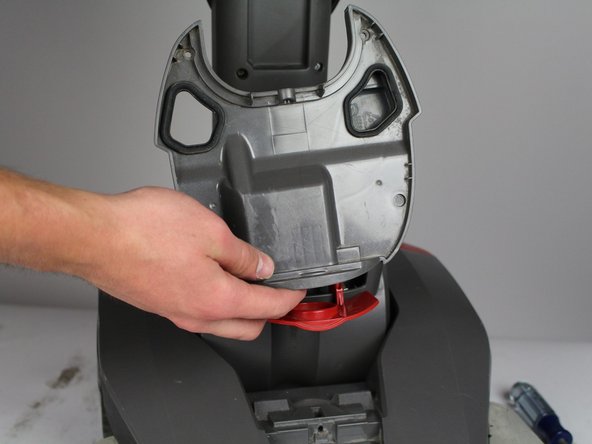
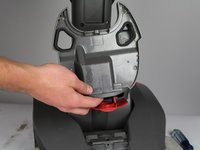
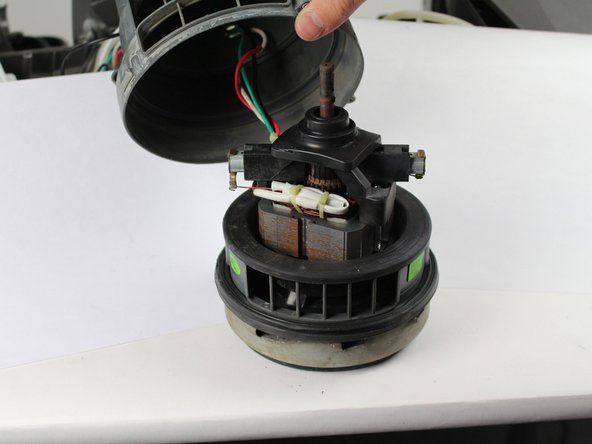
    • Detach grey piece from vacuum.

  10. Hoover Power Path Pro Advanced Suction Motor Replacement: 10 단계, 이미지 2개 중 1개 Hoover Power Path Pro Advanced Suction Motor Replacement: 10 단계, 이미지 2개 중 2개
    • Unscrew four screws using a Phillips 2 screwdriver.

  11. Hoover Power Path Pro Advanced Suction Motor Replacement: 11 단계, 이미지 1개 중 1개
    • Pull out of base of vacuum.

  12. Hoover Power Path Pro Advanced Suction Motor Replacement: 12 단계, 이미지 1개 중 1개
    • Flip vacuum over and unscrew three screws with a Phillips #2 screwdriver.

  13. Hoover Power Path Pro Advanced Suction Motor Replacement: 13 단계, 이미지 1개 중 1개
    • Unscrew two screws with Phillips #2 screwdriver.

  14. Hoover Power Path Pro Advanced Suction Motor Replacement: 14 단계, 이미지 1개 중 1개
    • Detach motor and unscrew two screws with a Phillips #2 screwdriver.

  15. Hoover Power Path Pro Advanced Suction Motor Replacement: 15 단계, 이미지 2개 중 1개 Hoover Power Path Pro Advanced Suction Motor Replacement: 15 단계, 이미지 2개 중 2개
    • Pull the bottom section off.

    • Pull the cap off.

결론

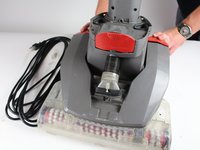
To reassemble your device, follow these instructions in reverse order.

다른 4명이 해당 안내서를 완성하였습니다.

작성자

3다른 기여자 명과 함께

Jose Andres Gonzalez Valdes

회원 가입일: 01/22/18

682 평판

안내서 5개를 작성함

Cal Poly, Team S16-G5, Banghart Winter 2018 Cal Poly, Team S16-G5, Banghart Winter 2018 회원

CPSU-BANGHART-W18S16G5

5 회원들

안내서 15개를 작성함

1가이드 댓글

What to do if the motor is still good but the cooling fan on the top of the armature has broken off?

Billy H. Deal Jr - 답글

댓글 쓰기

조회 통계:

지난 24시간: 0

지난 7일: 3

지난 30일: 22

전체 시간: 2,582