주요 콘텐츠로 건너뛰기

이 버전에는 잘못된 편집 사항이 있을 수 있습니다. 최신 확인된 스냅샷으로 전환하십시오.

필요한 것

  1. 이 단계는 번역되지 않았습니다. 번역을 도와주십시오

    : 1 단계, 이미지 1/2 : 1 단계, 이미지 2/2
    • Unplug the vacuum cleaner from the wall outlet before starting. Make sure the water tanks are empty.

    • Lay the cleaner down horizontally with its wheels closest to the floor.

  2. 이 단계는 번역되지 않았습니다. 번역을 도와주십시오

    : 2 단계, 이미지 1/2 : 2 단계, 이미지 2/2
    • Hold the lower brush roll with both hands and pull outwards until it is detached.

  3. 이 단계는 번역되지 않았습니다. 번역을 도와주십시오

    : 3 단계, 이미지 1/1
    • Unscrew the 6 marked screws using a Phillips #2 head screwdriver.

    • Remove the brush roller.

  4. 이 단계는 번역되지 않았습니다. 번역을 도와주십시오

    : 4 단계, 이미지 1/1
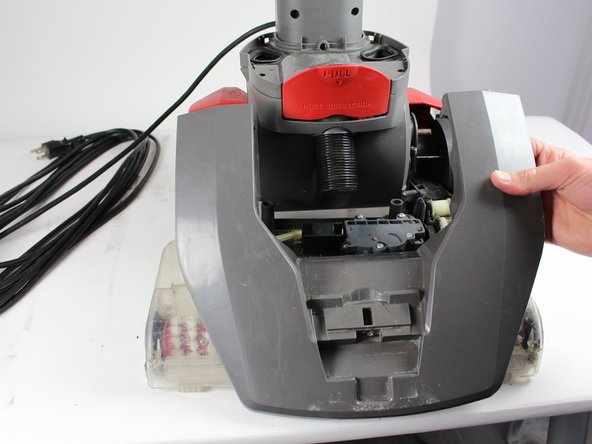
    • Use a long #2 Philips head screwdriver to remove the 8 numbered screws on the bottom of the cleaner.

  5. 이 단계는 번역되지 않았습니다. 번역을 도와주십시오

    : 5 단계, 이미지 1/2 : 5 단계, 이미지 2/2
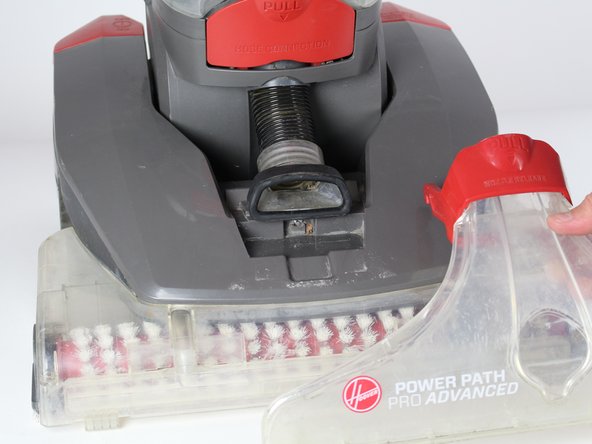
    • Pull the red handle shown to remove the front suction unit from the cleaner.

  6. 이 단계는 번역되지 않았습니다. 번역을 도와주십시오

    : 6 단계, 이미지 1/1
    • Unscrew the Phillips #2 screw at the bottom of the hose.

  7. 이 단계는 번역되지 않았습니다. 번역을 도와주십시오

    : 7 단계, 이미지 1/2 : 7 단계, 이미지 2/2
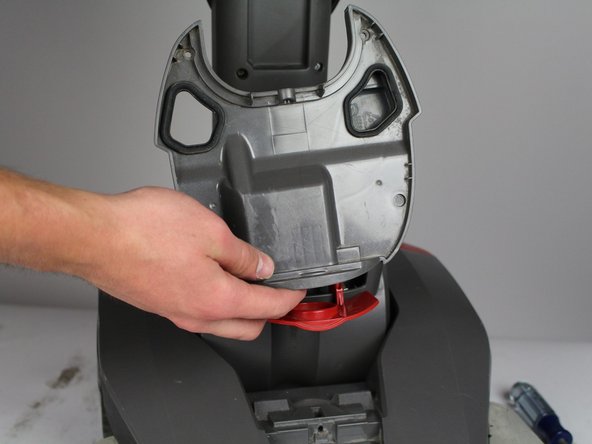
    • Push down on the handle release button. Pull and disconnect the edge of the top cover on the side of the handle release button.

    • Repeat the above step for the "On/Off" button.

    • When pulling the handle release button, make sure the top of the cleaner does not fall.

  8. 이 단계는 번역되지 않았습니다. 번역을 도와주십시오

    : 8 단계, 이미지 1/1
    • Gently grab the belt and pry it off from the rollers.

  9. 이 단계는 번역되지 않았습니다. 번역을 도와주십시오

    : 9 단계, 이미지 1/2 : 9 단계, 이미지 2/2
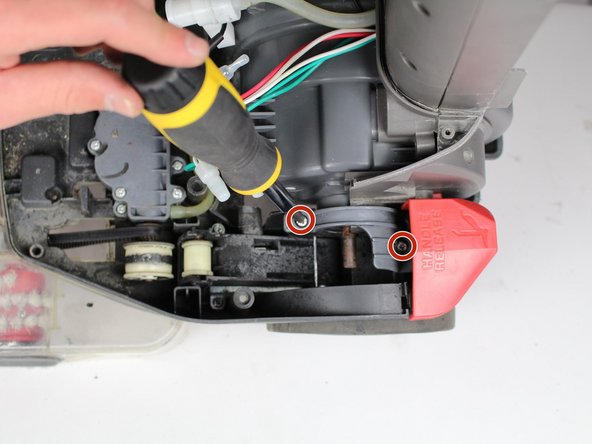
    • Unscrew two screws using Phillips #2 screwdriver.

    • Detach grey piece from vacuum.

  10. 이 단계는 번역되지 않았습니다. 번역을 도와주십시오

    : 10 단계, 이미지 1/2 : 10 단계, 이미지 2/2
    • Unscrew four screws using a Phillips 2 screwdriver.

  11. 이 단계는 번역되지 않았습니다. 번역을 도와주십시오

    : 11 단계, 이미지 1/1
    • Pull out of base of vacuum.

  12. 이 단계는 번역되지 않았습니다. 번역을 도와주십시오

    : 12 단계, 이미지 1/1
    • Flip vacuum over and unscrew three screws with a Phillips #2 screwdriver.

  13. 이 단계는 번역되지 않았습니다. 번역을 도와주십시오

    : 13 단계, 이미지 1/1
    • Unscrew two screws with Phillips #2 screwdriver.

  14. 이 단계는 번역되지 않았습니다. 번역을 도와주십시오

    : 14 단계, 이미지 1/1
    • Detach motor and unscrew two screws with a Phillips #2 screwdriver.

  15. 이 단계는 번역되지 않았습니다. 번역을 도와주십시오

    : 15 단계, 이미지 1/2 : 15 단계, 이미지 2/2
    • Pull the bottom section off.

    • Pull the cap off.

결승점

다른 4명이 해당 안내서를 완성하였습니다.

Jose Andres Gonzalez Valdes

회원 가입일: 01/22/18

682 평판

안내서 5개 작성하였습니다

Cal Poly, Team S16-G5, Banghart Winter 2018 Cal Poly, Team S16-G5, Banghart Winter 2018 회원

CPSU-BANGHART-W18S16G5

5 회원들

안내서 15개 작성하였습니다

댓글 한 개

What to do if the motor is still good but the cooling fan on the top of the armature has broken off?

Billy H. Deal Jr - 답글

댓글 쓰기

조회 통계:

24 시간 전: 0

7일 전: 5

30일 전: 30

전체 시간: 2,195