주요 콘텐츠로 건너뛰기

Hoover Windtunnel Air Steerable Upright Motor Assembly Replacement

필요한 것

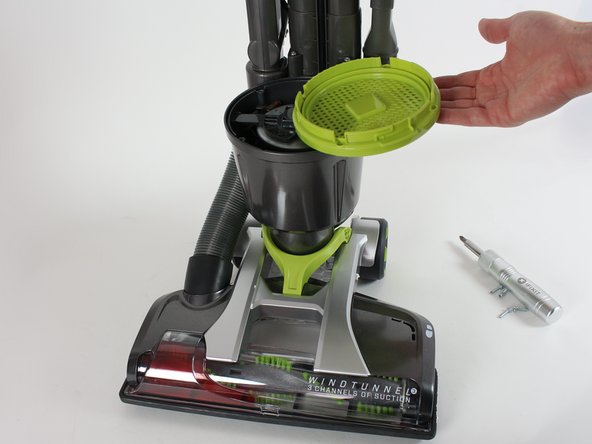
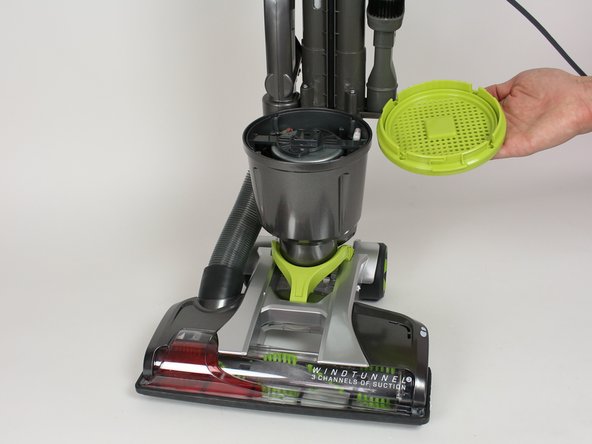
  1. Hoover Windtunnel Air Steerable Upright Motor Assembly  Replacement, HEPA Filter: 1 단계, 이미지 1/2 Hoover Windtunnel Air Steerable Upright Motor Assembly  Replacement, HEPA Filter: 1 단계, 이미지 2/2
    • Put the cleaner into the upright position, turn the power off, and unplug the power cord.

  2. Hoover Windtunnel Air Steerable Upright Motor Assembly  Replacement: 2 단계, 이미지 1/3 Hoover Windtunnel Air Steerable Upright Motor Assembly  Replacement: 2 단계, 이미지 2/3 Hoover Windtunnel Air Steerable Upright Motor Assembly  Replacement: 2 단계, 이미지 3/3
    • Remove the dirt cup from the cleaner.

    • The HEPA filter is located under the dirt cup and under where it says HEPA.

    • Twist the top counterclockwise to unlock the cap.

  3. Hoover Windtunnel Air Steerable Upright Motor Assembly  Replacement: 3 단계, 이미지 1/2 Hoover Windtunnel Air Steerable Upright Motor Assembly  Replacement: 3 단계, 이미지 2/2
    • Lift the HEPA filter out.

    • Tap the filter against the inside of a trashcan to knock out the dirt and debris or replace as necessary.

    • Do not wash the HEPA Filter.

  4. Hoover Windtunnel Air Steerable Upright Motor Assembly  Replacement, Motor Assembly: 4 단계, 이미지 1/3 Hoover Windtunnel Air Steerable Upright Motor Assembly  Replacement, Motor Assembly: 4 단계, 이미지 2/3 Hoover Windtunnel Air Steerable Upright Motor Assembly  Replacement, Motor Assembly: 4 단계, 이미지 3/3
    • Remove the 4 retaining screws and remove the filter tray.

    • Screw lengths are approximately 3/4".

  5. Hoover Windtunnel Air Steerable Upright Motor Assembly  Replacement: 5 단계, 이미지 1/1
    • Pull the motor housing vertically to dislodge the motor.

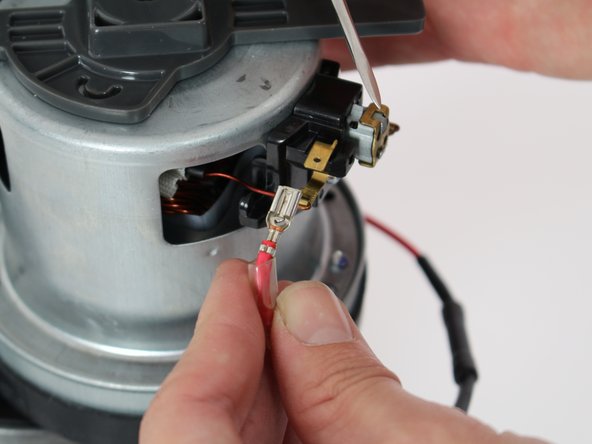
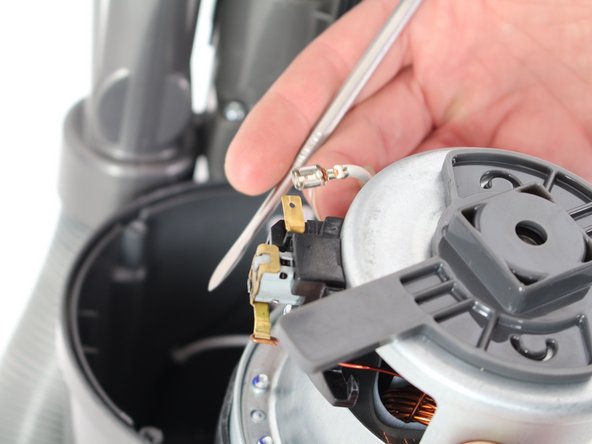
  6. Hoover Windtunnel Air Steerable Upright Motor Assembly  Replacement: 6 단계, 이미지 1/3 Hoover Windtunnel Air Steerable Upright Motor Assembly  Replacement: 6 단계, 이미지 2/3 Hoover Windtunnel Air Steerable Upright Motor Assembly  Replacement: 6 단계, 이미지 3/3
    • Use a plastic spudger or opening tool to press on the small circle and wiggle clips free.

결론

To reassemble your device, follow these instructions in reverse order.

다른 2명이 해당 안내서를 완성하였습니다.

steven hoover

회원 가입일: 09/26/17

257 평판

안내서 2개 작성하였습니다

Cal Poly, Team S7-G2, Banghart Fall 2017 Cal Poly, Team S7-G2, Banghart Fall 2017 회원

CPSU-BANGHART-F17S7G2

5 회원들

안내서 14개 작성하였습니다

댓글 0개

댓글 쓰기

조회 통계:

24 시간 전: 5

7일 전: 17

30일 전: 53

전체 시간: 3,852