주요 콘텐츠로 건너뛰기

Hover-1 Coast Power Button Spring Replacement

필요한 것

  1. Hover-1 Coast Power Button Spring Replacement, Board Battery: 1 단계, 이미지 1/3 Hover-1 Coast Power Button Spring Replacement, Board Battery: 1 단계, 이미지 2/3 Hover-1 Coast Power Button Spring Replacement, Board Battery: 1 단계, 이미지 3/3
    • To remove the battery on the Hover-1 Coast, you must uncover the screws on the top of the board.

    • Using a pick tool, puncture the grip tape and expose the screws.

    • Loosen all four 1" screws using a Phillips #1 screwdriver.

  2. Hover-1 Coast Power Button Spring Replacement: 2 단계, 이미지 1/3 Hover-1 Coast Power Button Spring Replacement: 2 단계, 이미지 2/3 Hover-1 Coast Power Button Spring Replacement: 2 단계, 이미지 3/3
    • Now pull the black protective cover off the board.

    • Locate the battery.

  3. Hover-1 Coast Power Button Spring Replacement: 3 단계, 이미지 1/3 Hover-1 Coast Power Button Spring Replacement: 3 단계, 이미지 2/3 Hover-1 Coast Power Button Spring Replacement: 3 단계, 이미지 3/3
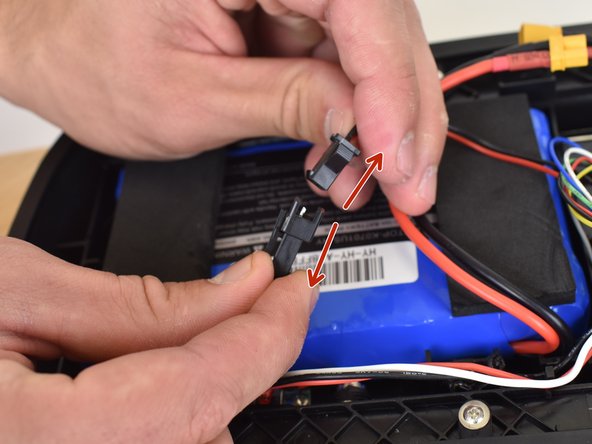
    • The battery is connected by these two sets of wires.

    • Remove the yellow wire first by pulling the two wires gently in opposite directions.

    • Now pull apart the black wire by gently pulling the two wires in opposite directions.

  4. Hover-1 Coast Power Button Spring Replacement: 4 단계, 이미지 1/3 Hover-1 Coast Power Button Spring Replacement: 4 단계, 이미지 2/3 Hover-1 Coast Power Button Spring Replacement: 4 단계, 이미지 3/3
    • Once the battery has been disconnected, gently pry the battery upward.

    • It is important to use a plastic opening tool to avoid puncturing the battery.

    • Once the battery is freed, remove it with your hands.

    • The battery is glued to the case and will require some effort to remove.

  5. Hover-1 Coast Power Button Spring Replacement, Power Button Spring: 5 단계, 이미지 1/3 Hover-1 Coast Power Button Spring Replacement, Power Button Spring: 5 단계, 이미지 2/3 Hover-1 Coast Power Button Spring Replacement, Power Button Spring: 5 단계, 이미지 3/3
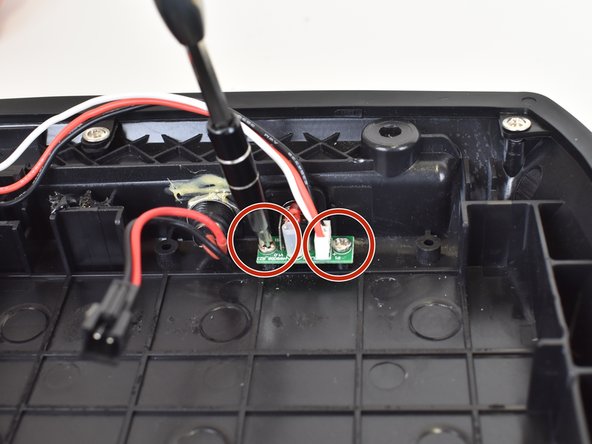
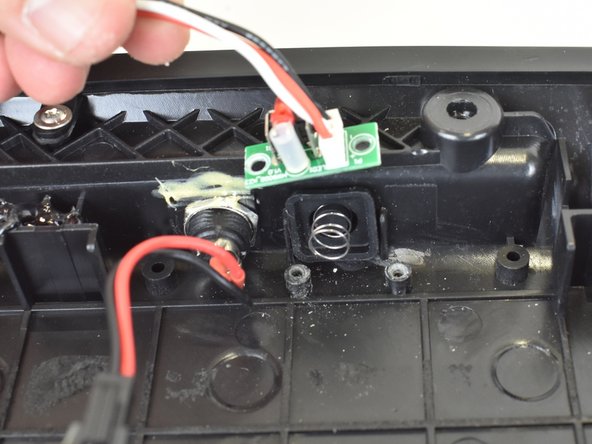
    • Using the Phillips #1 screwdriver, loosen the two screws and place the power button somewhere safe.

  6. Hover-1 Coast Power Button Spring Replacement: 6 단계, 이미지 1/2 Hover-1 Coast Power Button Spring Replacement: 6 단계, 이미지 2/2
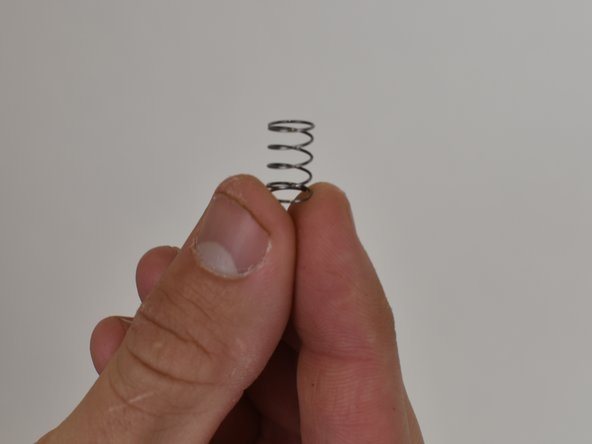
    • Remove the unwanted spring and place your new spring back into the hole.

결론

To reassemble your device, follow these instructions in reverse order.

Jace Oppenlander

회원 가입일: 10/04/18

545 평판

안내서 4개 작성하였습니다

댓글 0개

댓글 쓰기

조회 통계:

24 시간 전: 0

7일 전: 4

30일 전: 5

전체 시간: 345