주요 콘텐츠로 건너뛰기

Hover-1 Maverick Motor Wheel Replacement

필요한 것

  1. Hover-1 Maverick Motor Wheel Replacement, Motherboard: 1 단계, 이미지 1/3 Hover-1 Maverick Motor Wheel Replacement, Motherboard: 1 단계, 이미지 2/3 Hover-1 Maverick Motor Wheel Replacement, Motherboard: 1 단계, 이미지 3/3
    • Remove the twenty 15mm Phillips #1 screws from the shell of the hoverboard.

    • Open the shell.

    • There is one motherboard on each side of the device located near the wheels.

  2. Hover-1 Maverick Motor Wheel Replacement: 2 단계, 이미지 1/2 Hover-1 Maverick Motor Wheel Replacement: 2 단계, 이미지 2/2
    • Disconnect the battery to prevent any electrical currents from coming through the wires.

  3. Hover-1 Maverick Motor Wheel Replacement: 3 단계, 이미지 1/2 Hover-1 Maverick Motor Wheel Replacement: 3 단계, 이미지 2/2
    • Squeeze and pull on the wires to detach them from the motherboard.

  4. Hover-1 Maverick Motor Wheel Replacement: 4 단계, 이미지 1/2 Hover-1 Maverick Motor Wheel Replacement: 4 단계, 이미지 2/2
    • Remove the four 8mm Phillips #1 screws.

    • Remove the motherboard from the device.

    • Repeat for the other motherboard.

  5. Hover-1 Maverick Motor Wheel Replacement, Motor: 5 단계, 이미지 1/2 Hover-1 Maverick Motor Wheel Replacement, Motor: 5 단계, 이미지 2/2
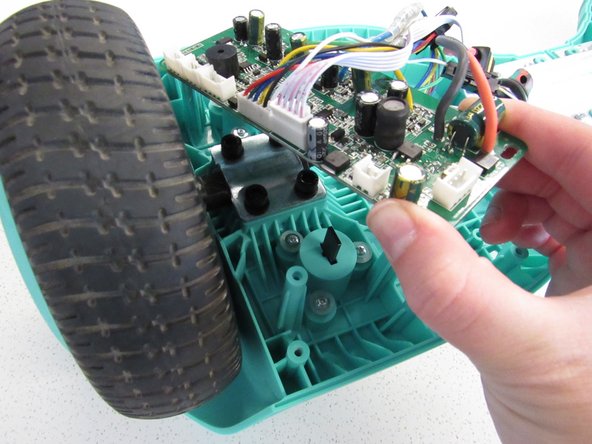
    • After the motherboard is removed from either side, remove the four 15 mm hex screws with a 5mm Allen wrench.

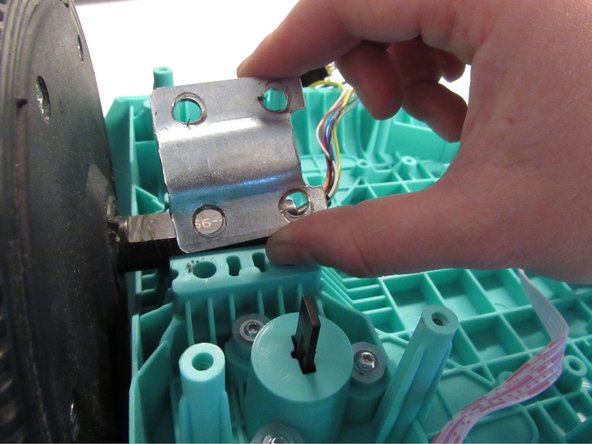
    • Remove the metal covering from over the motor.

  6. Hover-1 Maverick Motor Wheel Replacement: 6 단계, 이미지 1/1
    • The motor is attached to the wheel, so in order to remove the motor, you must take out the entire wheel.

결론

To reassemble your device, follow these instructions in reverse order.

Piper Feldman

회원 가입일: 01/23/20

409 평판

안내서 4개 작성하였습니다

Cal Poly, Team S2-G2, White Winter 2020 Cal Poly, Team S2-G2, White Winter 2020 회원

CPSU-WHITE-W20S2G2

2 회원들

안내서 4개 작성하였습니다

댓글 0개

댓글 쓰기

조회 통계:

24 시간 전: 0

7일 전: 1

30일 전: 5

전체 시간: 456