주요 콘텐츠로 건너뛰기

How To Fix Sticky Keyboard Keys on a MacBook

필요한 것

  1. How To Fix Sticky Keyboard Keys on a MacBook, How To Fix Sticky Keyboard Keys on a MacBook: 1 단계, 이미지 1/1
    • Before getting started make sure to completely turn off your computer.

    • Click on the apple in the upper left-hand corner of your computer screen. A drop down menu will appear.

    • Click "shut down".

  2. How To Fix Sticky Keyboard Keys on a MacBook: 2 단계, 이미지 1/3 How To Fix Sticky Keyboard Keys on a MacBook: 2 단계, 이미지 2/3 How To Fix Sticky Keyboard Keys on a MacBook: 2 단계, 이미지 3/3
    • Dip a q-tip in isopropanol, and wipe around each sticky key.

    • Make sure the q-tip is damp, not dripping.

    • You may need multiple q-tips, as they get pretty dirty.

  3. How To Fix Sticky Keyboard Keys on a MacBook: 3 단계, 이미지 1/1
    • Use a toothpick to remove crumbs or debris from under the sticky keys.

  4. How To Fix Sticky Keyboard Keys on a MacBook: 4 단계, 이미지 1/1
    • Now test out your keys. If they are still sticky continue on to Step 5.

  5. How To Fix Sticky Keyboard Keys on a MacBook: 5 단계, 이미지 1/3 How To Fix Sticky Keyboard Keys on a MacBook: 5 단계, 이미지 2/3 How To Fix Sticky Keyboard Keys on a MacBook: 5 단계, 이미지 3/3
    • Use a spudger or plastic opening tool to pry up sticky keys.

    • Insert the spudger under the side of a key.

    • Lift up.

    • Use your fingers to twist the key off.

    • To avoid damaging your laptop, use a spudger or plastic opening tool rather than the butter knife shown in the image.

  6. How To Fix Sticky Keyboard Keys on a MacBook: 6 단계, 이미지 1/2 How To Fix Sticky Keyboard Keys on a MacBook: 6 단계, 이미지 2/2
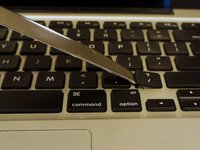
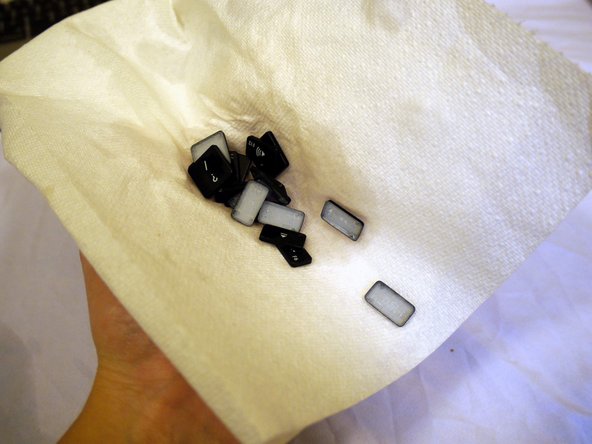
    • When you are removing a key if one or both of these white plastic pieces come off the key board, don't worry. They are called key carriers and are very easy to put back on.

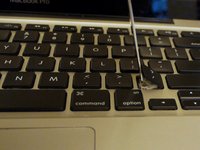
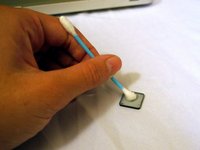
    • If one part of the carrier is still in the keyboard, remove it so you have both in you hands.

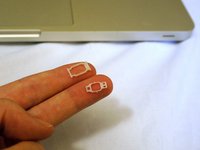
    • Look at the second picture and align the two piece then push them together. There should be a soft clicking sound.

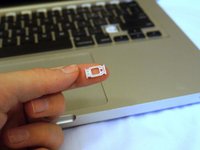
    • In the same alignment as the second picture, place the carrier in the spot on the keyboard where it came off and press firmly into place.

  7. How To Fix Sticky Keyboard Keys on a MacBook: 7 단계, 이미지 1/2 How To Fix Sticky Keyboard Keys on a MacBook: 7 단계, 이미지 2/2
    • Put soap and warm water in a cup.

    • As you remove the keys, put them in the soapy water.

    • Let the keys soak for 10 minutes.

  8. How To Fix Sticky Keyboard Keys on a MacBook: 8 단계, 이미지 1/1
    • Wipe down your keyboard with q-tips damp with rubbing alcohol.

  9. How To Fix Sticky Keyboard Keys on a MacBook: 9 단계, 이미지 1/2 How To Fix Sticky Keyboard Keys on a MacBook: 9 단계, 이미지 2/2
    • Optional: If your keys are particularly sticky use rubbing alcohol and a q-tip to wipe the back of the keys.

    • Dry the keys completely with a paper towel.

  10. How To Fix Sticky Keyboard Keys on a MacBook: 10 단계, 이미지 1/2 How To Fix Sticky Keyboard Keys on a MacBook: 10 단계, 이미지 2/2
    • Pop the keys back on:

    • First align the key and press firmly into place.

    • Then, move your finger side to side until you hear a double clicking sound.

결론

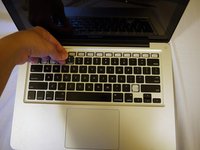
Hopefully now you've fixed the sticky keys problem on your MacBook. It's a good idea to do light cleaning and maintenance on your keyboard from time to time. iFixit's Electronics Cleaning Bundle and Precision Cleaning Kit are great for avoiding sticky keys and generally keeping the insides and outsides of your electronics spick and span.

다른 176명이 해당 안내서를 완성하였습니다.

Lilly Paul

회원 가입일: 02/24/15

2,243 평판

안내서 1개 작성함

Cal Poly, Team 24-6, Green Winter 2015 Cal Poly, Team 24-6, Green Winter 2015 회원

CPSU-GREEN-W15S24G6

4 회원들

안내서 15개 작성하였습니다

댓글 56개

YOU ROCK THANK YOU

(I'm going to type "S" a few times to demonstrate how well this helped me!

SSSSSsssssssssssssSSSSSSSSSSSSSSSsssssSSS

Victoria Patterson - 답글

Ugh it frustrates me that the author doesn't comprehensibly guide you through the complexities of taking keys off and on your keyboard. They are delicate and fit together elegantly. You should really elaborate before going and telling people to yank their keys off.

Aeron Ebbs - 답글

I disagree. He specified what to use, how to put them back on, etc. It's clear and precise!

Anyway I'm going to try this tonight so we'll see how it goes!

kaymay -

Actually it’s really not clear. If the key carriers come off and you don’t see how they were originally in the keyboard then there’s a huge amount of possible combinations as to which way around they could go. The author actually says “refer to the second picture to see how they go together” and then FORGOT TO UPLOAD THAT PICTURE ! You may have been lucky, but as many times as I’ve done this, it’s still a nightmare to figure out exactly which way around and which way up these little pieces go together. You may be lucky and get it right, or you may get it wrong but it’s still “good enough” or you may get it wrong and the key will never quite work the same again and you’ll end up taking it to a shop to replace the whole %#*@ keyboard for some ridiculous price because the author didn’t proof-read this article better and actually include the pictures that he said to refer to !

David Lyonz -

Great help - thx!

Kate - 답글

댓글 쓰기

조회 통계:

24 시간 전: 255

7일 전: 1,596

30일 전: 7,807

전체 시간: 977,262