
How to Fix a Dress Strap With a Clasp

최종 수정일 2026년 5월 19일
조회수: 848
통계 보기:
- 지난 24시간
- 4
- 지난 7일:
- 35
- 지난 30일:
- 186
- 전체 시간:
- 848
댓글: 0
해당 안내서에 댓글을 남긴 사람이 없습니다. 첫 번째가 되시겠습니까?
Go to guide comments완료함: 0 1
이 가이드를 "완료"로 표시한 사람은 아직 없습니다. 첫 번째 주인공이 되시겠어요?
1명이 이 안내서를 "완료"로 표시했습니다. 바로 귀하입니다 — 수고하셨어요!
즐겨찾기: 0 1
해당 안내서에 좋아요를 누르고 구독한 사람이 아직 없습니다. 첫 번째 주인공이 되시겠습니까?
1명이 이 안내서를 즐겨찾기 (및 구독) 했습니다 — 바로 귀하입니다!
소개
1단계로 이동하기 ↓This guide will follow the process for fixing your broken dress strap with a clasp using a needle, thread, and scissors. This technique is short and simple even without any experience with sewing.
To successfully use this guide, you will need to be able to perform two basic skills:
- You will need to know how to thread a needle, which you can watch how to do here.
- At the end of the guide, you will need to tie off the end of the thread. There are many different knots you can use at this step. We chose the quilter's knot, where you can follow along here.
- The amount of stitches you will need to secure the clasp depends on the width of your dress strap. There is no right or wrong amount as long as you are using a short stitch length and the stitching feels secure in the end.
- If you are not proud of your stitching and want to try again, use a seam ripper tool or small enough scissors to remove the stitching.
필요한 것
도구


-
-
-
Pull the end of the strap through the loop on the collar of the dress.
-
Locate the buckle along the length of the strap and feed the end of the strap under the opening of the buckle (closest to the strap).
-
Continue feeding the strap through the next opening of the buckle.
 FixBot에 문의하기
-
-
-
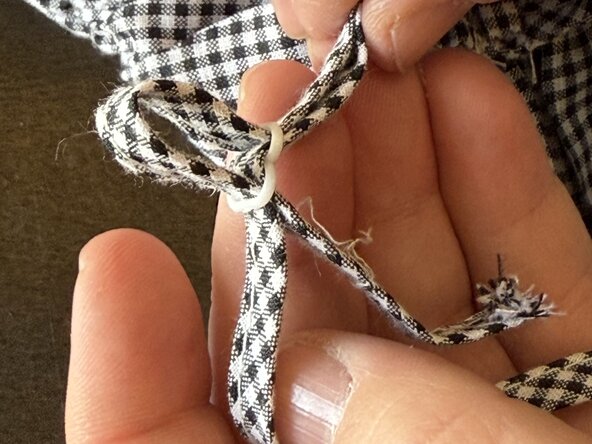
Roll the end of the strap 1/8".
-
Roll it one more time.
-
Compare the newly made loop to the other functioning strap to ensure the loops are the same length.
-
-
-
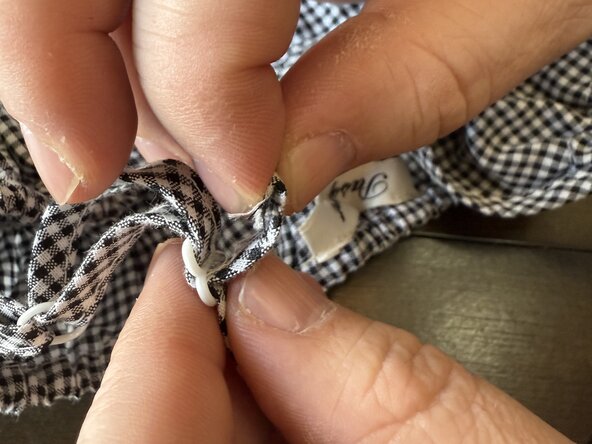
Poke the needle through to one edge of the looped strap to begin securing the fold to the strap.
-
Begin sewing along the width of the strap, using a short stitch length (2.0 mm).
-
-
-
-
To finish securing the fabric together, create a loop with the excess thread attached to the needle.
-
Use a quilter's knot to finish securing the fabric.
-
-






팀

Northern Arizona University, Team 1-2, Konrad Spring 2026 Northern Arizona University, Team 1-2, Konrad Spring 2026 회원
NAU-KONRAD-S26S1G2
4 회원들
안내서 12개를 작성함
