주요 콘텐츠로 건너뛰기

How to Fix a Leaking Shower Head

필요한 것

  1. How to Fix a Leaking Shower Head, How to Fix a Leaking Shower Head: 1 단계, 이미지 1/2 How to Fix a Leaking Shower Head, How to Fix a Leaking Shower Head: 1 단계, 이미지 2/2
    • Use a ruler to measure about 8" long on the teflon tape. Then use a pair of scissors to cut it.

  2. How to Fix a Leaking Shower Head: 2 단계, 이미지 1/2 How to Fix a Leaking Shower Head: 2 단계, 이미지 2/2
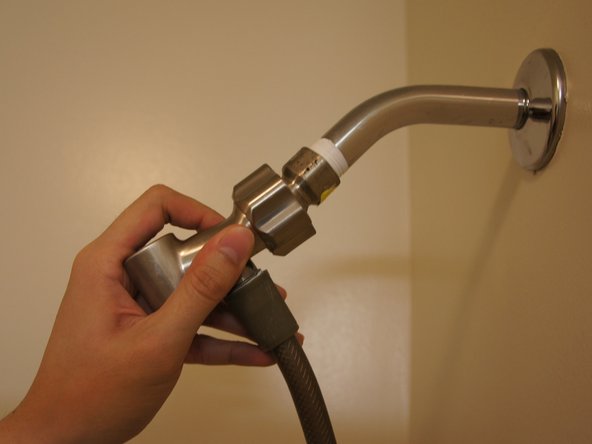
    • Place the wrench on the shower head mount. Adjust the wrench to fit tightly on the mount.

    • For showerheads with shiny finishes, use a rag between the showerhead and the wrench to prevent scratching off the finish.

    • Turn the wrench counter-clockwise to loosen the showerhead, then unscrew it the rest of the way by hand to remove it.

    • Be careful not to have the shower head fall down and hit yourself when taking it down.

  3. How to Fix a Leaking Shower Head: 3 단계, 이미지 1/3 How to Fix a Leaking Shower Head: 3 단계, 이미지 2/3 How to Fix a Leaking Shower Head: 3 단계, 이미지 3/3
    • Place and hold one end of the tape on the threads at the end of the shower arm (the pipe coming out of the wall).

    • Teflon tape likes to stick to itself, so be careful not to let it fold over itself, or you'll be unfolding it all day.

    • While taking care to keep the tape flat, wrap it clockwise around the threads, completely covering them and wrapping back over itself to stick.

    • Be sure to wrap the tape clockwise, so that as you tighten the showerhead it won't unravel the tape.

  4. How to Fix a Leaking Shower Head: 4 단계, 이미지 1/3 How to Fix a Leaking Shower Head: 4 단계, 이미지 2/3 How to Fix a Leaking Shower Head: 4 단계, 이미지 3/3
    • Thread the showerhead back onto the shower arm.

    • Spin it on a few times to get it hand tight.

  5. How to Fix a Leaking Shower Head: 5 단계, 이미지 1/2 How to Fix a Leaking Shower Head: 5 단계, 이미지 2/2
    • Test out the showerhead with your hand tightening first. If it still leaks, you may need to wrench on it a bit to seal things up.

    • Again, use the rag trick if your showerhead is shiny and you could scratch off the finish.

    • Be careful not to overtighten, as you could very easily damage the showerhead, shower arm, or plumbing within the shower wall.

  6. How to Fix a Leaking Shower Head: 6 단계, 이미지 1/1
    • The tape is replaced! However this may not have solved your problem. If the showerhead still leaks from the joint with the shower arm, there may be dirt or debris in the joint, or damaged threads on the shower arm.

    • Try tightening the showerhead a little more with your wrench, or reapplying teflon tape to ensure a good layer.

결론

This guide is made to maintain the tightened connection between the shower head and the pipe. If the shower head is leaking water elsewhere except at the connection, please seek for other fixing guides for repairing shower head leaking problem.

다른 6명이 해당 안내서를 완성하였습니다.

Jiahui Wu

회원 가입일: 02/23/15

269 평판

안내서 1개 작성함

Cal Poly, Team 12-5, Green Winter 2015 Cal Poly, Team 12-5, Green Winter 2015 회원

CPSU-GREEN-W15S12G5

3 회원들

안내서 8개 작성하였습니다

댓글 4개

I found the rubber washer was missing on the end of the hose so I put a 1/4" rubber grommet and it just happened to squish in the middle for a leak-less connection.

Craig Armstrong - 답글

My shower head is leaky in it’s joint and it’s not possible to wrap this place with tape. Water is dripping from the joint and it looks odd. Is there any solution for this or should I replace the shower head with a new one.

Rose Geiger - 답글

I have handheld shower head with slide bar, I tried the above method but still, sometimes it drips. Do you have other methods for shower leakage issues?

Ralph Matthews - 답글

This was my first experience trying to repair a leaking kitchen faucet. I used a few different tips and tricks to fix the problem, but none worked. I tried to fix the problem myself and the only thing that worked was to replace the entire faucet assembly.

Dwayne Smith - 답글

댓글 쓰기

조회 통계:

24 시간 전: 4

7일 전: 37

30일 전: 198

전체 시간: 40,063