주요 콘텐츠로 건너뛰기

How to Fix a Torn Slipper

필요한 것

  1. How to Fix a Torn Slipper, Glue up the vamp of the shoe: 1 단계, 이미지 1/2 How to Fix a Torn Slipper, Glue up the vamp of the shoe: 1 단계, 이미지 2/2
    • Use glue to glue up the torn part of the vamp (the top part of the shoe)

    • This is done to make it easier for the later stage. if the vamp wasn't broken, this step can be skipped.

  2. How to Fix a Torn Slipper, Measure the cloth you need: 2 단계, 이미지 1/3 How to Fix a Torn Slipper, Measure the cloth you need: 2 단계, 이미지 2/3 How to Fix a Torn Slipper, Measure the cloth you need: 2 단계, 이미지 3/3
    • Grab a piece of cloth and measure the amount needed to fix your shoe and cut it out.

  3. How to Fix a Torn Slipper, Glue the cloth to the shoe: 3 단계, 이미지 1/3 How to Fix a Torn Slipper, Glue the cloth to the shoe: 3 단계, 이미지 2/3 How to Fix a Torn Slipper, Glue the cloth to the shoe: 3 단계, 이미지 3/3
    • Glue the piece of cloth onto the shoe.

    • This step isn't needed if you are a pro, glue was used for holding the shoe and the cloth for easy sewing.

  4. How to Fix a Torn Slipper, Sewing the cloth to the shoe: 4 단계, 이미지 1/3 How to Fix a Torn Slipper, Sewing the cloth to the shoe: 4 단계, 이미지 2/3 How to Fix a Torn Slipper, Sewing the cloth to the shoe: 4 단계, 이미지 3/3
    • Now poke your thread over your needle

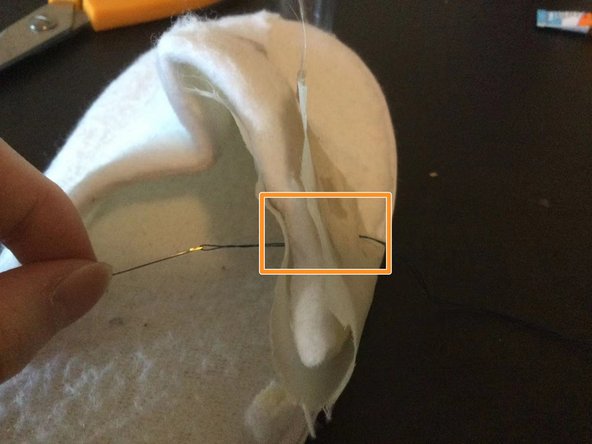
    • After you poke your thread into the needle, start sewing back and front, sew all the way around the cloth.

    • Be careful not to poke your hand while you are sewing

  5. How to Fix a Torn Slipper, Glue fixed vamp to the bottom of the shoe: 5 단계, 이미지 1/2 How to Fix a Torn Slipper, Glue fixed vamp to the bottom of the shoe: 5 단계, 이미지 2/2
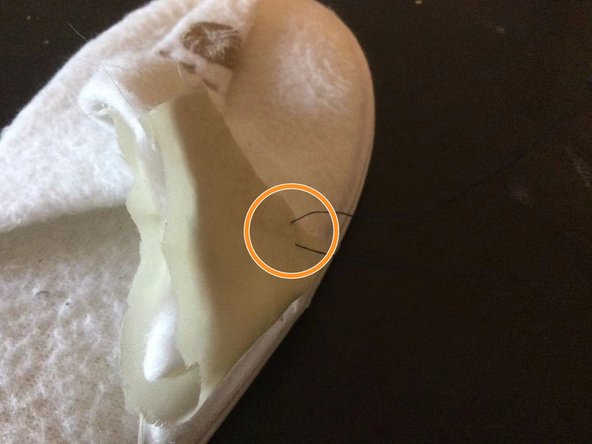
    • Use glue to hold the vamp and the bottom of the shoe together.

    • This is similar to step 3, if you are a pro with sewing you can skip this step.

  6. How to Fix a Torn Slipper, Sew the bottom and the vamp together.: 6 단계, 이미지 1/3 How to Fix a Torn Slipper, Sew the bottom and the vamp together.: 6 단계, 이미지 2/3 How to Fix a Torn Slipper, Sew the bottom and the vamp together.: 6 단계, 이미지 3/3
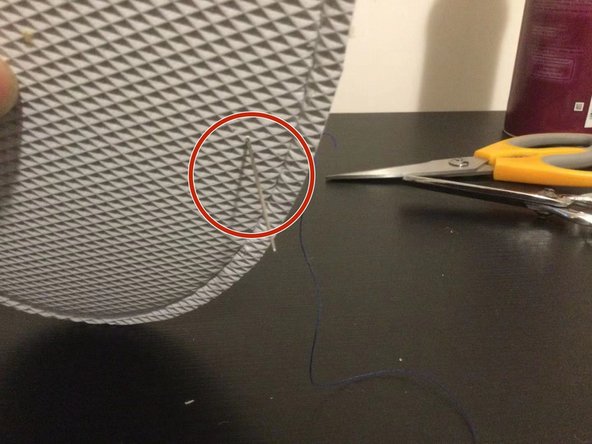
    • Now sew the top and bottom of the shoe together. Poke in from the side and down the bottom again and again.

    • If it is hard to poke through, you can always use something hard to help with pushing the needle through.

  7. How to Fix a Torn Slipper, The end: 7 단계, 이미지 1/2 How to Fix a Torn Slipper, The end: 7 단계, 이미지 2/2
    • Now, this is ready for use.

    • You can always use a thread and cloth that fit the colour of your shoe to look nice.

결론

This isn’t a very hard guide and can be performed by anyone who has enough time and tools to complete it.

다른 한 분이 해당 안내서를 완성하였습니다.

jia liu

회원 가입일: 09/19/21

171 평판

안내서 1개 작성함

York University, Team F-16, Woodhouse Fall 2021 York University, Team F-16, Woodhouse Fall 2021 회원

YORK-WOODHOUSE-F21SFG16

1 회원

안내서 2개 작성하였습니다

댓글 0개

댓글 쓰기

조회 통계:

24 시간 전: 2

7일 전: 12

30일 전: 22

전체 시간: 1,444