이 버전에는 잘못된 편집 사항이 있을 수 있습니다. 최신 확인된 스냅샷으로 전환하십시오.
필요한 것
-
이 단계는 번역되지 않았습니다. 번역을 도와주십시오
-
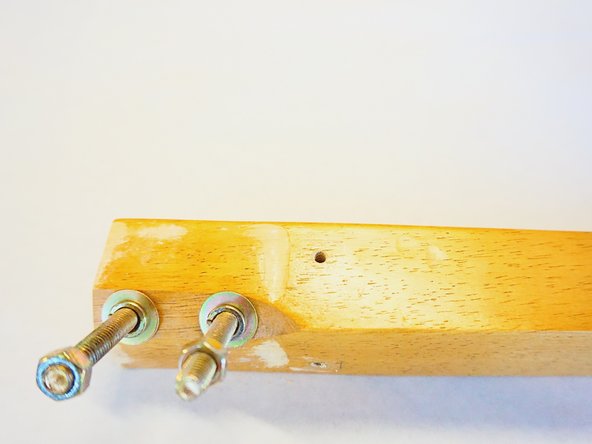
First, thoroughly assess your chair for loose elements.
-
Sit and jiggle them to test and note exactly what moves.
-
-
이 단계는 번역되지 않았습니다. 번역을 도와주십시오
-
Position an L-bracket as if it will brace the leg to the frame of the chair.
-
Mark the exact outline of the bracket, taking extra care when marking the center hole where your screws will hold the brace in place.
-
-
-
이 단계는 번역되지 않았습니다. 번역을 도와주십시오
-
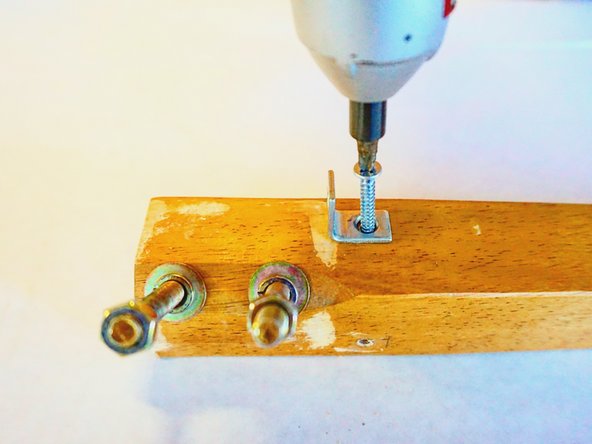
Pre-drill holes through the center of your marked circles on both your chair legs and chair frame.
-
-
이 단계는 번역되지 않았습니다. 번역을 도와주십시오
-
For extra hold and durability, use a small amount of wood glue at the chair legs joints.
-
Be sure to wipe away any excess wood glue.
-
-
이 단계는 번역되지 않았습니다. 번역을 도와주십시오
-
Tighten any preexisting hardware holding the legs to the chair base before fixing the L-bracket to the chair.
-
-
이 단계는 번역되지 않았습니다. 번역을 도와주십시오
-
Finally, screw the second side of the L-bracket to the base of the chair.
-


다른 2명이 해당 안내서를 완성하였습니다.
팀

UC Davis, Team S2-G6, Cole Spring 2017 UC Davis, Team S2-G6, Cole Spring 2017 회원
UCD-COLE-S17S2G6
3 회원들
안내서 1개 작성하였습니다
댓글 한 개
My entire corner wood pieces are broken and not fixable and the screen (bolt and nut) is bended also. I would like to purchase those small wood pieces, I am not a saavy. Need some help to find the pieces. you can mail me @ radhu_murali@hotmail.com.