주요 콘텐츠로 건너뛰기

How to Install a Hard Drive Sled Adapter for Mac Pro First Generation

필요한 것

  1. How to Install a Hard Drive Sled Adapter for Mac Pro First Generation, Case Panel: 1 단계, 이미지 1/1
    • Lift the lever to unlock the case.

  2. How to Install a Hard Drive Sled Adapter for Mac Pro First Generation: 2 단계, 이미지 1/1
    이 단계에 사용된 도구:
    Anti-Static Wrist Strap
    $7.95
    구매
    • Remove the side panel of the Mac Pro.

    • Discharge any static electricity by touching a grounded surface prior to working on any internal components. Touching the metal PCI slot covers works great, or any other grounded metal surface. You can also wear a anti-static wrist strap.

  3. How to Install a Hard Drive Sled Adapter for Mac Pro First Generation, Locate the Hard Drive Bays: 3 단계, 이미지 1/1
    • Locate the desired hard drive bay after opening the case .

    • This is usually the drive closest to the front of the case.

  4. How to Install a Hard Drive Sled Adapter for Mac Pro First Generation, Remove the Hard Drive Bay: 4 단계, 이미지 1/3 How to Install a Hard Drive Sled Adapter for Mac Pro First Generation, Remove the Hard Drive Bay: 4 단계, 이미지 2/3 How to Install a Hard Drive Sled Adapter for Mac Pro First Generation, Remove the Hard Drive Bay: 4 단계, 이미지 3/3
    • Make sure that the clip used to release the side panel is open or the Hard Drive bays won't slide out

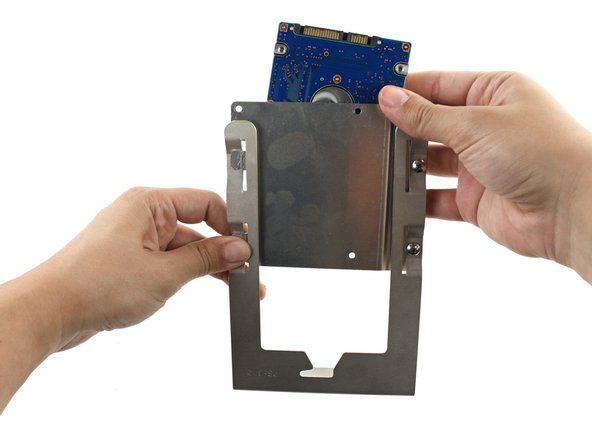
    • Pull the Hard Drive straight out by grabbing the metal sled from the bottom. It may be hard to pull out at first, but after it gets released the sled shouldn't take a lot of effort to remove.

  5. How to Install a Hard Drive Sled Adapter for Mac Pro First Generation, Remove metal Hard Drive sled: 5 단계, 이미지 1/3 How to Install a Hard Drive Sled Adapter for Mac Pro First Generation, Remove metal Hard Drive sled: 5 단계, 이미지 2/3 How to Install a Hard Drive Sled Adapter for Mac Pro First Generation, Remove metal Hard Drive sled: 5 단계, 이미지 3/3
    • When handling the hard drive hold it by the sled or sides be sure not to touch the green circuit board visible in all 3 pictures.

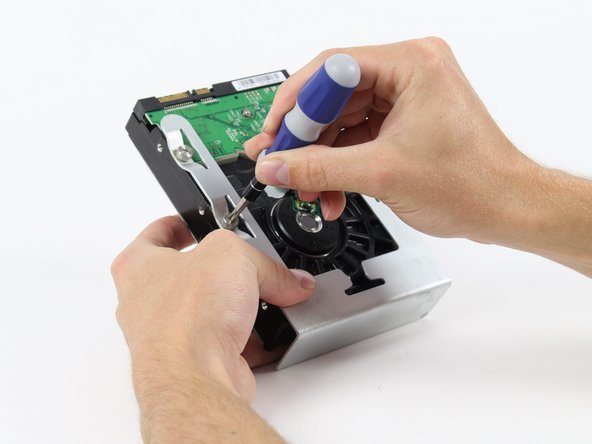
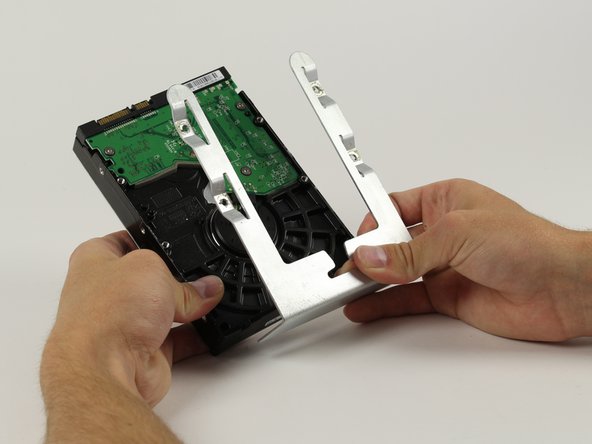
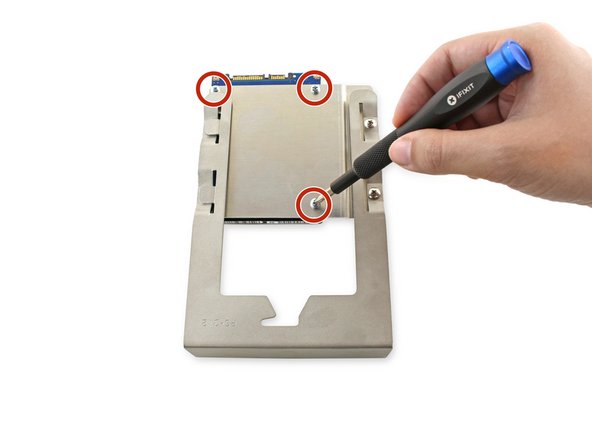
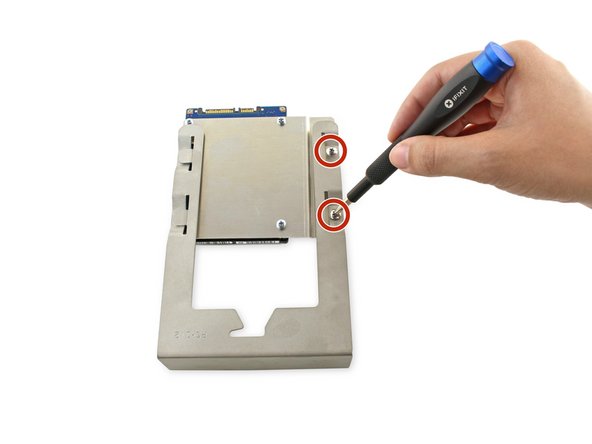
    • Locate the four 6-32 type screws on the Hard Drive sled.

    • Using a Phillips head screw driver remove the four screws and separate the metal sled from the Hard Drive

  6. How to Install a Hard Drive Sled Adapter for Mac Pro First Generation, How to Install a Hard Drive Sled Adapter for Mac Pro First Generation: 6 단계, 이미지 1/3 How to Install a Hard Drive Sled Adapter for Mac Pro First Generation, How to Install a Hard Drive Sled Adapter for Mac Pro First Generation: 6 단계, 이미지 2/3 How to Install a Hard Drive Sled Adapter for Mac Pro First Generation, How to Install a Hard Drive Sled Adapter for Mac Pro First Generation: 6 단계, 이미지 3/3
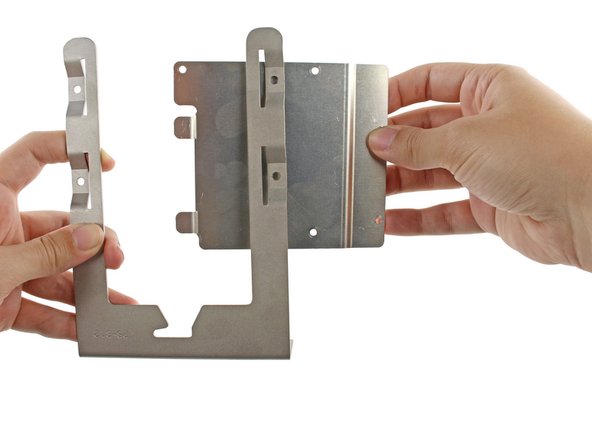
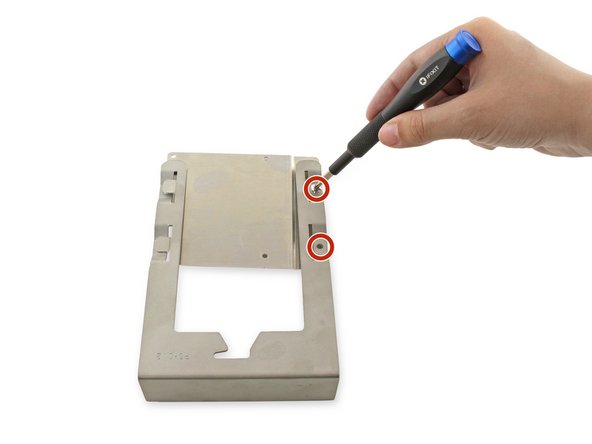
    • Insert the two tabs on the left side of the metal adapter bracket into the slots on the left side of the hard drive bay sled.

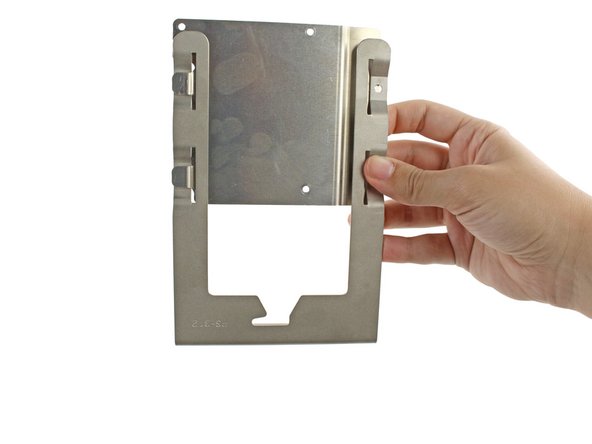
    • Align the holes on the right side.

  7. How to Install a Hard Drive Sled Adapter for Mac Pro First Generation: 7 단계, 이미지 1/1
    • Screw the two 7.8mm PH0 screws into the two holes on the right.

    • Leave these screws slightly loose; they will be tightened once the hard drive is attached.

  8. How to Install a Hard Drive Sled Adapter for Mac Pro First Generation: 8 단계, 이미지 1/3 How to Install a Hard Drive Sled Adapter for Mac Pro First Generation: 8 단계, 이미지 2/3 How to Install a Hard Drive Sled Adapter for Mac Pro First Generation: 8 단계, 이미지 3/3
    • Align the holes in the hard drive with the three holes on the bracket.

    • Screw the three 6.1mm PH0 screws into the bracket and hard drive.

    • These screws can be secured tightly.

  9. How to Install a Hard Drive Sled Adapter for Mac Pro First Generation: 9 단계, 이미지 1/1
    • Tighten the two 7.8mm PH0 screws on the right side of the bracket.

결론

To reassemble your device, follow these instructions in reverse order.

다른 5명이 해당 안내서를 완성하였습니다.

Kristen Gismondi

회원 가입일: 11/12/14

81,663 평판

안내서 200개 작성하였습니다

iFixit iFixit 회원

Staff

135 회원들

안내서 16,732개 작성하였습니다

댓글 한 개

Tried installing these on MacPro5,1 today. Very disappointed. Sled does not slide into place correctly, and any attempt to nudge it into place only scratches the carrier.

Going back to OWC sled to mount SSD drives.

tjod - 답글

댓글 쓰기

조회 통계:

24 시간 전: 0

7일 전: 0

30일 전: 15

전체 시간: 5,770