주요 콘텐츠로 건너뛰기

How to Reassemble the Palm IIIc

필요한 것

  1. How to Reassemble the Palm IIIc, How to Reassemble the Palm IIIc: 1 단계, 이미지 1/1
    • Reinsert the screen into the case that contains the buttons.

  2. How to Reassemble the Palm IIIc: 2 단계, 이미지 1/1
    • Put the Motherboard back into casing from right to left.

    • Make sure the black clips are securing the motherboard into the casing.

  3. How to Reassemble the Palm IIIc: 3 단계, 이미지 1/3 How to Reassemble the Palm IIIc: 3 단계, 이미지 2/3 How to Reassemble the Palm IIIc: 3 단계, 이미지 3/3
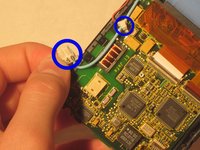
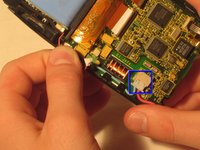
    • Secure the bottom two ZIF connectors into their slots by opening the flap and inserting the ZIF connectors.

    • Gently press down on the flap to secure the ZIF connector. This secures the screen and buttons to the motherboard.

  4. How to Reassemble the Palm IIIc: 4 단계, 이미지 1/2 How to Reassemble the Palm IIIc: 4 단계, 이미지 2/2
    • Connect the blue and red screen cables to the beige box they were removed from.

  5. How to Reassemble the Palm IIIc: 5 단계, 이미지 1/2 How to Reassemble the Palm IIIc: 5 단계, 이미지 2/2
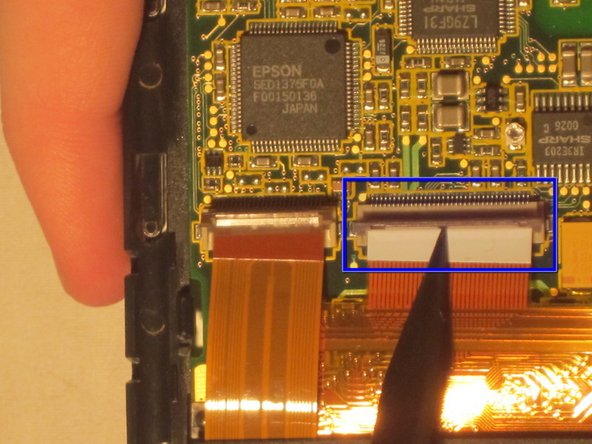
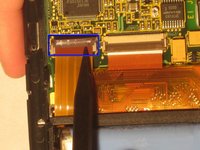
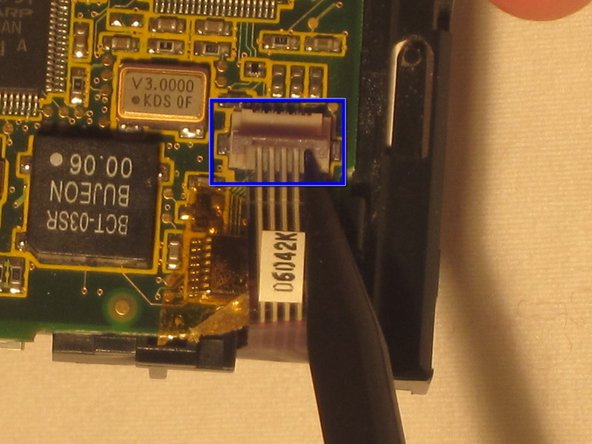
    • Open the ZIF connector box at the top of the motherboard by gently pulling up on the flap.

    • Insert the ZIF tab into the connector box.

    • Gently press down on the flap to secure the ZIF tab in place.

  6. How to Reassemble the Palm IIIc: 6 단계, 이미지 1/1
    • Attach the white box on the end of the red cable connected to the battery into the connector box on the motherboard.

  7. How to Reassemble the Palm IIIc: 7 단계, 이미지 1/1
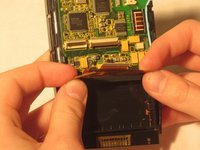
    • Place the front and back covers around the casing containing the motherboard and screen.

    • Before securing the covers, place the sensor in between the front and back cover at the top of the device.

    • After the sensor is in place between the two covers, firmly secure the front and back covers.

  8. How to Reassemble the Palm IIIc: 8 단계, 이미지 1/1
    • Replace the long screws at the top of the back case with the Philips head screwdriver.

    • Replace the short screws to the bottom of the back case using the Philips head screwdriver.

    • After the screws are in place, insert the stylus.

  9. How to Reassemble the Palm IIIc: 9 단계, 이미지 1/1
    • Gently snap the flip cover back into place where it connects at the top of the Palm IIIc

결승점

다른 한 분이 해당 안내서를 완성하였습니다.

Angela Arthur

회원 가입일: 02/16/12

101 평판

안내서 1개 작성함

Ohio State, Team 1-5, Buehl Winter 2012 Ohio State, Team 1-5, Buehl Winter 2012 회원

OSU-BUEHL-W12S1G5

5 회원들

안내서 1개 작성하였습니다

댓글 0개

댓글 쓰기

조회 통계:

24 시간 전: 0

7일 전: 0

30일 전: 0

전체 시간: 240