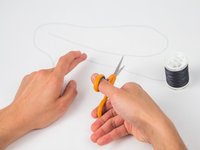
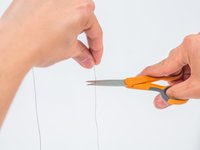
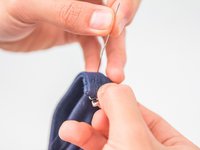
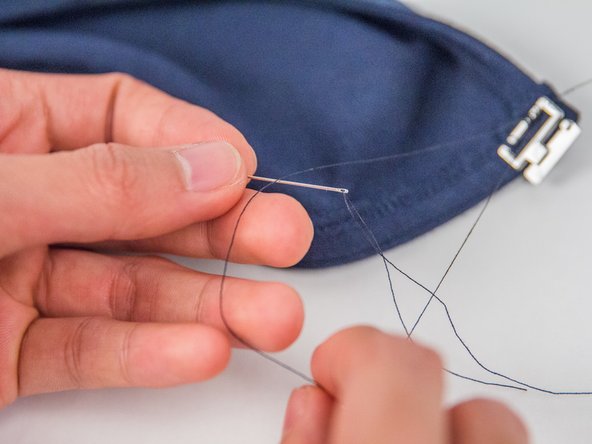
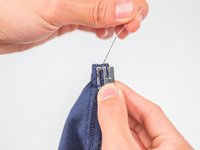
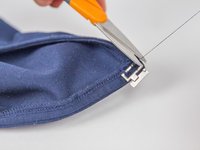
주요 콘텐츠로 건너뛰기

How to Repair a Rectangle Closure Hook Clasp on Clothing

필요한 것

  1. How to Repair a Rectangle Closure Hook Clasp on Clothing, How to Repair a Rectangle Closure Hook Clasp on Clothing: 1 단계, 이미지 1/2 How to Repair a Rectangle Closure Hook Clasp on Clothing, How to Repair a Rectangle Closure Hook Clasp on Clothing: 1 단계, 이미지 2/2
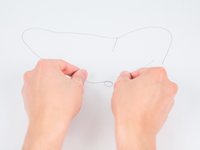
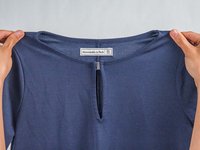
    • Collect the article of clothing that requires a clasp repair.

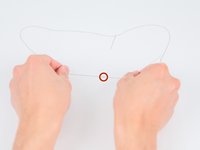
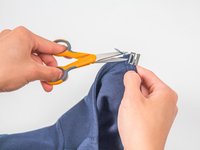
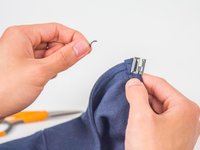
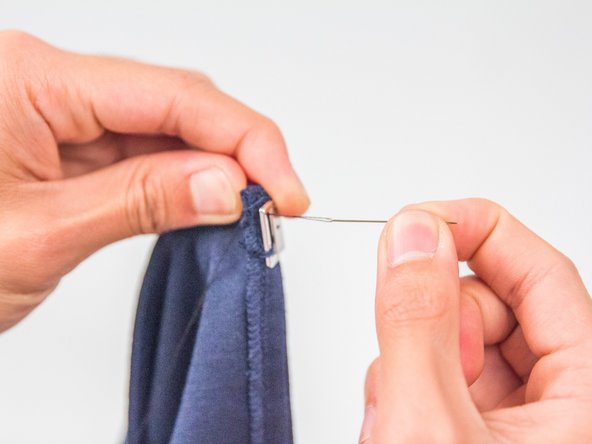
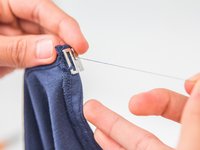
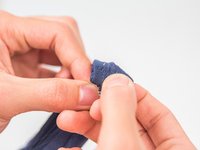
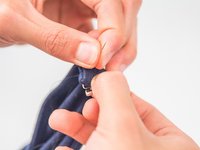
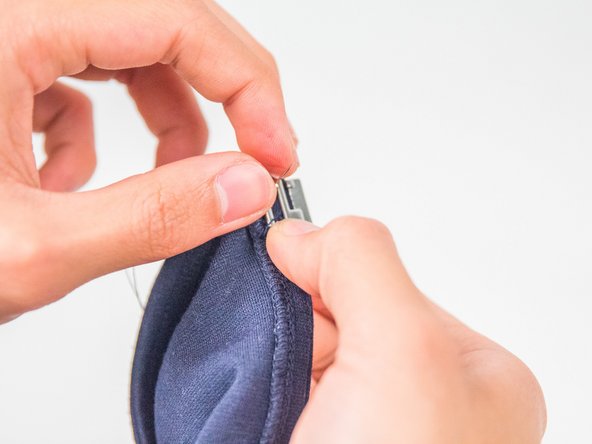
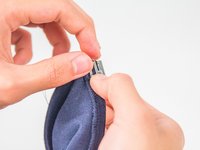
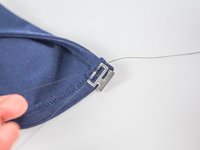
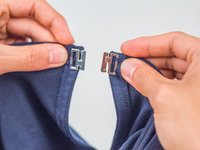
    • Locate the clasp and identify the area that needs the sewing repair.

    • If your clasp is completely removed from the garment, be sure to place it in the original store bought position.

  2. How to Repair a Rectangle Closure Hook Clasp on Clothing: 2 단계, 이미지 1/2 How to Repair a Rectangle Closure Hook Clasp on Clothing: 2 단계, 이미지 2/2
    • Choose some thread in a matching or similar color to the garment.

    • Ensure that the type of thread is appropriate for the repair. Avoid using embroidery floss, dental floss, or rope.

    • Choose a needle, preferably one that is small and thin.

    • Smaller needles leave smaller holes in the garment and are less likely to cause issues while sewing.

  3. How to Repair a Rectangle Closure Hook Clasp on Clothing: 3 단계, 이미지 1/2 How to Repair a Rectangle Closure Hook Clasp on Clothing: 3 단계, 이미지 2/2
    • Cut an arm's length of the thread.

    • Shorter lengths of thread are easier to manage while sewing. Longer pieces will tangle and knot.

  4. How to Repair a Rectangle Closure Hook Clasp on Clothing: 4 단계, 이미지 1/3 How to Repair a Rectangle Closure Hook Clasp on Clothing: 4 단계, 이미지 2/3 How to Repair a Rectangle Closure Hook Clasp on Clothing: 4 단계, 이미지 3/3
    • Take the cut length of thread and poke it through the eye (hole) of the needle.

    • Take your time! This step requires concentration and patience.

    • Pull the thread through the eye of the needle until it is about a hand's length.

    • You should now be looking at a threaded needle with thread long on one side and short on the other.

  5. How to Repair a Rectangle Closure Hook Clasp on Clothing: 5 단계, 이미지 1/3 How to Repair a Rectangle Closure Hook Clasp on Clothing: 5 단계, 이미지 2/3 How to Repair a Rectangle Closure Hook Clasp on Clothing: 5 단계, 이미지 3/3
    • Take the threaded needle and make a simple double knot on the long end of the thread.

    • Snip off the extra thread near the knot.

  6. How to Repair a Rectangle Closure Hook Clasp on Clothing: 6 단계, 이미지 1/3 How to Repair a Rectangle Closure Hook Clasp on Clothing: 6 단계, 이미지 2/3 How to Repair a Rectangle Closure Hook Clasp on Clothing: 6 단계, 이미지 3/3
    • Check the garment and cut off any old pieces of thread from the clasp area.

    • Keep in mind that this step is only necessary if the old thread from the previous sewn binding is in the way of your repair.

  7. How to Repair a Rectangle Closure Hook Clasp on Clothing: 7 단계, 이미지 1/3 How to Repair a Rectangle Closure Hook Clasp on Clothing: 7 단계, 이미지 2/3 How to Repair a Rectangle Closure Hook Clasp on Clothing: 7 단계, 이미지 3/3
    • Hold the clasp firmly in its desired place.

    • Poke the needle through the inside of the garment, aiming for the inside of the clasp.

    • Remember to always check whether or not your fingers are in the way while sewing. Otherwise you will poke your fingers!

    • The end knot on the thread should always be hidden on the inside of the garment. In this example, the knot was hidden beneath the extra material on the inside of the garment. This is known as the seam allowance.

    • Pull the needle through until the knot catches and you are unable to pull anymore.

  8. How to Repair a Rectangle Closure Hook Clasp on Clothing: 8 단계, 이미지 1/3 How to Repair a Rectangle Closure Hook Clasp on Clothing: 8 단계, 이미지 2/3 How to Repair a Rectangle Closure Hook Clasp on Clothing: 8 단계, 이미지 3/3
    • Flip to the outside of the garment.

    • Check to ensure that the needle is placed on the outside of the clasp before continuing.

    • Poke the needle through the fabric. Aim for a spot in the garment's seam to hide your new stitches.

    • Pull the needle all the way through until the thread has snugly pushed the clasp close to the garment's fabric.

  9. How to Repair a Rectangle Closure Hook Clasp on Clothing: 9 단계, 이미지 1/2 How to Repair a Rectangle Closure Hook Clasp on Clothing: 9 단계, 이미지 2/2
    • Turn the garment to the inside again.

    • Poke the needle through the fabric, aiming for the inside of the clasp.

    • Tug the needle all the way through until it catches.

    • Repeat Steps 7-9 as many times as necessary. This action creates a group of stitches that hold the clasp in place.

    • More repetitions of the stitches will create a sturdier binding for the clasp.

  10. How to Repair a Rectangle Closure Hook Clasp on Clothing: 10 단계, 이미지 1/3 How to Repair a Rectangle Closure Hook Clasp on Clothing: 10 단계, 이미지 2/3 How to Repair a Rectangle Closure Hook Clasp on Clothing: 10 단계, 이미지 3/3
    • Make sure to end your last stitch on the inside of the garment.

    • Poke the needle through the stitches you made and tug until there is a loop.

    • Make sure that the loop is big enough to maneuver the needle through, but not so big that it tangles.

    • Take the needle and pull it through the center of the loop.

    • Pull the needle through the center of the loop again.

  11. How to Repair a Rectangle Closure Hook Clasp on Clothing: 11 단계, 이미지 1/3 How to Repair a Rectangle Closure Hook Clasp on Clothing: 11 단계, 이미지 2/3 How to Repair a Rectangle Closure Hook Clasp on Clothing: 11 단계, 이미지 3/3
    • Pull on the needle until a knot is formed on top of your stitches.

    • Straighten the threaded needle and hold it firmly.

    • Take a pair of scissors and snip off the extra thread.

    • Check to make sure you do not accidentally cut off the knot too!

  12. How to Repair a Rectangle Closure Hook Clasp on Clothing: 12 단계, 이미지 1/3 How to Repair a Rectangle Closure Hook Clasp on Clothing: 12 단계, 이미지 2/3 How to Repair a Rectangle Closure Hook Clasp on Clothing: 12 단계, 이미지 3/3
    • Examine the finished repair in good light.

    • Test the clasp to ensure that it works properly.

    • Check the garment and make sure that the repair stitches are not too noticeable from the outside.

결론

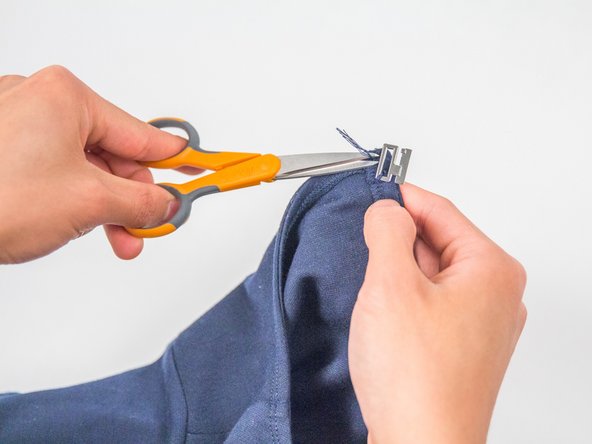
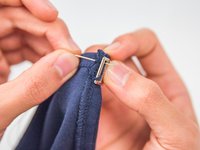
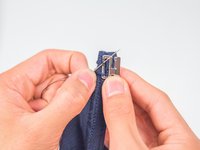
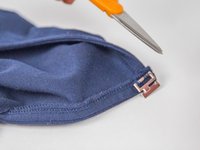
You have now completed the repair of the rectangle closure hook clasp on your article of clothing. Wearing your mended clothing is highly recommended!

다른 한 분이 해당 안내서를 완성하였습니다.

Alisa Sakakura

회원 가입일: 04/28/17

147 평판

안내서 1개 작성함

UC Davis, Team S1-G3, Coad Spring 2017 UC Davis, Team S1-G3, Coad Spring 2017 회원

UCD-COAD-S17S1G3

3 회원들

안내서 1개 작성하였습니다

댓글 0개

댓글 쓰기

조회 통계:

24 시간 전: 0

7일 전: 2

30일 전: 39

전체 시간: 4,048