주요 콘텐츠로 건너뛰기

How to Replace Cracked Tile

필요한 것

  1. How to Replace Cracked Tile, Cracked Tile: 1 단계, 이미지 1/1
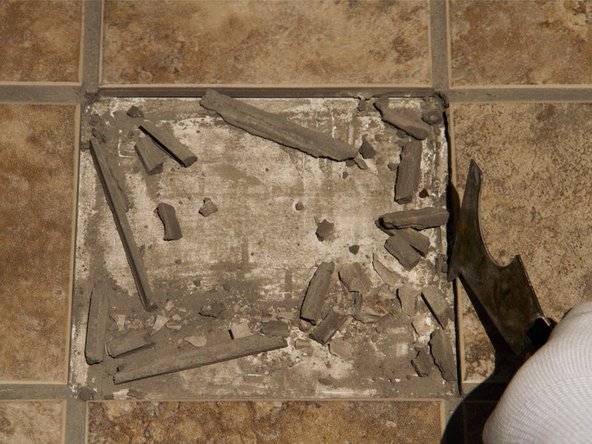
    • Use a painter's tool or putty knife to remove the grout from around the cracked tile.

    • Using an edge or corner of your painter's tool or putty knife, scrape the grout along the perimeter of the broken tile.

    • Be careful not to crack or scratch surrounding tiles.

  2. How to Replace Cracked Tile: 2 단계, 이미지 1/3 How to Replace Cracked Tile: 2 단계, 이미지 2/3 How to Replace Cracked Tile: 2 단계, 이미지 3/3
    • Use the painter's tool or putty knife to pry up the broken tile.

    • If the tile does not lift, place an old rag over the tile and use the hammer to break the tile into smaller pieces.

    • Avoid using surrounding tile as leverage and be precise and careful while using the hammer.

  3. How to Replace Cracked Tile: 3 단계, 이미지 1/3 How to Replace Cracked Tile: 3 단계, 이미지 2/3 How to Replace Cracked Tile: 3 단계, 이미지 3/3
    • Remove the broken pieces of tile, using gloved hands for large pieces or a broom for smaller shards.

    • Using the painter's tool or putty knife, scrape the grout from the edges of tile and any adhesive from under the tile.

    • Be careful of sharp shards of tile.

  4. How to Replace Cracked Tile: 4 단계, 이미지 1/3 How to Replace Cracked Tile: 4 단계, 이미지 2/3 How to Replace Cracked Tile: 4 단계, 이미지 3/3
    • Apply new adhesive using the trowel, making sure the adhesive is spread evenly.

    • Drag the toothed end of the trowel across the adhesive to create even rows.

    • Quickly remove any adhesive from the surrounding tiles using a wet sponge or old rag, working quickly as the adhesive will begin to dry.

  5. How to Replace Cracked Tile: 5 단계, 이미지 1/3 How to Replace Cracked Tile: 5 단계, 이미지 2/3 How to Replace Cracked Tile: 5 단계, 이미지 3/3
    • Place the new tile down in the center of the empty space.

    • If available, use tile spacers to ensure proper placement.

    • Allow the adhesive to dry based on the instructions provided on the product.

    • During this time, prevent foot traffic on the new tile.

  6. How to Replace Cracked Tile: 6 단계, 이미지 1/2 How to Replace Cracked Tile: 6 단계, 이미지 2/2
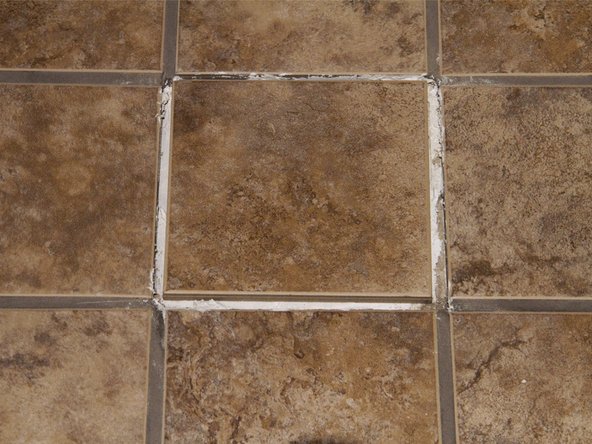
    • After the adhesive has dried, add water to a small amount of grout until it's the consistency of toothpaste.

    • Fill in the area around the new tile, making sure the new grout matches the height of the surrounding grout.

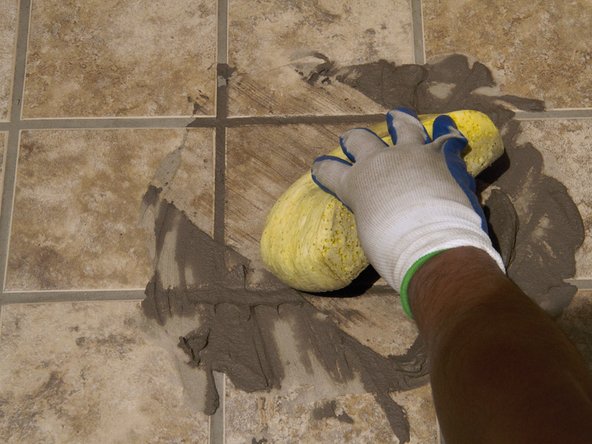
    • Use a moist sponge to wipe diagonally across the tile, cleaning off excess grout after each wipe.

  7. How to Replace Cracked Tile: 7 단계, 이미지 1/2 How to Replace Cracked Tile: 7 단계, 이미지 2/2
    • If any bubbles or gaps form in the grout while removing excess, add more grout and repeat the cleaning process.

    • Wait and allow grout to dry for several hours.

    • Keep foot traffic away from the new tile until the grout has had time to dry.

결론

Allow the grout to dry and then resume normal use.

다른 8명이 해당 안내서를 완성하였습니다.

Allie Wallace

회원 가입일: 02/25/16

342 평판

안내서 1개 작성함

Texas Tech, Team 26-7, Rauch Spring 2016 Texas Tech, Team 26-7, Rauch Spring 2016 회원

TTU-RAUCH-S16S26G7

3 회원들

안내서 2개 작성하였습니다

댓글 0개

댓글 쓰기

조회 통계:

24 시간 전: 5

7일 전: 23

30일 전: 60

전체 시간: 3,875