주요 콘텐츠로 건너뛰기

How to Replace a Bottom Bracket on a Bicycle

필요한 것

  1. How to Replace a Bottom Bracket on a Bicycle, Bottom Bracket: 1 단계, 이미지 1/1
    • Flip the bike so that it is resting on the handle bars and seat.

  2. How to Replace a Bottom Bracket on a Bicycle: 2 단계, 이미지 1/3 How to Replace a Bottom Bracket on a Bicycle: 2 단계, 이미지 2/3 How to Replace a Bottom Bracket on a Bicycle: 2 단계, 이미지 3/3
    • Take out the bolts on the base of the crank using an allen wrench that fits the bolt.

    • Do this to both sides. Set the bolts aside.

  3. How to Replace a Bottom Bracket on a Bicycle: 3 단계, 이미지 1/3 How to Replace a Bottom Bracket on a Bicycle: 3 단계, 이미지 2/3 How to Replace a Bottom Bracket on a Bicycle: 3 단계, 이미지 3/3
    • Screw the crank puller into the place where the bolts used to be.

    • Tighten the crank puller until it pulls the crank off the bike.

    • Repeat for the other side.

    • Set aside the cranks, keeping track of which side each one goes on.

  4. How to Replace a Bottom Bracket on a Bicycle: 4 단계, 이미지 1/2 How to Replace a Bottom Bracket on a Bicycle: 4 단계, 이미지 2/2
    • Go to the side that does not have the drive train. This side must be completed first!

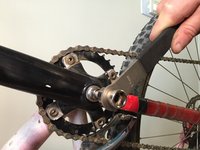
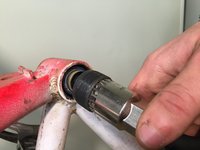
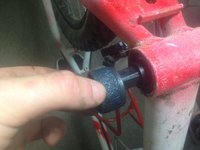
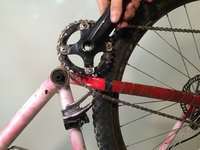
    • Insert the bottom bracket tool into the bottom bracket. Use the tool to turn the bottom bracket counter clock wise. It will be difficult to turn, but enough force will get it to turn.

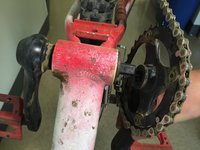
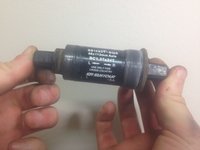
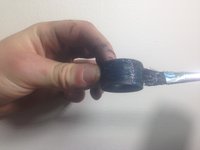
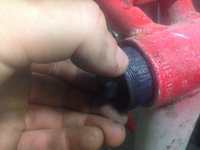
    • Completely remove the small side of the bottom bracket.

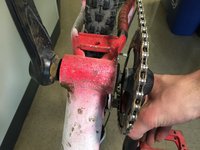
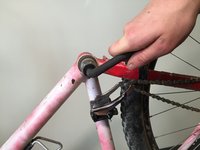
    • Repeat for the side with the drive train, except turn the bottom bracket tool clockwise this time.

  5. How to Replace a Bottom Bracket on a Bicycle: 5 단계, 이미지 1/1
    • Pull out the damaged bottom bracket from the drive train side.

    • Discard the broken bottom bracket.

  6. How to Replace a Bottom Bracket on a Bicycle: 6 단계, 이미지 1/2 How to Replace a Bottom Bracket on a Bicycle: 6 단계, 이미지 2/2
    • Get the new bottom bracket.

    • Notice the left (L) and right (R) markers on the part. This will help guide you when inserting the part.

    • Grease both parts of the threads using the paint brush. Apply enough grease so that the threads are evenly coated.

  7. How to Replace a Bottom Bracket on a Bicycle: 7 단계, 이미지 1/3 How to Replace a Bottom Bracket on a Bicycle: 7 단계, 이미지 2/3 How to Replace a Bottom Bracket on a Bicycle: 7 단계, 이미지 3/3
    • Insert the bottom bracket from the drive side of the bike with the larger side facing your hand.

    • Gently screw in the second set of threads on the other side with your fingers.

  8. How to Replace a Bottom Bracket on a Bicycle: 8 단계, 이미지 1/2 How to Replace a Bottom Bracket on a Bicycle: 8 단계, 이미지 2/2
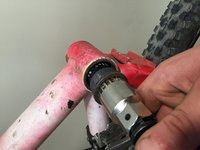
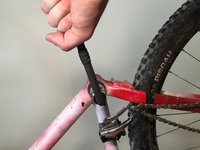
    • Use the bottom bracket tool to screw in the larger side (drive side) of the bottom bracket. Make sure to screw it in counter clock wise.

    • Screw the bottom bracket in all the way, but make sure not to tighten it down.

    • Repeat for the smaller side, except screw the bottom bracket in clock wise.

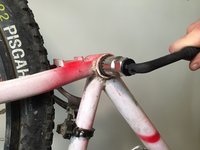
    • Tighten both sides down with the bottom bracket tool.

  9. How to Replace a Bottom Bracket on a Bicycle: 9 단계, 이미지 1/2 How to Replace a Bottom Bracket on a Bicycle: 9 단계, 이미지 2/2
    • Put the cranks back on their corresponding sides.

    • Make sure the chain goes back around the chain ring.

    • Put the bolts back through and tighten them into place with the allen wrench used earlier.

  10. How to Replace a Bottom Bracket on a Bicycle: 10 단계, 이미지 1/1
    • Rotate the pedals with your hands to check that the bottom bracket is rotating smoothly and not catching.

결론

Congratulations! You are finished and can ride your bike again!

다른 12명이 해당 안내서를 완성하였습니다.

Kaitlin Brenneman

회원 가입일: 09/29/15

601 평판

안내서 1개 작성함

Cal Poly, Team 10-6, Green Fall 2015 Cal Poly, Team 10-6, Green Fall 2015 회원

CPSU-GREEN-F15S10G6

3 회원들

안내서 3개 작성하였습니다

댓글 한 개

Some people just like the feel of holding the catalog, newspaper Free Catalog or magazine in their hands.

seo - 답글

댓글 쓰기

조회 통계:

24 시간 전: 8

7일 전: 26

30일 전: 109

전체 시간: 24,062