주요 콘텐츠로 건너뛰기

How to Structurally Repair the Wings of High Flying Foam Gliders

필요한 것

  1. How to Structurally Repair the Wings of High Flying Foam Gliders, How to Structurally Repair the Wings of High Flying Foam Gliders: 1 단계, 이미지 1/1
    • To begin this repair, carefully remove the damaged wing from the body of the plane.

    • Interior of the damaged wing

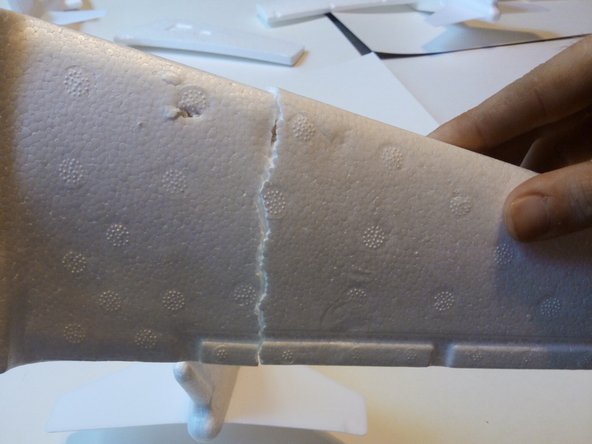
    • Exterior of the damaged wing

  2. How to Structurally Repair the Wings of High Flying Foam Gliders: 2 단계, 이미지 1/1
    • Use a ruler to make a mark on the wooden dowel at 6 inches.

  3. How to Structurally Repair the Wings of High Flying Foam Gliders: 3 단계, 이미지 1/1
    • After you have made your 6 inch mark, use a pair of wood snips to cut the dowel cleanly at 6 inches.

  4. How to Structurally Repair the Wings of High Flying Foam Gliders: 4 단계, 이미지 1/1
    • Repeat steps 2 and 3 to craft another 6 inch piece of wooden dowel.

  5. How to Structurally Repair the Wings of High Flying Foam Gliders: 5 단계, 이미지 1/1
    • Push the dowel piece about 2 to 3 inches into the inside the interior part of the damaged wing (see step 1).

    • When inserting the dowel do so with care. It helps prevent further cracking or splitting the foam wing.

  6. How to Structurally Repair the Wings of High Flying Foam Gliders: 6 단계, 이미지 1/1
    • Once the the dowel piece has been pushed into the interior part of the wing, make a mark where the wood and foam meet.

  7. How to Structurally Repair the Wings of High Flying Foam Gliders: 7 단계, 이미지 1/1
    • Measure and mark 1 inch away from the mark that was made in step 6.

  8. How to Structurally Repair the Wings of High Flying Foam Gliders: 8 단계, 이미지 1/1
    • Using wood snips again make a cut at the mark made in step 7.

  9. How to Structurally Repair the Wings of High Flying Foam Gliders: 9 단계, 이미지 1/3 How to Structurally Repair the Wings of High Flying Foam Gliders: 9 단계, 이미지 2/3 How to Structurally Repair the Wings of High Flying Foam Gliders: 9 단계, 이미지 3/3
    • Slide the exterior part of the wing towards the interior part of the wing and dowel, creating a hole in both parts of the wing.

  10. How to Structurally Repair the Wings of High Flying Foam Gliders: 10 단계, 이미지 1/1
    • Repeat steps 5 through 7 to insert the second dowel piece into the lower half of the wing.

  11. How to Structurally Repair the Wings of High Flying Foam Gliders: 11 단계, 이미지 1/1
    • Make the same cut that was made in step 8 to your second dowel.

    • First dowel

    • Second dowel

  12. How to Structurally Repair the Wings of High Flying Foam Gliders: 12 단계, 이미지 1/1
    • Follow the same method as step 9 and create a hole in the exterior section of the damaged wing.

  13. How to Structurally Repair the Wings of High Flying Foam Gliders: 13 단계, 이미지 1/3 How to Structurally Repair the Wings of High Flying Foam Gliders: 13 단계, 이미지 2/3 How to Structurally Repair the Wings of High Flying Foam Gliders: 13 단계, 이미지 3/3
    • Remove the dowels from the wing.

    • Apply a Gorilla White Gorilla Glue pen to the inside of the holes and the area in-between them.

  14. How to Structurally Repair the Wings of High Flying Foam Gliders: 14 단계, 이미지 1/2 How to Structurally Repair the Wings of High Flying Foam Gliders: 14 단계, 이미지 2/2
    • Insert the dowels back into the holes and bring both parts of the wing back together.

  15. How to Structurally Repair the Wings of High Flying Foam Gliders: 15 단계, 이미지 1/1
    • Set the wing outside and allow to air dry for 5 minutes.

  16. How to Structurally Repair the Wings of High Flying Foam Gliders: 16 단계, 이미지 1/1
    • Insert the wing back into the body of the plane.

  17. How to Structurally Repair the Wings of High Flying Foam Gliders: 17 단계, 이미지 1/1
    • Go outside and fly your plane to test your repair. If it flies, you have a structurally repaired wing!

결론

To reassemble your device, follow these instructions in reverse order.

Kenny Jones

회원 가입일: 05/30/17

101 평판

안내서 1개 작성함

댓글 0개

댓글 쓰기

조회 통계:

24 시간 전: 0

7일 전: 2

30일 전: 15

전체 시간: 1,263