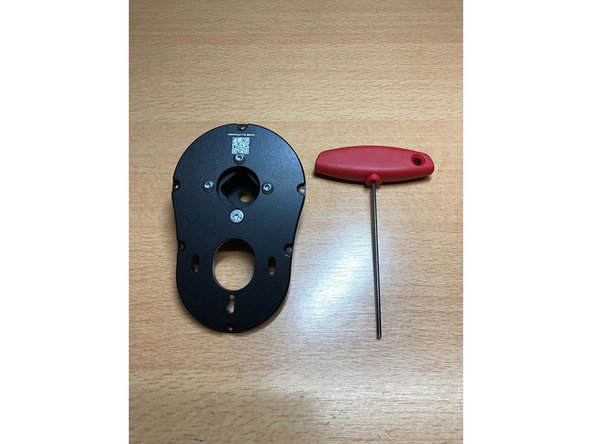
주요 콘텐츠로 건너뛰기

How to assembly FatBoy Mini Urethane Gear Drive

필요한 것

  1. How to assembly FatBoy Mini Urethane Gear Drive, Assembly Hanger Mounting hub: 1 단계, 이미지 1/1
    • Install 4 x M3 grub screws to the hanger hub.

    • Don't forget to use Loctite on grub screw thread

  2. How to assembly FatBoy Mini Urethane Gear Drive, Attach hanger hub to the baseplate: 2 단계, 이미지 1/2 How to assembly FatBoy Mini Urethane Gear Drive, Attach hanger hub to the baseplate: 2 단계, 이미지 2/2
    • Install 4 x M2.5 bolts through the baseplate to hanger hub.

    • Don't forget to use Loctite on threads

  3. How to assembly FatBoy Mini Urethane Gear Drive, Shorten motor shaft for motor gear mounting: 3 단계, 이미지 1/1
    • Cut the motor axle to the 18mm length from the baseplate.

    • Make sure to cover motor, motor wholes and whole motor with something to prevent metal dust getting into the motor. Magnets easily attracts metal particles inside and can cause shortening.

  4. How to assembly FatBoy Mini Urethane Gear Drive, Prepare motor for mounting to baseplate: 4 단계, 이미지 1/3 How to assembly FatBoy Mini Urethane Gear Drive, Prepare motor for mounting to baseplate: 4 단계, 이미지 2/3 How to assembly FatBoy Mini Urethane Gear Drive, Prepare motor for mounting to baseplate: 4 단계, 이미지 3/3
    • It is only useful when motor has open areas in the baseplate it minimize grease getting into the motor.

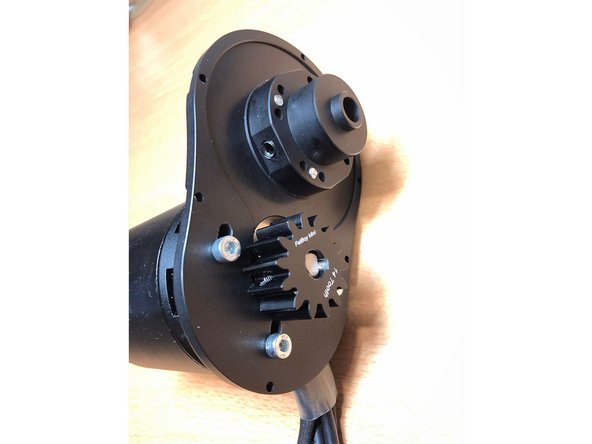
    • Attach stainless steel plate to the motor

    • Apply this step only if motor has keyway

    • Apply retaining compound like (Loctite 648) to keyway and install in the keyway

  5. How to assembly FatBoy Mini Urethane Gear Drive, Attach motor to baseplate: 5 단계, 이미지 1/1
    • Use 3xM3 bolts to attach motor to the baseplate

    • Don't forget to use Loctite on threads

  6. How to assembly FatBoy Mini Urethane Gear Drive, Attach motor gear to motor axle: 6 단계, 이미지 1/2 How to assembly FatBoy Mini Urethane Gear Drive, Attach motor gear to motor axle: 6 단계, 이미지 2/2
    • Tighten M2 grub screws on motor gear to secure motor gear on axle.

    • Don't forget to use Loctite on grub screw thread

  7. How to assembly FatBoy Mini Urethane Gear Drive, Mount assembly on hanger: 7 단계, 이미지 1/1
    • Mount assembly to hanger

    • Tighten grub screws to lock assembly in place.

    • Make sure the assemblies are parallel to the wheel.

  8. How to assembly FatBoy Mini Urethane Gear Drive, Mount wheel gear assembly to axle: 8 단계, 이미지 1/2 How to assembly FatBoy Mini Urethane Gear Drive, Mount wheel gear assembly to axle: 8 단계, 이미지 2/2
    • Add brass washer to axle before mounting wheel hub.

    • Attach wheel hub assembly to axle

    • Baseplate should be parallel to the wheel gear assembly otherwise wheel gear will mesh on angle and will cause negative effects.

  9. How to assembly FatBoy Mini Urethane Gear Drive, Add wheel spacer: 9 단계, 이미지 1/3 How to assembly FatBoy Mini Urethane Gear Drive, Add wheel spacer: 9 단계, 이미지 2/3 How to assembly FatBoy Mini Urethane Gear Drive, Add wheel spacer: 9 단계, 이미지 3/3
    • Add wheel spacer on axle which helps to keep tension between bearings

  10. How to assembly FatBoy Mini Urethane Gear Drive, Mesh Gears: 10 단계, 이미지 1/2 How to assembly FatBoy Mini Urethane Gear Drive, Mesh Gears: 10 단계, 이미지 2/2
    • Attach wheel to the wheel gear assembly

    • Motor gear and Wheel gear assembly should be always parallel to each in all wheel position. If gears not parallel and at angle it can cause negative effects and product more noise than necessary.

    • Loosen up motor bolts so that motor gear would press wheel gear.

    • Use sheet of paper to drive it through wheel gear and motor gear. Spin wheel to push paper through the gears

    • After meshing is good tighten motor bolts

  11. How to assembly FatBoy Mini Urethane Gear Drive, Prepare final assembly: 11 단계, 이미지 1/3 How to assembly FatBoy Mini Urethane Gear Drive, Prepare final assembly: 11 단계, 이미지 2/3 How to assembly FatBoy Mini Urethane Gear Drive, Prepare final assembly: 11 단계, 이미지 3/3
    • Remove wheel from wheel gear assembly

    • Put wheel gear into the cover and attach V-ring on the wheel gear.

    • Use some grease on v-ring to make it easier to slide on the cover.

    • It is good time to apply grease to the gears

    • Use 7xM2 bolts to attach motor cover to baseplate

  12. How to assembly FatBoy Mini Urethane Gear Drive, Mount cover to baseplate: 12 단계, 이미지 1/3 How to assembly FatBoy Mini Urethane Gear Drive, Mount cover to baseplate: 12 단계, 이미지 2/3 How to assembly FatBoy Mini Urethane Gear Drive, Mount cover to baseplate: 12 단계, 이미지 3/3
    • Use 6xM2.5 bolts to attach motor cover to baseplate

  13. How to assembly FatBoy Mini Urethane Gear Drive, Repeat same for other side: 13 단계, 이미지 1/1
    • Use same instructions for assembling another side

  14. How to assembly FatBoy Mini Urethane Gear Drive, Test spin: 14 단계, 이미지 1/1
    • Do a test spin on the bench to make sure everything is fine and sounds okay

    • On the first test ride start by slowly accelerating and slowly braking to make sure everything is working fine.

    • If there is some minor vibration happening at specific RPM it can be some misbalance in wheel/gears which should disappear after gears sit down in their place.

결론

To reassemble your device, follow these instructions in reverse order.

Aurimas Niekis

회원 가입일: 11/26/18

695 평판

안내서 3개 작성하였습니다

댓글 0개

댓글 쓰기

조회 통계:

24 시간 전: 0

7일 전: 0

30일 전: 0

전체 시간: 710