소개
If your pressure point is like a melted piece of butter and/or you can pull your lever behind your bar, you should bleed your brakes.
To avoid a mess and getting dirty wear gloves and an old shirt and keep a cleaning cloth on hand. Wear safety glasses to protect your eyes from dust and/or liquids.
필요한 것
-
-
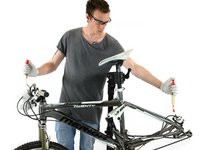
For easier handling, mount your bike into a bike stand.
-
Remove the rear wheel.
-
-
-
-
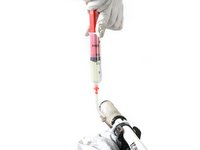
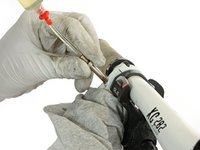
Fill up three quarters of the second bleeding syringe with DOT 5.1 brake fluid. Hold the syringe upright, cover the tip with a shop towel, and gently depress the plunger to purge any air bubbles from the syringe. Mount the second syringe to the braking lever.
-
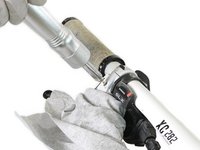
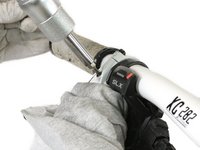
On the caliper side install the hose on the bleeding nipple, then open the nipple 1/2 turn.
-
-
-
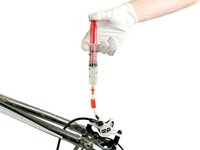
Push the syringe on the caliper. The piston of the lever mounted syringe will come out.
-
Repeat the process on the lever mounted syringe until there are no more air bubbles or there is no more dirty liquid coming out of the system.
-
If necessary, remove the syringes and re-fill them with fresh liquid and repeat the process.
-


To reassemble your bike, follow these instructions in reverse order.
다른 3명이 해당 안내서를 완성하였습니다.

팀

Tobias Isakeit - Repairability Engineer Tobias Isakeit - Repairability Engineer 회원
Business
1 회원
안내서 1,145개를 작성함
3가이드 댓글
Und warum tritt an bremszylinder an der Entlüftung schraube bremsflüssigkeit aus?
wir haben alles so gemacht, wie beschrieben, aber es tritt am entlüftungsnippel Öl aus und Luft????
Bei welchem Schritt tritt denn die Bremsflüssigkeit am Entlüftungsnippel aus?
Grundsätzlich ist es normal, dass sich während dem Entlüftungsprozess ein wenig Bremsflüssigkeit am Entlüftungsnippel sammeln kann.
Wichtig ist, dass die Entlüftungsschraube während dem Entlüften nur minimal geöffnet wird, sodass die Flüssigkeit hindurch in das System gedrückt werden kann.
Dennis -