필요한 것
-
-
Remove the following P5 pentalobe screws securing the lower case to the MacBook Pro:
-
Eight 3.0 mm
-
Two 2.3 mm
-
-
-
-
First, take off the rear panel on the Macbook Pro. You will need to use a screwdriver to remove Apple's pentalobe screws.
-
I used paper to make a layout of the screw locations just in case they were different screws; luckily they weren't.
-
-
-
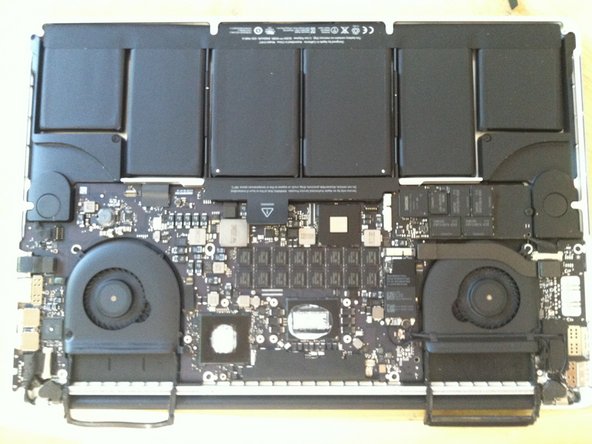
Once opened up, you'll see the battery sticker. Peel back the sticker and disconnect the battery cable. See the breakdown review for better pictures on removing the battery cable.
-
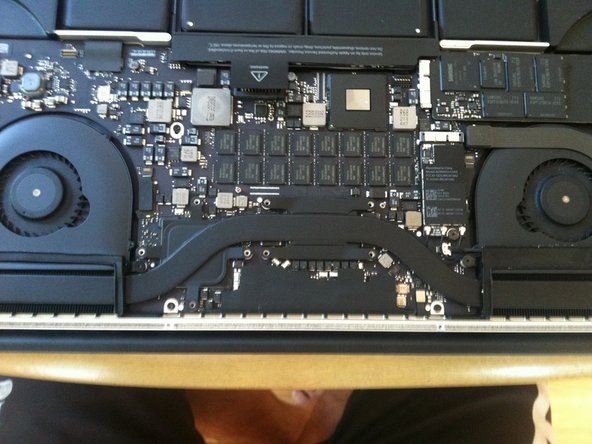
Luckily, to remove the heatsink, you don't have to remove anything else except for the battery cable and screws holding it down.
-
After the battery is disconnected, note the locations of the screws on the heatsink. there are 4 screws around both the CPU and GPU along with a screw at each end of the heatsink
-
The screw on one end of the heat sink has a rubber cap. Remove the cap to access the screw.
-
-
-
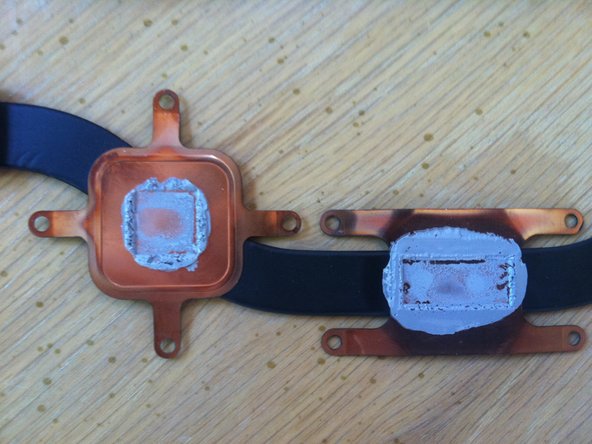
Remove this caked on thermal paste with the ArctiClean.
-
Do the same for the CPU and GPU.
-
Note: the black borders around the CPU and GPU seems to be unattached on one side. Don't worry, you didn't break it. Be sure to thoroughly remove the excess cleaning solution from under it by gently blowing it out if necessary. I'm sure it will evaporate in a timely manner otherwise.
-
-
-
Re-apply your quality thermal paste to the now shiny clean CPU and GPU. DO NOT use too much. We don't want to overdo it like Apple. A line the size of a grain of rice on both the CPU and GPU should be perfect. **You do not need to apply thermal paste on the heatsink as well - only on the CPU and GPU.
-
Re-assemble the MBP, making sure to spread out the paste evenly as you place and screw the heatsink back in. Also remember that the paste will spread as the unit heats up. DO NOT leave air pockets in the paste when covering the processor and GPU.
-
I got temps about 10-12C cooler during game usage. Have fun with your cooler MBPr.
-


To reassemble your device, follow these instructions in reverse order.
To reassemble your device, follow these instructions in reverse order.
다른 21명이 해당 안내서를 완성하였습니다.
댓글 11개
If I do this, do i loose the warranty?
There are a few inaccuracies on this guide. As with any unofficial guide, use your common sense.
First, on the bottom cover, the 2 screws closest to the rear and center are DIFFERENT from the other 8 (10 total on the bottom). The author of this guide said they're all the same which isn't quite true. Use the Pentalobe screwdriver for these screws and make sure you find the 2 that are DIFFERENT or the bottom cover won't close just right.
Second, the screws for the heat sink should only be accessed by a T5 torx, not the pentalobe. This was omitted from the required tools list.
Third, there is no battery sticker.
Fourth, check and re-check what you see vs an online guide, especially since nothing from iFixit is official Apple documentation.