주요 콘텐츠로 건너뛰기

How to Replace a Nequare Cordless Vacuum S182 Filter

  1. How to Replace a Nequare Cordless Vacuum S182 Filter, Filter: 1 단계, 이미지 1/2 How to Replace a Nequare Cordless Vacuum S182 Filter, Filter: 1 단계, 이미지 2/2
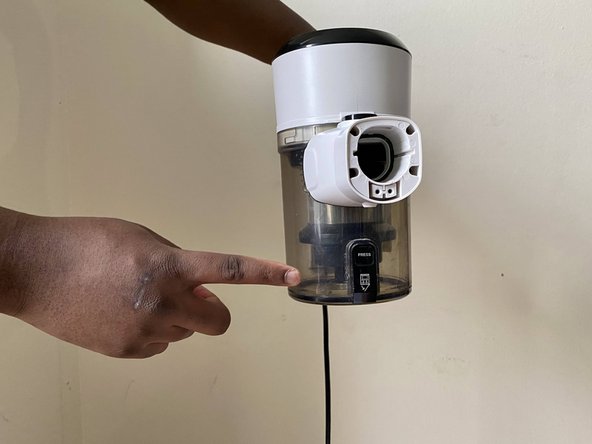
    • Locate the black button to release the white motor unit from the rest of the vacuum cleaner.

  2. How to Replace a Nequare Cordless Vacuum S182 Filter: 2 단계, 이미지 1/2 How to Replace a Nequare Cordless Vacuum S182 Filter: 2 단계, 이미지 2/2
    • Hold down the black button to remove the white motor unit above and gently pull the motor unit upwards.

  3. How to Replace a Nequare Cordless Vacuum S182 Filter: 3 단계, 이미지 1/2 How to Replace a Nequare Cordless Vacuum S182 Filter: 3 단계, 이미지 2/2
    • Press the release button at the side of the dust canister to dispose of the debris.

    • Be sure to hold the the canister over a garbage can to avoid a spill.

  4. How to Replace a Nequare Cordless Vacuum S182 Filter: 4 단계, 이미지 1/3 How to Replace a Nequare Cordless Vacuum S182 Filter: 4 단계, 이미지 2/3 How to Replace a Nequare Cordless Vacuum S182 Filter: 4 단계, 이미지 3/3
    • After emptying the debris, hold down the black button, then twist and pull the canister out.

  5. How to Replace a Nequare Cordless Vacuum S182 Filter: 5 단계, 이미지 1/2 How to Replace a Nequare Cordless Vacuum S182 Filter: 5 단계, 이미지 2/2
    • Take the filter out and dispose of it.

  6. How to Replace a Nequare Cordless Vacuum S182 Filter: 6 단계, 이미지 1/2 How to Replace a Nequare Cordless Vacuum S182 Filter: 6 단계, 이미지 2/2
    • Remove the black part by gently pushing from inside of the canister.

  7. How to Replace a Nequare Cordless Vacuum S182 Filter: 7 단계, 이미지 1/2 How to Replace a Nequare Cordless Vacuum S182 Filter: 7 단계, 이미지 2/2
    • Clean both the canister and the black part either by rinsing it out or using a wash cloth.

  8. How to Replace a Nequare Cordless Vacuum S182 Filter: 8 단계, 이미지 1/3 How to Replace a Nequare Cordless Vacuum S182 Filter: 8 단계, 이미지 2/3 How to Replace a Nequare Cordless Vacuum S182 Filter: 8 단계, 이미지 3/3
    • Put the black part back into the canister and put in the new filter.

결론

To reassemble your device, follow these instructions in reverse order.

다른 한 분이 해당 안내서를 완성하였습니다.

Oghenefejiro Egede

회원 가입일: 01/26/21

181 평판

안내서 1개 작성함

York University, Team S2-G27, O'Regan Winter 2021 York University, Team S2-G27, O'Regan Winter 2021 회원

YORK-O'REGAN-W21S2G27

2 회원들

안내서 2개 작성하였습니다

댓글 0개

댓글 쓰기

조회 통계:

24 시간 전: 0

7일 전: 8

30일 전: 32

전체 시간: 1,241