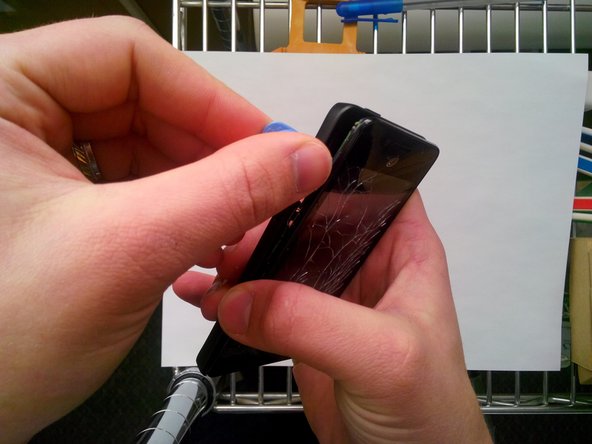
주요 콘텐츠로 건너뛰기

Huawei H881C Screen Replacement Replacement

필요한 것

  1. Huawei H881C Screen Replacement Replacement, Screen Replacement: 1 단계, 이미지 1/2 Huawei H881C Screen Replacement Replacement, Screen Replacement: 1 단계, 이미지 2/2
    • This is where we begin! At the bottom of the phone, pull the plastic back cover off.

    • Ahh, the battery. Simply pull the battery up and out of the housing.

  2. Huawei H881C Screen Replacement Replacement: 2 단계, 이미지 1/1
    • 8x T5 torx screws are what we need to remove next. There is one hiding below a black sticker. WARNING: This will void your warranty!

  3. Huawei H881C Screen Replacement Replacement: 3 단계, 이미지 1/3 Huawei H881C Screen Replacement Replacement: 3 단계, 이미지 2/3 Huawei H881C Screen Replacement Replacement: 3 단계, 이미지 3/3
    • Now that the screws are removed, grab a spudger tool or a thick guitar pick. Start at the volume rocker and work your way around the phone by carefully pulling back the frame.

  4. Huawei H881C Screen Replacement Replacement: 4 단계, 이미지 1/3 Huawei H881C Screen Replacement Replacement: 4 단계, 이미지 2/3 Huawei H881C Screen Replacement Replacement: 4 단계, 이미지 3/3
    • We're inside! At this step, there are 3 ribbon cables we need to disconnect to continue. Carefully pull these ribbon connections up.

  5. Huawei H881C Screen Replacement Replacement: 5 단계, 이미지 1/2 Huawei H881C Screen Replacement Replacement: 5 단계, 이미지 2/2
    • Under the screen/digitizer connection, there is one more cable. Carefully disconnect this one was well.

    • Remove the camera by pulling straight up.

  6. Huawei H881C Screen Replacement Replacement: 6 단계, 이미지 1/3 Huawei H881C Screen Replacement Replacement: 6 단계, 이미지 2/3 Huawei H881C Screen Replacement Replacement: 6 단계, 이미지 3/3
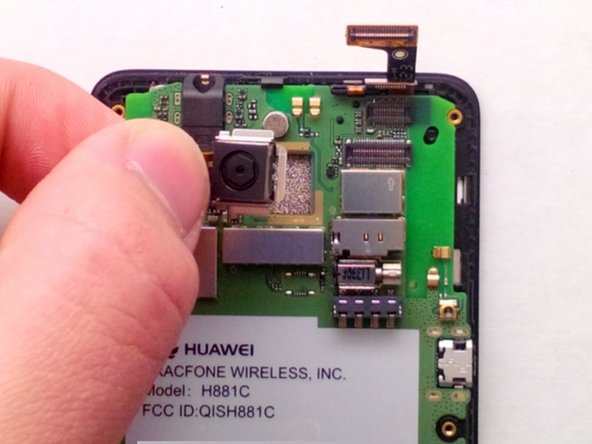
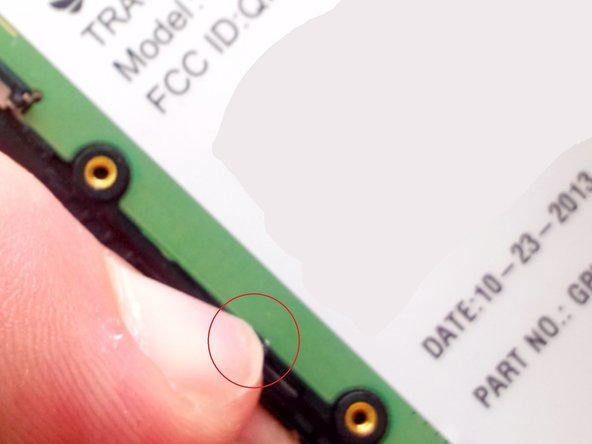
    • Don't mind the ugly "circles". What is circled is the clips you need to pull back to remove the motherboard from the frame.

    • Your fingernail will work perfect for this.

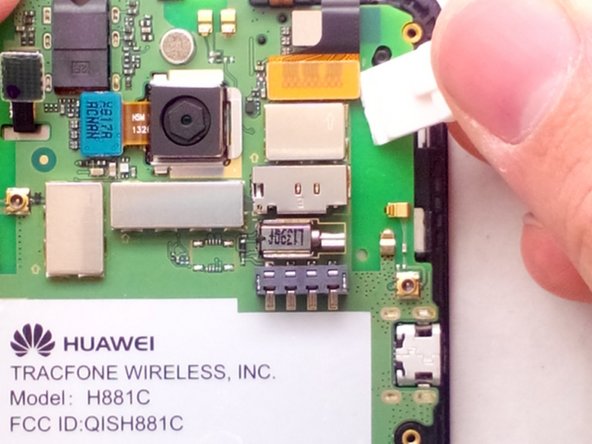
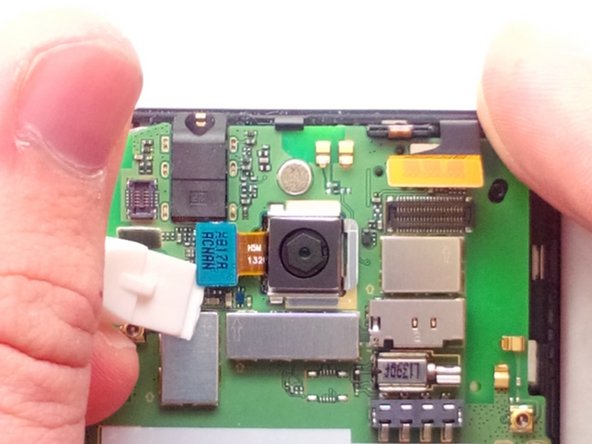
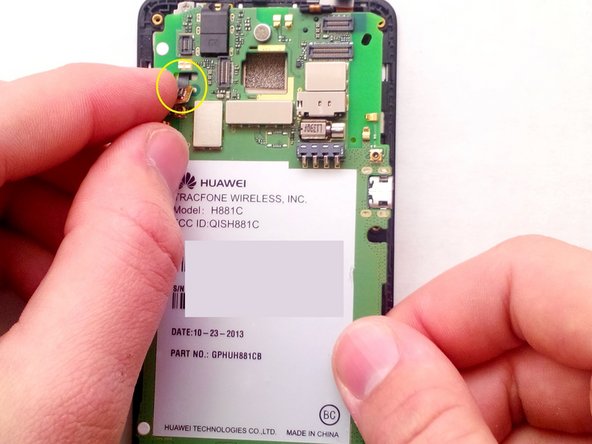
    • Let's remove the motherboard. With your right hand, slowly pull back the motherboard. With you left hand, guide the ribbon cable through the hole to avoid damaging it.

  7. Huawei H881C Screen Replacement Replacement: 7 단계, 이미지 1/3 Huawei H881C Screen Replacement Replacement: 7 단계, 이미지 2/3 Huawei H881C Screen Replacement Replacement: 7 단계, 이미지 3/3
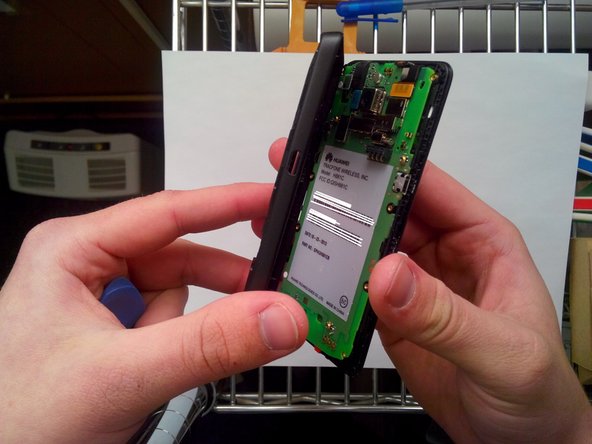
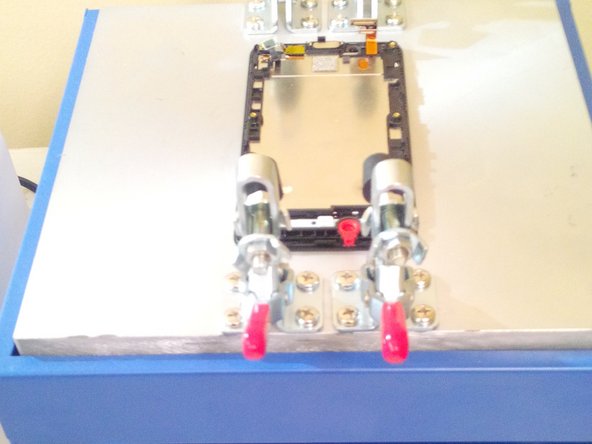
    • Now that the motherboard is out, this is the screen/digitizer/LCD assembly. From here, we need to only remove the digitizer.

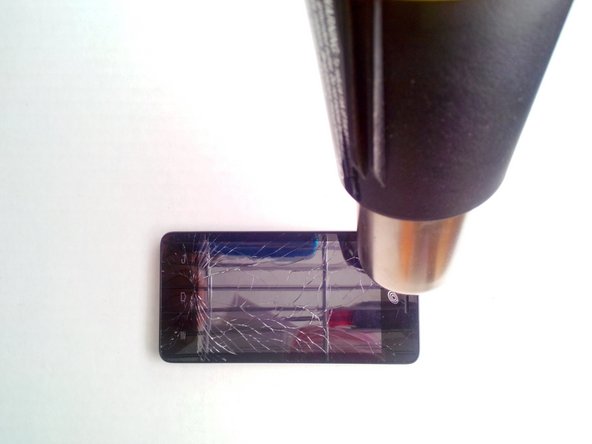
    • We recommend using a heat gun or a hot plate if you have one. If you don't have either, use a blow dryer!

    I bought a kit from ebay, and it came with a sticker type paper which im guessing is this adheasive but how do i put it on the frame?

    Sam - 답글

  8. Huawei H881C Screen Replacement Replacement: 8 단계, 이미지 1/3 Huawei H881C Screen Replacement Replacement: 8 단계, 이미지 2/3 Huawei H881C Screen Replacement Replacement: 8 단계, 이미지 3/3
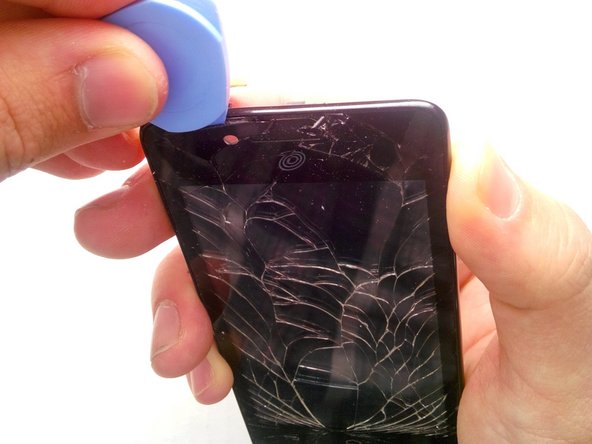
    • After its hot enough, use a thick guitar pick to peel back the broken screen from the frame. Be careful, it may be hot and glass could get everywhere.

    • Once you've removed the old screen/digitizer, apply new adhesive on the frame and put the new part on. Make sure that you get the old adhesive peeled off. We recommend heating the adhesive before applying the new screen for better bonding.

    • That's it! Now, follow the steps backwards to reassemble your device. Congrats! You've replaced the screen!

결론

To reassemble your device, follow these instructions in reverse order.

다른 10명이 해당 안내서를 완성하였습니다.

GadgetERService

회원 가입일: 11/22/13

1,650 평판

안내서 2개 작성하였습니다

Minnesota Repair Techs Minnesota Repair Techs 회원

Community

3 회원들

안내서 2개 작성하였습니다

댓글 2개

what do you use as an adheasive?

Randy Edwards - 답글

Randy, I'm extremely late responding to your post. I use what the industry calls, "red tape". This stuff is perfect for pretty much any electronic repair, especially iPads.

GadgetERService -

댓글 쓰기

조회 통계:

24 시간 전: 0

7일 전: 1

30일 전: 3

전체 시간: 19,512