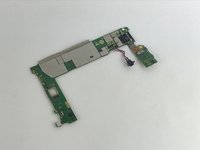
주요 콘텐츠로 건너뛰기

Huawei MediaPad S7-301u Motherboard Replacement

필요한 것

  1. Huawei MediaPad S7-301u Motherboard Replacement, Battery: 1 단계, 이미지 1/3 Huawei MediaPad S7-301u Motherboard Replacement, Battery: 1 단계, 이미지 2/3 Huawei MediaPad S7-301u Motherboard Replacement, Battery: 1 단계, 이미지 3/3
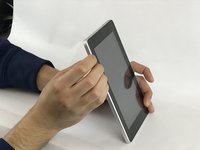
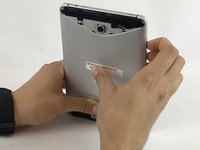
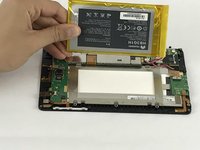
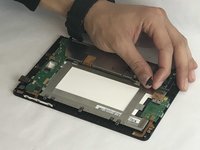
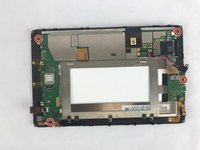
    • Use either your finger or a metal spudger to lift both the top and bottom black covers on the back of the tablet.

  2. Huawei MediaPad S7-301u Motherboard Replacement: 2 단계, 이미지 1/1
    • Use a Phillips (J000) bit screwdriver to remove the 6 (2 mm) screws located at the top and bottom of the tablet.

  3. Huawei MediaPad S7-301u Motherboard Replacement: 3 단계, 이미지 1/3 Huawei MediaPad S7-301u Motherboard Replacement: 3 단계, 이미지 2/3 Huawei MediaPad S7-301u Motherboard Replacement: 3 단계, 이미지 3/3
    • Hold the device by the silver edge and the front of the screen.

    • Then use your other hand to push gently on the center back of the tablet until the front screen is detached from the silver back cover.

    • Finally, separate the screen from the silver back casing.

  4. Huawei MediaPad S7-301u Motherboard Replacement: 4 단계, 이미지 1/3 Huawei MediaPad S7-301u Motherboard Replacement: 4 단계, 이미지 2/3 Huawei MediaPad S7-301u Motherboard Replacement: 4 단계, 이미지 3/3
    • Use the plastic spudger to remove the battery from the device that is glued on the metal frame.

    • Be careful not to puncture the battery while removing it.

    • Follow the wires to where they are connected on the motherboard and simply pull the white connector out of the socket.

    • When removing the battery, be careful with the connector that attaches the wires to the motherboard.

  5. Huawei MediaPad S7-301u Motherboard Replacement, Motherboard: 5 단계, 이미지 1/3 Huawei MediaPad S7-301u Motherboard Replacement, Motherboard: 5 단계, 이미지 2/3 Huawei MediaPad S7-301u Motherboard Replacement, Motherboard: 5 단계, 이미지 3/3
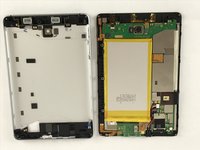
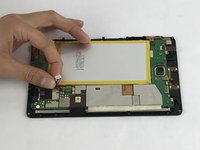
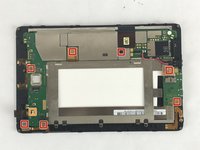
    • Once the battery is removed, the motherboard is ready to be removed.

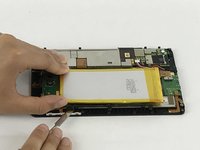
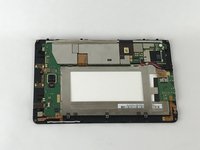
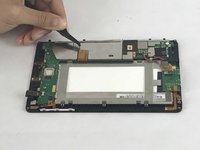
    • Remove the camera from the motherboard by disconnecting the clip next to it. You can use the precision tweezer here.

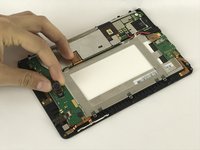
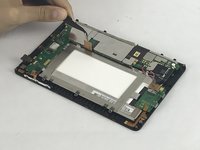
    • To remove the power port from the motherboard, unscrew the two 4mm screws with a T5 bit.

  6. Huawei MediaPad S7-301u Motherboard Replacement: 6 단계, 이미지 1/3 Huawei MediaPad S7-301u Motherboard Replacement: 6 단계, 이미지 2/3 Huawei MediaPad S7-301u Motherboard Replacement: 6 단계, 이미지 3/3
    • Use the precision tweezers to disconnect the 7 clips from the motherboard

    • Remove the headphone input cable from the motherboard by carefully pulling on the clip.

  7. Huawei MediaPad S7-301u Motherboard Replacement: 7 단계, 이미지 1/2 Huawei MediaPad S7-301u Motherboard Replacement: 7 단계, 이미지 2/2
    • Unscrew the 4 screws 4mm with T5 bit from the edges or the frame of the motherboard to remove it

    • Carefully remove the motherboard from the metal frame.

    • A long thin tape will be attached to the motherboard. This tape can be pulled along with the motherboard.

결론

To reassemble your device, follow these instructions in reverse order.

다른 2명이 해당 안내서를 완성하였습니다.

Miguel Lugo

회원 가입일: 09/26/17

586 평판

안내서 3개 작성하였습니다

USF Tampa, Team S11-G5, Passmore Fall 2017 USF Tampa, Team S11-G5, Passmore Fall 2017 회원

USFT-PASSMORE-F17S11G5

4 회원들

안내서 8개 작성하였습니다

댓글 0개

댓글 쓰기

조회 통계:

24 시간 전: 0

7일 전: 2

30일 전: 9

전체 시간: 1,131