주요 콘텐츠로 건너뛰기

Huntington GA41PS-RDS Acoustic Guitar String Replacement

필요한 것

  1. Huntington GA41PS-RDS Acoustic Guitar String Replacement, Guitar String: 1 단계, 이미지 1/1
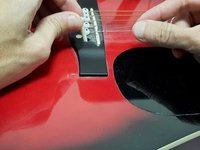
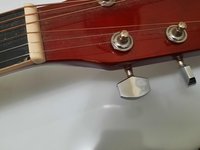
    • Place your guitar on a flat surface where you can easily identify the broken string.

  2. Huntington GA41PS-RDS Acoustic Guitar String Replacement: 2 단계, 이미지 1/3 Huntington GA41PS-RDS Acoustic Guitar String Replacement: 2 단계, 이미지 2/3 Huntington GA41PS-RDS Acoustic Guitar String Replacement: 2 단계, 이미지 3/3
    • Rotate the guitar pegs counter clockwise to loosen the broken string, until it can be removed by hand.

  3. Huntington GA41PS-RDS Acoustic Guitar String Replacement: 3 단계, 이미지 1/2 Huntington GA41PS-RDS Acoustic Guitar String Replacement: 3 단계, 이미지 2/2
    • Remove the bridge pin located at the lower end of the guitar.

    • Remove the other end of the broken string carefully. Keep the bridge pin removed.

  4. Huntington GA41PS-RDS Acoustic Guitar String Replacement: 4 단계, 이미지 1/3 Huntington GA41PS-RDS Acoustic Guitar String Replacement: 4 단계, 이미지 2/3 Huntington GA41PS-RDS Acoustic Guitar String Replacement: 4 단계, 이미지 3/3
    • Take the ball end of the new string and insert it into the bridge hole.

    • Insert the bridge pin back into the hole. Pull the rest of the string slightly to make sure it is tight.

    • Select the correct string to replace. I will be using the thinnest E string for this guide

  5. Huntington GA41PS-RDS Acoustic Guitar String Replacement: 5 단계, 이미지 1/3 Huntington GA41PS-RDS Acoustic Guitar String Replacement: 5 단계, 이미지 2/3 Huntington GA41PS-RDS Acoustic Guitar String Replacement: 5 단계, 이미지 3/3
    • Take the pointed end of the string and insert it into the string post.

    • Allow excess string to pass through. Tug on the string and make sure the string is parallel to the fret board.

    • Be careful. Do not hold too close to the sharp end of the string.

  6. Huntington GA41PS-RDS Acoustic Guitar String Replacement: 6 단계, 이미지 1/3 Huntington GA41PS-RDS Acoustic Guitar String Replacement: 6 단계, 이미지 2/3 Huntington GA41PS-RDS Acoustic Guitar String Replacement: 6 단계, 이미지 3/3
    • Make one loop around the string post with the excess string.

    • Rotate the tuning peg clockwise to tighten the string.

  7. Huntington GA41PS-RDS Acoustic Guitar String Replacement: 7 단계, 이미지 1/2 Huntington GA41PS-RDS Acoustic Guitar String Replacement: 7 단계, 이미지 2/2
    • Trim the excess string with the pliers. Make sure to cut close to the string post so it does not stick out.

결론

To reassemble your device, follow these instructions in reverse order.

Ruhail Khan

회원 가입일: 01/18/22

145 평판

안내서 1개 작성함

York University, Team R-15, Melo-Thaiss Winter 2022 York University, Team R-15, Melo-Thaiss Winter 2022 회원

YORK-MELO-THAISS-W22SRG15

1 회원

안내서 1개 작성하였습니다

댓글 0개

댓글 쓰기

조회 통계:

24 시간 전: 2

7일 전: 2

30일 전: 8

전체 시간: 349