주요 콘텐츠로 건너뛰기

Husqvarna Trimmer Gas Line Chamber Replacement

필요한 것

  1. Husqvarna Trimmer Gas Line Chamber Replacement, Air gas tank out: 1 단계, 이미지 1/2 Husqvarna Trimmer Gas Line Chamber Replacement, Air gas tank out: 1 단계, 이미지 2/2
    • Empty the gas tank and be sure to let air out for at least 48 hours.

    • Do not inhale, consume, and refill gas chamber.

  2. Husqvarna Trimmer Gas Line Chamber Replacement, Location of lines: 2 단계, 이미지 1/1
    • Locate the connection of the gas lines by the carburetor

  3. Husqvarna Trimmer Gas Line Chamber Replacement, Detachment: 3 단계, 이미지 1/1
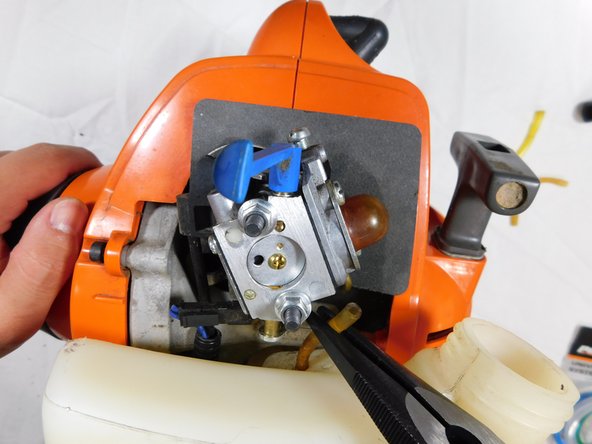
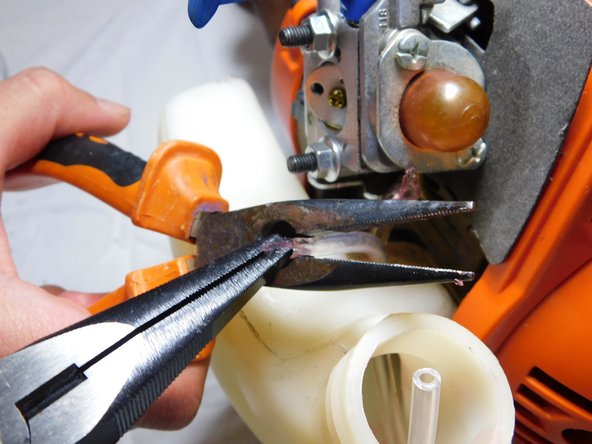
    • Detach the hoses of the gas line from the carburetor using the needle nose pliers.

    • Carefully remove line to avoid damage.

  4. Husqvarna Trimmer Gas Line Chamber Replacement, Pull line: 4 단계, 이미지 1/1
    • Use the needle nose pliers to pull the gas lines towards the top of the gas tank.

  5. Husqvarna Trimmer Gas Line Chamber Replacement, Remove line completely: 5 단계, 이미지 1/1
    • Pull the gas line until it is completely removed from the gas tank.

  6. Husqvarna Trimmer Gas Line Chamber Replacement, Use sharp edge scissors: 6 단계, 이미지 1/2 Husqvarna Trimmer Gas Line Chamber Replacement, Use sharp edge scissors: 6 단계, 이미지 2/2
    • For the second line, use a pair of sharp edge scissors to cut the remainder of the gas line from the gas tank.

    • Remove the remainder of the gas line using your hands and ensure it comes out completely leaving no gas line residue.

  7. Husqvarna Trimmer Gas Line Chamber Replacement, Connect filter attachment: 7 단계, 이미지 1/3 Husqvarna Trimmer Gas Line Chamber Replacement, Connect filter attachment: 7 단계, 이미지 2/3 Husqvarna Trimmer Gas Line Chamber Replacement, Connect filter attachment: 7 단계, 이미지 3/3
    • Gather filter attachment kit.

    • Gather the hoses that most closely resemble the size of the hose previously taken out.

    • Connect the filter attachment (provided in the kit) to the hose.

    • Kit contents may vary depending on brand.

  8. Husqvarna Trimmer Gas Line Chamber Replacement, Use metal wire: 8 단계, 이미지 1/1
    • Use the metal wire, provided in the kit to guide the new tube through the hole of the gas tank.

    • Ensure that the wire comes out of the inlet of the gas tank.

  9. Husqvarna Trimmer Gas Line Chamber Replacement, Hook the wire: 9 단계, 이미지 1/1
    • Hook the end of the gas line to the wire, so that the wire can be pulled and feed the wire through the hole.

    • To make it easy to hook the wire into the gas line, put a hole big enough for the wire to go into the line.

  10. Husqvarna Trimmer Gas Line Chamber Replacement, Lubricate: 10 단계, 이미지 1/1
    • Lubricate the hose using the two stroke engine oil.

    • Use the old access gas line if a dropper is difficult to locate.

  11. Husqvarna Trimmer Gas Line Chamber Replacement, Pull through the hole: 11 단계, 이미지 1/1
    • Keep pulling the gas line through the hole until the gas lines are long enough to meet the tubes on the carburetor.

    • The same rules apply when hooking up the second gas line. Just repeat steps 7 through 11.

    • Do this step with maximum precaution. The end of the gas line may tear and break.

  12. Husqvarna Trimmer Gas Line Chamber Replacement, Fit lines into carburetor: 12 단계, 이미지 1/3 Husqvarna Trimmer Gas Line Chamber Replacement, Fit lines into carburetor: 12 단계, 이미지 2/3 Husqvarna Trimmer Gas Line Chamber Replacement, Fit lines into carburetor: 12 단계, 이미지 3/3
    • Pull out the hoses until they fit the pipes in the carburetor. Using the needle nose pliers.

    • If necessary, you may need a second pair of pliers to help get the gas line through the hole.

결론

To reassemble your device, follow these instructions in reverse order.

다른 한 분이 해당 안내서를 완성하였습니다.

FinalProject

회원 가입일: 04/09/23

205 평판

안내서 1개 작성함

댓글 0개

댓글 쓰기

조회 통계:

24 시간 전: 1

7일 전: 3

30일 전: 10

전체 시간: 125