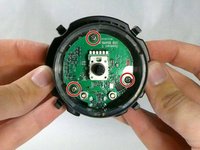
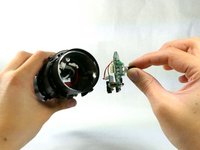
주요 콘텐츠로 건너뛰기

HyperX QuadCast S I/O Board Replacement

필요한 것

  1. HyperX QuadCast S I/O Board Replacement, Gain Control Knob: 1 단계, 이미지 1/3 HyperX QuadCast S I/O Board Replacement, Gain Control Knob: 1 단계, 이미지 2/3 HyperX QuadCast S I/O Board Replacement, Gain Control Knob: 1 단계, 이미지 3/3
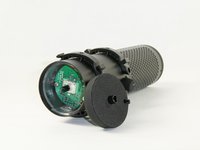
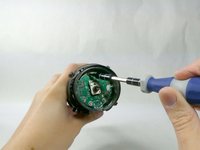
    • Set the microphone on a flat surface.

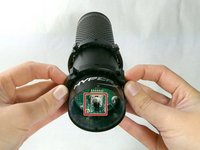
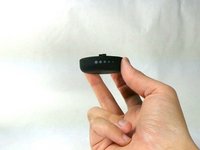
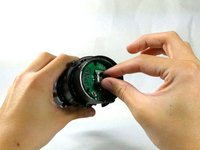
    • Pull each of the support bands upwards and off of the notches to release the microphone from its base.

    • There are four support bands in total, but it does not matter which band you choose to take off first.

  2. HyperX QuadCast S I/O Board Replacement: 2 단계, 이미지 1/3 HyperX QuadCast S I/O Board Replacement: 2 단계, 이미지 2/3 HyperX QuadCast S I/O Board Replacement: 2 단계, 이미지 3/3
    • Orientate the microphone with the gain control knob upwards.

    • Pull outwards from the microphone to release the gain control knob.

    • It will not take much force to release the knob from the microphone. Be aware that a small "pop" may be heard once the knob is unplugged.

  3. HyperX QuadCast S I/O Board Replacement: 3 단계, 이미지 1/3 HyperX QuadCast S I/O Board Replacement: 3 단계, 이미지 2/3 HyperX QuadCast S I/O Board Replacement: 3 단계, 이미지 3/3
    • Remove the gain control knob.

    • The gain control knob connects to the tiny black pin indicated. When reattaching the knob, make sure to properly align the hole to the shape of the pin.

  4. HyperX QuadCast S I/O Board Replacement, I/O Board: 4 단계, 이미지 1/2 HyperX QuadCast S I/O Board Replacement, I/O Board: 4 단계, 이미지 2/2
    • Remove the three 6 mm Phillips #0 screws.

  5. HyperX QuadCast S I/O Board Replacement: 5 단계, 이미지 1/3 HyperX QuadCast S I/O Board Replacement: 5 단계, 이미지 2/3 HyperX QuadCast S I/O Board Replacement: 5 단계, 이미지 3/3
    • Begin to pull out the I/O board.

    • Unplug any cables connected to the I/O board.

    • Some of the cables will need to be soldered back to any replacement I/O board to function properly.

  6. HyperX QuadCast S I/O Board Replacement: 6 단계, 이미지 1/2 HyperX QuadCast S I/O Board Replacement: 6 단계, 이미지 2/2
    • Finish pulling out the I/O board to remove it from the microphone.

결론

To reassemble your device, follow these instructions in reverse order.

Nathan Arruda

회원 가입일: 10/25/22

684 평판

안내서 6개 작성하였습니다

UMass Dartmouth, Team 4-1, Sinclaire Fall 2022 UMass Dartmouth, Team 4-1, Sinclaire Fall 2022 회원

UMASSD-SINCLAIRE-F22S4G1

5 회원들

안내서 9개 작성하였습니다

댓글 2개

I need a replacement io board, does ifixit or anyone else have them?

josh bryant - 답글

Unfortunately HyperX does not sell the replacement parts separately. Your best bet is to find a scrap quad-cast to pull parts from.

Nathan Arruda -

댓글 쓰기

조회 통계:

24 시간 전: 6

7일 전: 45

30일 전: 142

전체 시간: 1,723