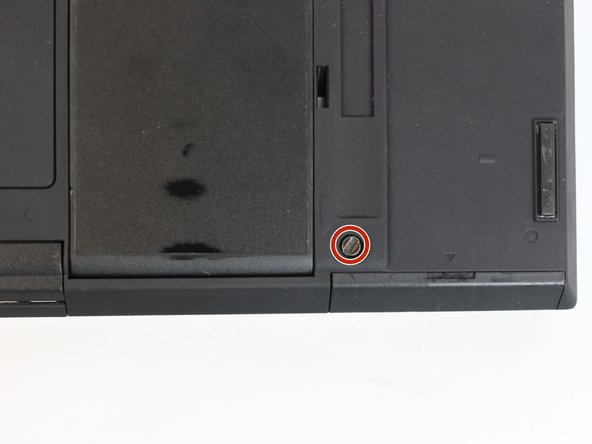
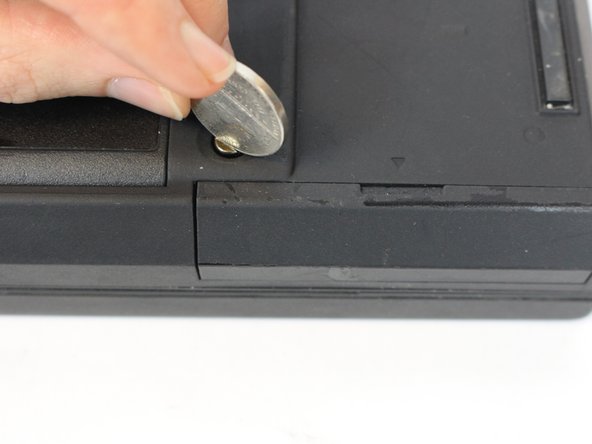
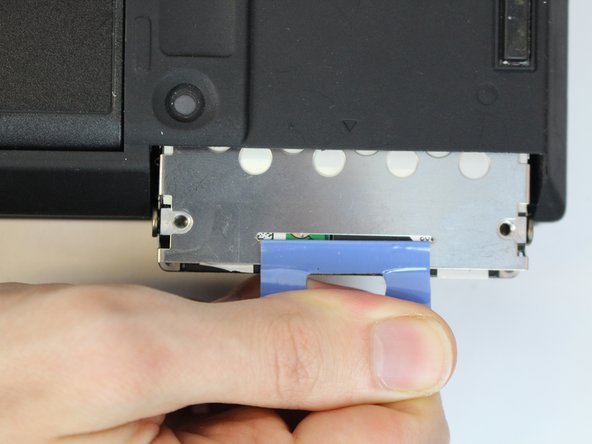
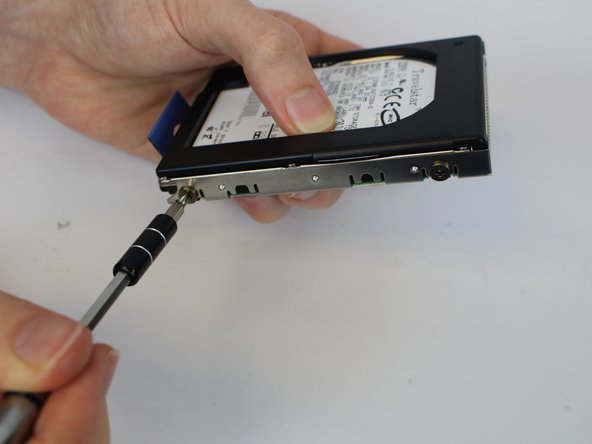
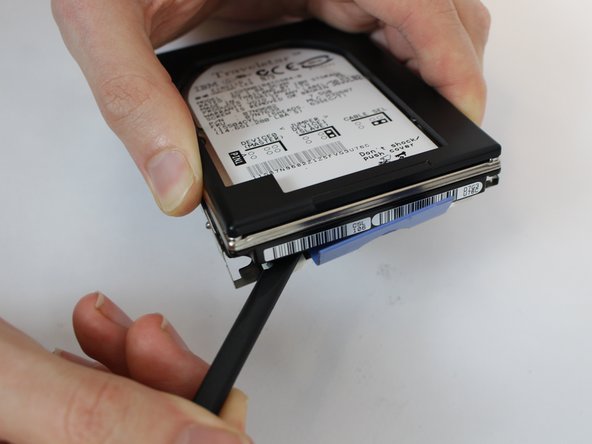
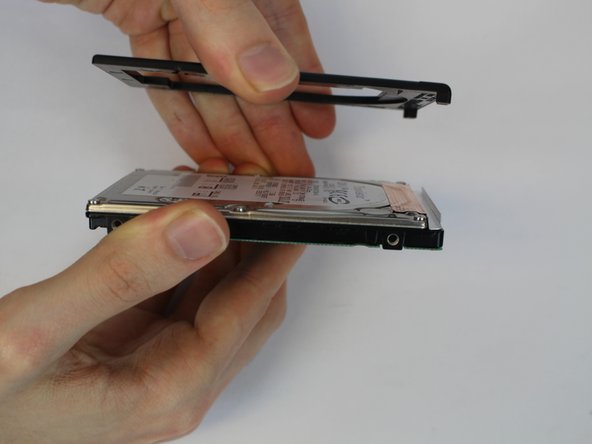
주요 콘텐츠로 건너뛰기

IBM ThinkPad 600E Hard Drive Disk Replacement

필요한 것

  1. IBM ThinkPad 600E Hard Drive Disk Replacement, Battery: 1 단계, 이미지 1/3 IBM ThinkPad 600E Hard Drive Disk Replacement, Battery: 1 단계, 이미지 2/3 IBM ThinkPad 600E Hard Drive Disk Replacement, Battery: 1 단계, 이미지 3/3
    • Flip the laptop over and find the battery latch.

  2. IBM ThinkPad 600E Hard Drive Disk Replacement: 2 단계, 이미지 1/1
    • Move the latch to the side with the unlocked symbol.

  3. IBM ThinkPad 600E Hard Drive Disk Replacement: 3 단계, 이미지 1/3 IBM ThinkPad 600E Hard Drive Disk Replacement: 3 단계, 이미지 2/3 IBM ThinkPad 600E Hard Drive Disk Replacement: 3 단계, 이미지 3/3
    • Pry the battery out using your fingers.

  4. IBM ThinkPad 600E Hard Drive Disk Replacement, Hard Drive Disk: 4 단계, 이미지 1/1
    • Put on the anti-static wrist trap and clip it to a large metal object.

    • If you do not have an anti-static wristband, make sure to touch a large metal object to ground yourself before beginning to work on your replacement. Occasionally touch the metal object.

  5. IBM ThinkPad 600E Hard Drive Disk Replacement: 5 단계, 이미지 1/3 IBM ThinkPad 600E Hard Drive Disk Replacement: 5 단계, 이미지 2/3 IBM ThinkPad 600E Hard Drive Disk Replacement: 5 단계, 이미지 3/3
    • Using a coin, remove the coin screw by turning counterclockwise.

    • It's best to use a thicker coin, such as a nickel.

  6. IBM ThinkPad 600E Hard Drive Disk Replacement: 6 단계, 이미지 1/1
    • Using a plastic spudger, pry off the plastic cover by pulling it out.

  7. IBM ThinkPad 600E Hard Drive Disk Replacement: 7 단계, 이미지 1/3 IBM ThinkPad 600E Hard Drive Disk Replacement: 7 단계, 이미지 2/3 IBM ThinkPad 600E Hard Drive Disk Replacement: 7 단계, 이미지 3/3
    • Utilizing your fingers, untuck the tab and pull to remove the hard drive.

  8. IBM ThinkPad 600E Hard Drive Disk Replacement: 8 단계, 이미지 1/3 IBM ThinkPad 600E Hard Drive Disk Replacement: 8 단계, 이미지 2/3 IBM ThinkPad 600E Hard Drive Disk Replacement: 8 단계, 이미지 3/3
    • Using a screwdriver, remove the screws by turning them counterclockwise to remove the bracket.

    • four 3mm PH0 screws

    • The metal bracket is still attached with a weak adhesive tape, gently pry it off with a spudger.

  9. IBM ThinkPad 600E Hard Drive Disk Replacement: 9 단계, 이미지 1/2 IBM ThinkPad 600E Hard Drive Disk Replacement: 9 단계, 이미지 2/2
    • The top plastic piece is adhered with a weak adhesive. Gently pry it off with a spudger.

결론

To reassemble your device, follow these instructions in reverse order.

다른 3명이 해당 안내서를 완성하였습니다.

Kevin Nguyen

회원 가입일: 10/04/16

722 평판

안내서 4개 작성하였습니다

USF Tampa, Team 1-4, Nance Fall 2016 USF Tampa, Team 1-4, Nance Fall 2016 회원

USFT-NANCE-F16S1G4

4 회원들

안내서 12개 작성하였습니다

댓글 0개

댓글 쓰기

조회 통계:

24 시간 전: 0

7일 전: 10

30일 전: 51

전체 시간: 3,146