소개
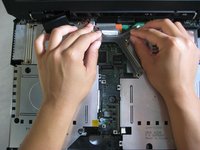
This guide details how to replace the IBM ThinkPad A30 fan. If the fan is faulty and needs to be replaced, then your computer may overheat and shut down without warning.
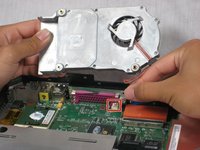
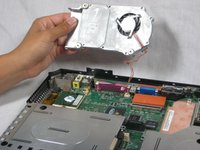
The CPU Fan is how the computer cools itself during usage. The fan dissipates the heat that the computer creates while in use. If the fan was to stop working, it would cause the processor to overheat and damage to the computer.
Before using this guide, you can first try running a 4k video on YouTube and if the fan starts running after you load the video, then the CPU fan is fine.
필요한 것
-
-
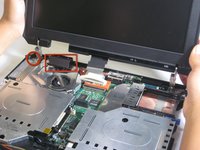
Slide the highlighted tab to the left.
-
With your finger on the tab, remove the battery by lifting it upwards away from the laptop.
-
-


To reassemble your device, follow these instructions in reverse order.
팀

Cal Poly, Team 4-44, Amido Fall 2010 Cal Poly, Team 4-44, Amido Fall 2010 회원
CPSU-AMIDO-F10S4G44
4 회원들
안내서 26개를 작성함