주요 콘텐츠로 건너뛰기

Imation Superdisk USB Drive Daughter Board Replacement

필요한 것

  1. Imation Superdisk USB Drive Daughter Board Replacement, Plastic Housing: 1 단계, 이미지 1/2 Imation Superdisk USB Drive Daughter Board Replacement, Plastic Housing: 1 단계, 이미지 2/2
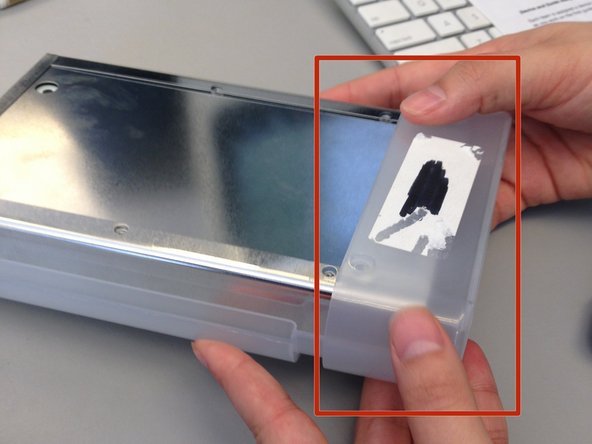
    • Flip the device over so the bottom is facing up.

    • You will know it is the bottom because there will be six silver screws visible.

  2. Imation Superdisk USB Drive Daughter Board Replacement: 2 단계, 이미지 1/2 Imation Superdisk USB Drive Daughter Board Replacement: 2 단계, 이미지 2/2
    • Remove the USB converter device by gently pulling it out.

    • Do not pull the converter device out by the cord.

  3. Imation Superdisk USB Drive Daughter Board Replacement: 3 단계, 이미지 1/2 Imation Superdisk USB Drive Daughter Board Replacement: 3 단계, 이미지 2/2
    • Remove the six silver screws using a small Phillips head screwdriver.

  4. Imation Superdisk USB Drive Daughter Board Replacement: 4 단계, 이미지 1/2 Imation Superdisk USB Drive Daughter Board Replacement: 4 단계, 이미지 2/2
    • Slide the bottom plastic panel of the shell down so it is free of the end cap and the top panel.

    • Lift panel free of device.

  5. Imation Superdisk USB Drive Daughter Board Replacement: 5 단계, 이미지 1/2 Imation Superdisk USB Drive Daughter Board Replacement: 5 단계, 이미지 2/2
    • Remove the plastic end cap by sliding it forward, freeing from the rest of the device.

    • You can identify the end cap by noting the label "SuperDisk Drive" above where you would insert a floppy disk.

  6. Imation Superdisk USB Drive Daughter Board Replacement: 6 단계, 이미지 1/2 Imation Superdisk USB Drive Daughter Board Replacement: 6 단계, 이미지 2/2
    • Slide the metal housing out of the plastic shell.

  7. Imation Superdisk USB Drive Daughter Board Replacement, Metal Casing: 7 단계, 이미지 1/2 Imation Superdisk USB Drive Daughter Board Replacement, Metal Casing: 7 단계, 이미지 2/2
    • Slide metal panel out of the metal casing.

  8. Imation Superdisk USB Drive Daughter Board Replacement: 8 단계, 이미지 1/2 Imation Superdisk USB Drive Daughter Board Replacement: 8 단계, 이미지 2/2
    • Slide disk drive out of metal casing.

  9. Imation Superdisk USB Drive Daughter Board Replacement, Daughter Board: 9 단계, 이미지 1/1
    • Flip the disk drive over so the the plug on the daughter board is visible.

  10. Imation Superdisk USB Drive Daughter Board Replacement: 10 단계, 이미지 1/2 Imation Superdisk USB Drive Daughter Board Replacement: 10 단계, 이미지 2/2
    • Using an iPod opener put pressure on the white plug and pull backwards until the daughter board unplugs from the main unit.

  11. Imation Superdisk USB Drive Daughter Board Replacement: 11 단계, 이미지 1/2 Imation Superdisk USB Drive Daughter Board Replacement: 11 단계, 이미지 2/2
    • Gently pull on the daughter board until it separates from the device.

결론

To reassemble your device, follow these instructions in reverse order.

다른 2명이 해당 안내서를 완성하였습니다.

Darlena

회원 가입일: 02/11/14

219 평판

안내서 3개 작성하였습니다

Ohio State, Team 1-2, Buehl Spring 2014 Ohio State, Team 1-2, Buehl Spring 2014 회원

OSU-BUEHL-S14S1G2

4 회원들

안내서 14개 작성하였습니다

댓글 0개

댓글 쓰기

조회 통계:

24 시간 전: 0

7일 전: 4

30일 전: 17

전체 시간: 935