주요 콘텐츠로 건너뛰기

InFocus IN3104 Lamp Replacement

필요한 것

  1. InFocus IN3104 Lamp Replacement, Top Cover: 1 단계, 이미지 1/3 InFocus IN3104 Lamp Replacement, Top Cover: 1 단계, 이미지 2/3 InFocus IN3104 Lamp Replacement, Top Cover: 1 단계, 이미지 3/3
    • Turn the projector so that the lens is facing you.

    • On the left side of the projector, there is a screw and a knob inside of the small grate.

    • Use a Phillips #1 screwdriver to remove the 6 mm screw that secures top cover.

    • Remove the service cover.

  2. InFocus IN3104 Lamp Replacement: 2 단계, 이미지 1/3 InFocus IN3104 Lamp Replacement: 2 단계, 이미지 2/3 InFocus IN3104 Lamp Replacement: 2 단계, 이미지 3/3
    • Use a Phillips #1 screwdriver to remove the seven 6 mm screws.

    • Use a Phillips #1 screwdriver to remove the two 5 mm screws.

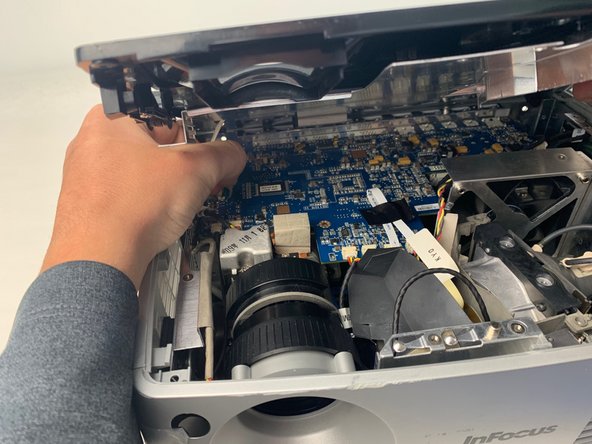
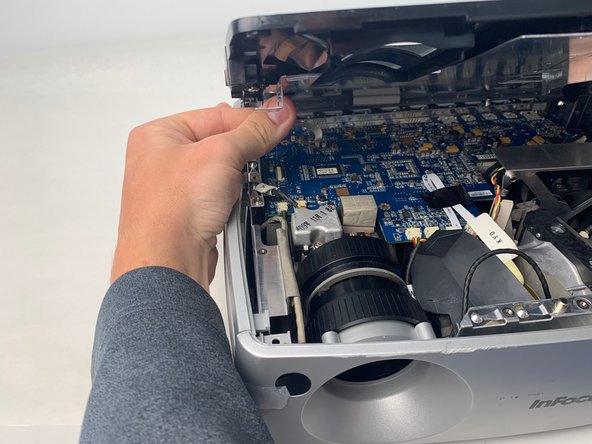
    • Remove the top cover.

    • Do not pull the cover too hard. It may damage the wire that is connected to the motherboard.

  3. InFocus IN3104 Lamp Replacement, InFocus IN3104 Metal Cover Disassembly: 3 단계, 이미지 1/2 InFocus IN3104 Lamp Replacement, InFocus IN3104 Metal Cover Disassembly: 3 단계, 이미지 2/2
    • Use a Phillips #1 screwdriver to remove the nine 6 mm screws.

    • Lift up the metal cover and set it aside to reveal the motherboard.

  4. InFocus IN3104 Lamp Replacement: 4 단계, 이미지 1/3 InFocus IN3104 Lamp Replacement: 4 단계, 이미지 2/3 InFocus IN3104 Lamp Replacement: 4 단계, 이미지 3/3
    • Carefully pry up the black plastic locking bar of the ZIF connector on the motherboard with a plastic spudger.

    • Pull out the blue-tipped, white ribbon cable from the connector.

    • Remove the metal cover.

  5. InFocus IN3104 Lamp Replacement, Lamp: 5 단계, 이미지 1/3 InFocus IN3104 Lamp Replacement, Lamp: 5 단계, 이미지 2/3 InFocus IN3104 Lamp Replacement, Lamp: 5 단계, 이미지 3/3
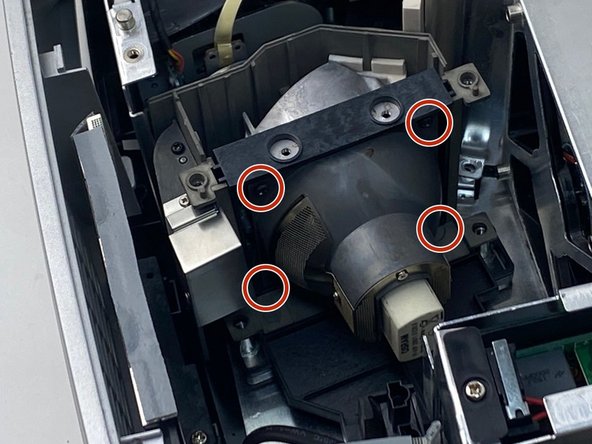
    • Use a Phillips #0 screwdriver to remove the four 6 mm screws.

    • You may need to use a flexible extender to help remove the screws easily.

  6. InFocus IN3104 Lamp Replacement: 6 단계, 이미지 1/3 InFocus IN3104 Lamp Replacement: 6 단계, 이미지 2/3 InFocus IN3104 Lamp Replacement: 6 단계, 이미지 3/3
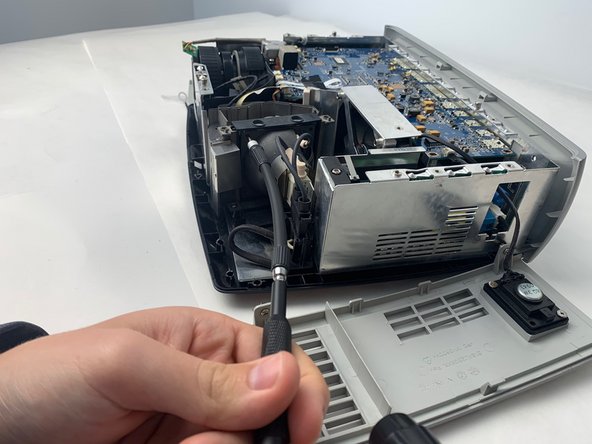
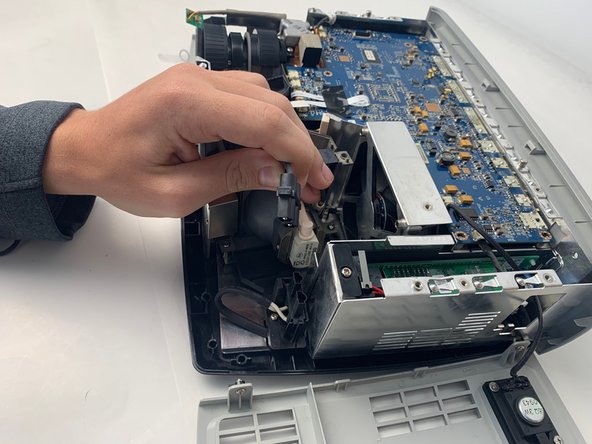
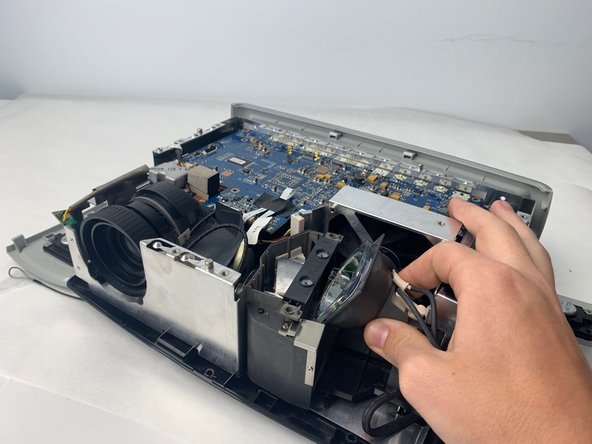
    • Remove the lamp power cable situated beside the lamp by pulling it straight out.

    • Remove the lamp by pulling it straight out from the device.

결론

To reassemble your device, follow these instructions in reverse order.

Tae Min Kim

회원 가입일: 01/24/20

409 평판

안내서 5개 작성하였습니다

댓글 0개

댓글 쓰기

조회 통계:

24 시간 전: 0

7일 전: 5

30일 전: 6

전체 시간: 598