주요 콘텐츠로 건너뛰기

InFocus Screenplay 4805 Lamp Replacement

필요한 것

  1. InFocus Screenplay 4805 Lamp Replacement, Remove the lamp door: 1 단계, 이미지 1/1
    • Front panel assembly removal is not required.

    • To remove the lamp door, use a metal or plastic pry tool and unclip the lamp door from the projector. Set this aside for reassembly.

  2. InFocus Screenplay 4805 Lamp Replacement, Disconnect the lamp: 2 단계, 이미지 1/3 InFocus Screenplay 4805 Lamp Replacement, Disconnect the lamp: 2 단계, 이미지 2/3 InFocus Screenplay 4805 Lamp Replacement, Disconnect the lamp: 2 단계, 이미지 3/3
    • If you are replacing the lamp as an assembly, follow this guide in reverse from this step.

    • Remove the two gold 1 cm screws and washers on the side of lens housing using the 4.0 flat-head bit

    • Pinch the white wire tab to gently detach the side that connects with the lens housing.

  3. InFocus Screenplay 4805 Lamp Replacement, **REBUILD ONLY** Housing disassembly: 3 단계, 이미지 1/2 InFocus Screenplay 4805 Lamp Replacement, **REBUILD ONLY** Housing disassembly: 3 단계, 이미지 2/2
    • This step is only required when rebuilding the old lamp with a replacement bulb.

    • Slide the bulb housing out of the projector.

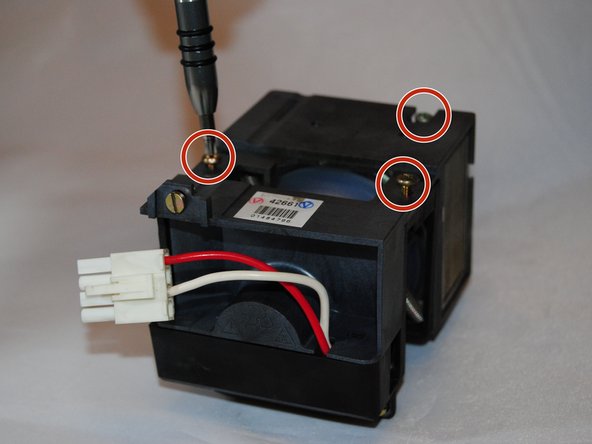
    • Use the Phillips #1 screwdriver to remove the three 1 cm gold screws on the bulb housing.

  4. InFocus Screenplay 4805 Lamp Replacement, **REBUILD ONLY** Housing disassembly: 4 단계, 이미지 1/2 InFocus Screenplay 4805 Lamp Replacement, **REBUILD ONLY** Housing disassembly: 4 단계, 이미지 2/2
    • This step is only required when rebuilding the old lamp with a replacement bulb.

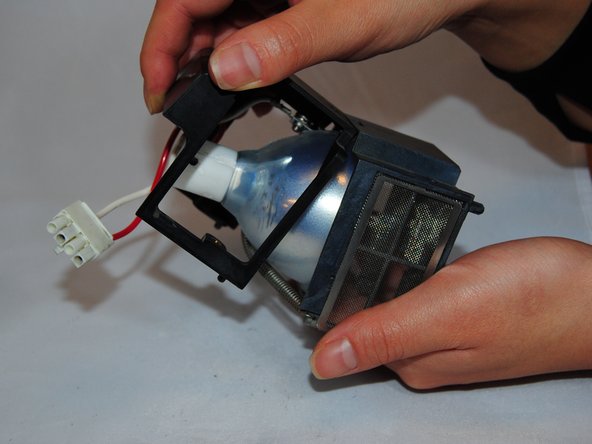
    • Gently pull the top of the bulb housing off.

    • Lift up the middle of the bulb housing to remove it.

    • Be careful of loose parts, such as the metal housing and the glass focusing lens.

  5. InFocus Screenplay 4805 Lamp Replacement, **REBUILD ONLY** Housing disassembly: 5 단계, 이미지 1/3 InFocus Screenplay 4805 Lamp Replacement, **REBUILD ONLY** Housing disassembly: 5 단계, 이미지 2/3 InFocus Screenplay 4805 Lamp Replacement, **REBUILD ONLY** Housing disassembly: 5 단계, 이미지 3/3
    • This step is only required when rebuilding the old lamp with a replacement bulb.

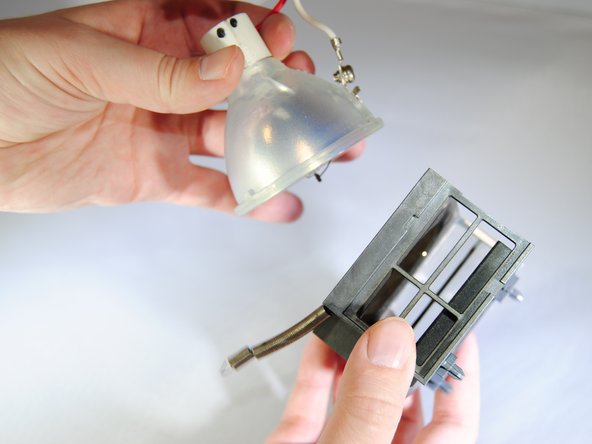
    • Unhook the spring from the bulb housing.

    • Gently remove the bulb.

결론

To reassemble the device, follow these instructions in reverse order.

다른 한 분이 해당 안내서를 완성하였습니다.

Marilyn Urness

회원 가입일: 09/28/17

671 평판

안내서 6개 작성하였습니다

댓글 3개

To remove and later disassemble the lamp, you don’t need to remove whole cover. Just open the lamp bay door and follow the steps starting  from 6!

madyogi - 답글

madyogi, exactly. You are absolutely right!

ilya.zhizhin - 답글

I was able to fix an old projector I got for $40. Thank you so much for the tutorial.

Madelyn Tapia - 답글

댓글 쓰기

조회 통계:

24 시간 전: 0

7일 전: 1

30일 전: 13

전체 시간: 1,451