주요 콘텐츠로 건너뛰기

Infant Optics DXR-8 Power Button Replacement

필요한 것

  1. Infant Optics DXR-8 Power Button Replacement, Internal Monitor Components: 1 단계, 이미지 1/3 Infant Optics DXR-8 Power Button Replacement, Internal Monitor Components: 1 단계, 이미지 2/3 Infant Optics DXR-8 Power Button Replacement, Internal Monitor Components: 1 단계, 이미지 3/3
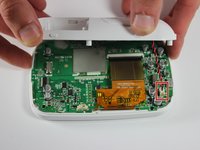
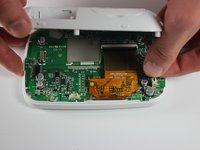
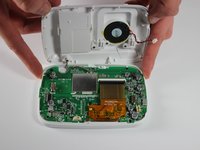
    • Using the plastic opening tool, remove screen protector from front of monitor.

  2. Infant Optics DXR-8 Power Button Replacement: 2 단계, 이미지 1/3 Infant Optics DXR-8 Power Button Replacement: 2 단계, 이미지 2/3 Infant Optics DXR-8 Power Button Replacement: 2 단계, 이미지 3/3
    • Remove the six 4mm screws using a Phillips #00 screwdriver.

    • Remove the screen, exposing the circuit board.

    • Turn device over to expose rear circuit board.

  3. Infant Optics DXR-8 Power Button Replacement: 3 단계, 이미지 1/3 Infant Optics DXR-8 Power Button Replacement: 3 단계, 이미지 2/3 Infant Optics DXR-8 Power Button Replacement: 3 단계, 이미지 3/3
    • Disconnect speaker from monitor for ease of access by unplugging wire.

  4. Infant Optics DXR-8 Power Button Replacement, Power Button: 4 단계, 이미지 1/1
    • The power button is located at the top of the device.

  5. Infant Optics DXR-8 Power Button Replacement: 5 단계, 이미지 1/1
    • Remove the button by picking it up out of the hole it is connected to.

  6. Infant Optics DXR-8 Power Button Replacement: 6 단계, 이미지 1/1
    • Insert a new button by placing the small end in the hole to connect the button to the device.

결론

To reassemble your device, follow the instructions in reverse order.

다른 2명이 해당 안내서를 완성하였습니다.

댓글 2개

Where did you get the replacement switch?

Dave Peterson - 답글

Where can you purchase a new power switch on the circuit board for replacement?

Derrick Silvestri - 답글

댓글 쓰기

조회 통계:

24 시간 전: 0

7일 전: 3

30일 전: 22

전체 시간: 4,827