주요 콘텐츠로 건너뛰기

Insignia Flex Elite 7.85 Front Camera Replacement

필요한 것

  1. Insignia Flex Elite 7.85 Front Camera  Replacement, Front Camera: 1 단계, 이미지 1/1
    • Make sure the device is turned off before taking it apart to avoid any injuries

    • Use a plastic opening tool to remove the metal backing of the tablet

    • Insert the plastic opening tool between the screen and metal backing. use a prying motion to lift the front case from the the metal panel.

    • move the tool around the perimeter of the device until the screen separates.

    • the volume and the power button will become free from device when the screen and metal backing are separated. These small pieces are easy to lose, be careful. They're easy to put back into place when reassembling the tablet.

  2. Insignia Flex Elite 7.85 Front Camera  Replacement: 2 단계, 이미지 1/2 Insignia Flex Elite 7.85 Front Camera  Replacement: 2 단계, 이미지 2/2
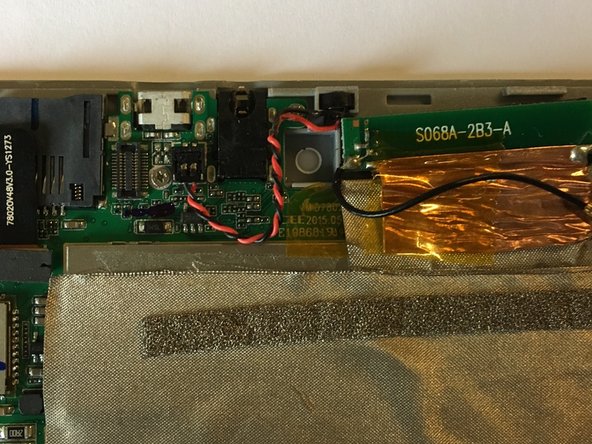
    • once the tablet is open, locate the camera

    • The camera is fitted in a small square compartment

    • Use a plastic opening tool to pry slightly on the back of the camera making it easier to come out of its compartment

    • When removing the camera, ensure that the red and black wire on top of it is not disconnected from the motherboard.

  3. Insignia Flex Elite 7.85 Front Camera  Replacement: 3 단계, 이미지 1/1
    • Using a plastic opening tool, pry the camera from the compartment.

    • Pry around the perimeter of the camera until it comes out free.

    • Be careful, make sure the motherboard does not break.

  4. Insignia Flex Elite 7.85 Front Camera  Replacement: 4 단계, 이미지 1/1
    • The front camera should be out of its compartment by now. Reinstall the new camera.

결론

To reassemble your device, follow these instructions in reverse order.

JOSI ZULU

회원 가입일: 03/20/17

101 평판

안내서 1개 작성함

UMass Dartmouth, Team S9-G2, Martin Spring 2017 UMass Dartmouth, Team S9-G2, Martin Spring 2017 회원

UMASSD-MARTIN-S17S9G2

3 회원들

안내서 10개 작성하였습니다

댓글 0개

댓글 쓰기

조회 통계:

24 시간 전: 0

7일 전: 1

30일 전: 3

전체 시간: 117