주요 콘텐츠로 건너뛰기

Insignia NS-B4111 Motherboard Replacement

필요한 것

  1. Insignia NS-B4111 Motherboard Replacement, Battery: 1 단계, 이미지 1/2 Insignia NS-B4111 Motherboard Replacement, Battery: 1 단계, 이미지 2/2
    • Unplug and remove the power cord. Turn the boombox upside down.

    • Grip the sides of the case and use your thumbs to pop open the battery cover.

  2. Insignia NS-B4111 Motherboard Replacement: 2 단계, 이미지 1/2 Insignia NS-B4111 Motherboard Replacement: 2 단계, 이미지 2/2
    • Pry out the batteries with your fingers.

  3. Insignia NS-B4111 Motherboard Replacement, Casing: 3 단계, 이미지 1/1
    • Turn the boombox upside down again. With the Phillips PH1 or the Flathead #3 screwdriver, remove the three 14mm black screws.

    • Remove the four 18mm chrome screws with the Phillips PH1 screwdriver.

  4. Insignia NS-B4111 Motherboard Replacement: 4 단계, 이미지 1/2 Insignia NS-B4111 Motherboard Replacement: 4 단계, 이미지 2/2
    • Gently remove the bottom half of the casing from the top half of the casing.

    • The antenna base is connected to the motherboard by a red wire. This wire will prevent the two halves from separating completely.

  5. Insignia NS-B4111 Motherboard Replacement, Antenna Base: 5 단계, 이미지 1/2 Insignia NS-B4111 Motherboard Replacement, Antenna Base: 5 단계, 이미지 2/2
    • Remove the 10mm chrome screw from the antenna base with the Phillips PH1 screwdriver. Remove the antenna base from the casing.

    • This red wire will now be loose and you can move it out of the antenna base slot.

  6. Insignia NS-B4111 Motherboard Replacement, Motherboard: 6 단계, 이미지 1/1
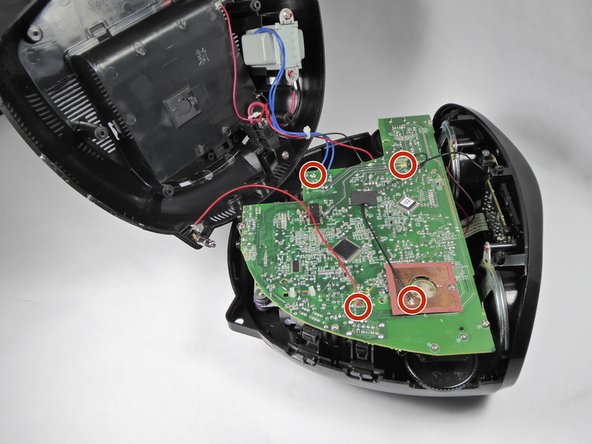
    • Unscrew the four 12.5mm screws with the Phillips PH1 Screwdriver.

    • Unscrew the one 10mm long screw with the Phillips PH1 Screwdriver.

  7. Insignia NS-B4111 Motherboard Replacement: 7 단계, 이미지 1/1
    • Orient the device so that the back is facing you.

    • Unplug the six pin male/female header from its socket on the motherboard. The wires on the header are these colors: burgundy, red, orange, yellow, green, and blue.

    • Use a tweezer if you find it hard to pull the header out with your fingers.

    • Gently pull out the ribbon cable from its socket on the motherboard.

    • Pay attention to the orientation of the header and the ribbon cable. Replacing the wires the wrong way may short circuit the board.

  8. Insignia NS-B4111 Motherboard Replacement: 8 단계, 이미지 1/1
    • Rotate the device so that the front is facing you.

    • Unplug the four pin header from its socket on the motherboard. The wires on the header are these colors: brown, red, orange, and yellow.

    • Use a tweezer if you find it hard to pull this header out with your fingers.

    • Gently pull out the ribbon cable from its socket.

    • Pay attention to the orientation of the header and the ribbon cable. Replacing the base the wrong way may short circuit the board.

  9. Insignia NS-B4111 Motherboard Replacement: 9 단계, 이미지 1/1
    • Pull out the two pin header from its socket on the motherboard. The wires on this header are black and white.

    • Use a tweezer if you find it hard to pull this cable out with your fingers.

  10. Insignia NS-B4111 Motherboard Replacement, Motherboard: 10 단계, 이미지 1/1
    • Scrape off the glue from the black wire with the blue plastic opening tool.

  11. Insignia NS-B4111 Motherboard Replacement: 11 단계, 이미지 1/2 Insignia NS-B4111 Motherboard Replacement: 11 단계, 이미지 2/2
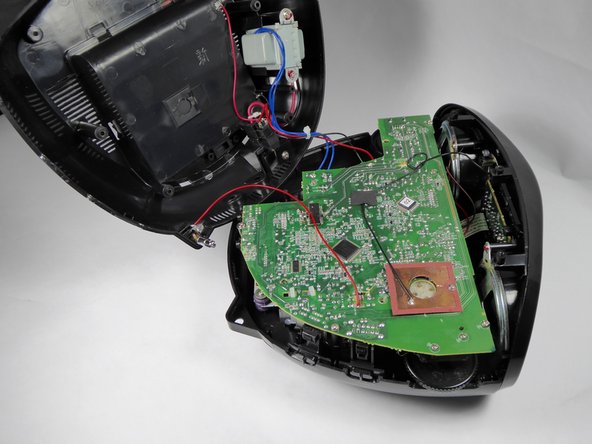
    • Desolder the one black, one red, and two blue wires. If you need help soldering, see this guide.

결론

To reassemble your device, follow these instructions in reverse order.

Kristin Yoshioka

회원 가입일: 09/21/16

984 평판

안내서 9개 작성하였습니다

UC Davis, Team 1-5, Oliver Fall 2016 UC Davis, Team 1-5, Oliver Fall 2016 회원

UCD-OLIVER-F16S1G5

5 회원들

안내서 11개 작성하였습니다

댓글 0개

댓글 쓰기

조회 통계:

24 시간 전: 0

7일 전: 0

30일 전: 0

전체 시간: 1,046