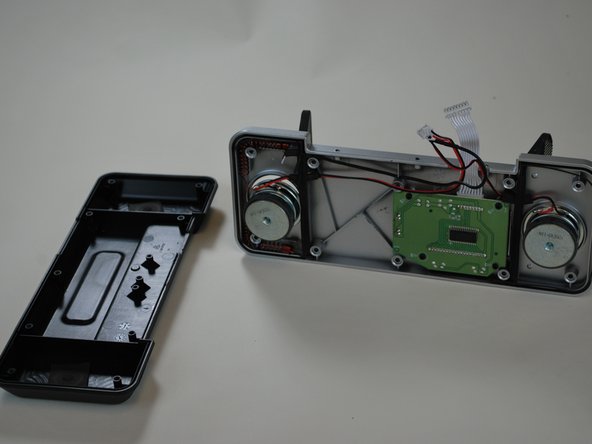
주요 콘텐츠로 건너뛰기

Insignia NS-CLIP02 Digital Display Replacement

필요한 것

  1. Insignia NS-CLIP02 Digital Display Replacement, Motherboard: 1 단계, 이미지 1/1
    • Set the clock radio on the work space so the bottom of the device is showing.

  2. Insignia NS-CLIP02 Digital Display Replacement: 2 단계, 이미지 1/2 Insignia NS-CLIP02 Digital Display Replacement: 2 단계, 이미지 2/2
    • Use a metal spudger to peel back the adhesive sticker on the bottom of the clock.

    • You should see a single screw beneath the sticker.

  3. Insignia NS-CLIP02 Digital Display Replacement: 3 단계, 이미지 1/2 Insignia NS-CLIP02 Digital Display Replacement: 3 단계, 이미지 2/2
    • Using a plastic opening tool, peel off the adhesive gel stoppers.

  4. Insignia NS-CLIP02 Digital Display Replacement: 4 단계, 이미지 1/1
    • Use a Phillips screwdriver to remove the six 11 mm screws on the bottom of the device.

  5. Insignia NS-CLIP02 Digital Display Replacement: 5 단계, 이미지 1/1
    • Remove the bottom cover from the device to reveal the motherboard.

  6. Insignia NS-CLIP02 Digital Display Replacement: 6 단계, 이미지 1/1
    • Use a Phillips screwdriver to remove the 9.5 mm screw located near the center of the motherboard.

  7. Insignia NS-CLIP02 Digital Display Replacement: 7 단계, 이미지 1/1
    • Lift the motherboard away from the device.

  8. Insignia NS-CLIP02 Digital Display Replacement: 8 단계, 이미지 1/3 Insignia NS-CLIP02 Digital Display Replacement: 8 단계, 이미지 2/3 Insignia NS-CLIP02 Digital Display Replacement: 8 단계, 이미지 3/3
    • Disconnect the four cables connecting the motherboard to the device.

  9. Insignia NS-CLIP02 Digital Display Replacement, Digital Display: 9 단계, 이미지 1/1
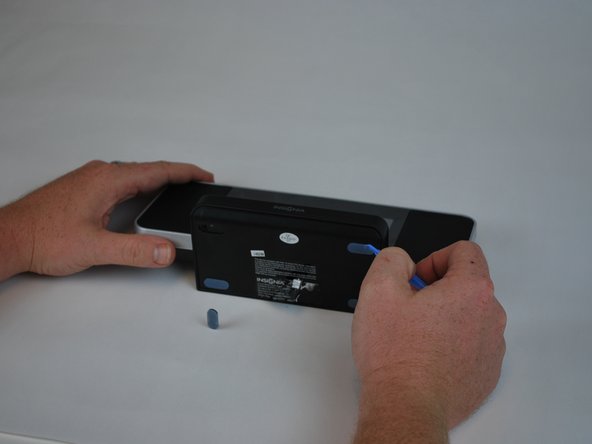
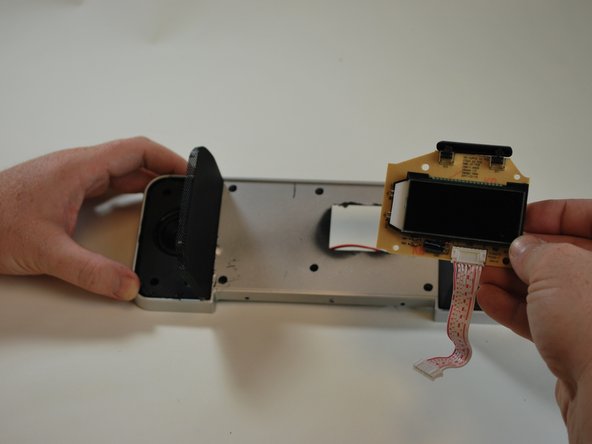
    • Using the Phillips screwdriver, remove the three screws that run along the center of the base.

  10. Insignia NS-CLIP02 Digital Display Replacement: 10 단계, 이미지 1/2 Insignia NS-CLIP02 Digital Display Replacement: 10 단계, 이미지 2/2
    • Carefully remove the base.

  11. Insignia NS-CLIP02 Digital Display Replacement: 11 단계, 이미지 1/2 Insignia NS-CLIP02 Digital Display Replacement: 11 단계, 이미지 2/2
    • Using the metal spudger, gently lift the face plate away from the display.

  12. Insignia NS-CLIP02 Digital Display Replacement: 12 단계, 이미지 1/1
    • Once the face plate is removed, use the Phillips screwdriver to remove the six screws shown here.

  13. Insignia NS-CLIP02 Digital Display Replacement: 13 단계, 이미지 1/2 Insignia NS-CLIP02 Digital Display Replacement: 13 단계, 이미지 2/2
    • Using the metal spudger, lift the speaker grilles from the display.

    • The speaker grilles will hinge on the side closest to the display.

  14. Insignia NS-CLIP02 Digital Display Replacement: 14 단계, 이미지 1/1
    • Using the Phillips screwdriver, remove the four screws shown here.

  15. Insignia NS-CLIP02 Digital Display Replacement: 15 단계, 이미지 1/2 Insignia NS-CLIP02 Digital Display Replacement: 15 단계, 이미지 2/2
    • The two pieces of the display should easily separate.

  16. Insignia NS-CLIP02 Digital Display Replacement: 16 단계, 이미지 1/1
    • Using the Phillips screwdriver, remove the three screws shown here.

  17. Insignia NS-CLIP02 Digital Display Replacement: 17 단계, 이미지 1/3 Insignia NS-CLIP02 Digital Display Replacement: 17 단계, 이미지 2/3 Insignia NS-CLIP02 Digital Display Replacement: 17 단계, 이미지 3/3
    • The digital display should now be easy to remove.

    • Replace with new part.

결론

To reassemble your device, follow these instructions in reverse order.

Aubrey

회원 가입일: 02/24/15

214 평판

안내서 2개 작성하였습니다

USF Tampa, Team 9-3, Leahy Winter 2015 USF Tampa, Team 9-3, Leahy Winter 2015 회원

USFT-LEAHY-W15S9G3

4 회원들

안내서 6개 작성하였습니다

댓글 0개

댓글 쓰기

조회 통계:

24 시간 전: 0

7일 전: 0

30일 전: 0

전체 시간: 463