주요 콘텐츠로 건너뛰기

Insignia NS-DS9PDVD15 Screen Replacement

필요한 것

  1. Insignia NS-DS9PDVD15  Screen Replacement, Bottom Cover: 1 단계, 이미지 1/2 Insignia NS-DS9PDVD15  Screen Replacement, Bottom Cover: 1 단계, 이미지 2/2
    • Turn the power off. Slide the power button to OFF.

  2. Insignia NS-DS9PDVD15  Screen Replacement: 2 단계, 이미지 1/2 Insignia NS-DS9PDVD15  Screen Replacement: 2 단계, 이미지 2/2
    • Unplug AC adapter from car cigarette lighter.

  3. Insignia NS-DS9PDVD15  Screen Replacement: 3 단계, 이미지 1/1
    • Make sure there is no DVD or CD in the disc tray

  4. Insignia NS-DS9PDVD15  Screen Replacement: 4 단계, 이미지 1/2 Insignia NS-DS9PDVD15  Screen Replacement: 4 단계, 이미지 2/2
    • Unscrew the nine 9mm screws with a JIS #000 screwdriver.

  5. Insignia NS-DS9PDVD15  Screen Replacement: 5 단계, 이미지 1/3 Insignia NS-DS9PDVD15  Screen Replacement: 5 단계, 이미지 2/3 Insignia NS-DS9PDVD15  Screen Replacement: 5 단계, 이미지 3/3
    • Pry off back panel with prying tool, then remove by hand.

  6. Insignia NS-DS9PDVD15  Screen Replacement, Disc Tray: 6 단계, 이미지 1/2 Insignia NS-DS9PDVD15  Screen Replacement, Disc Tray: 6 단계, 이미지 2/2
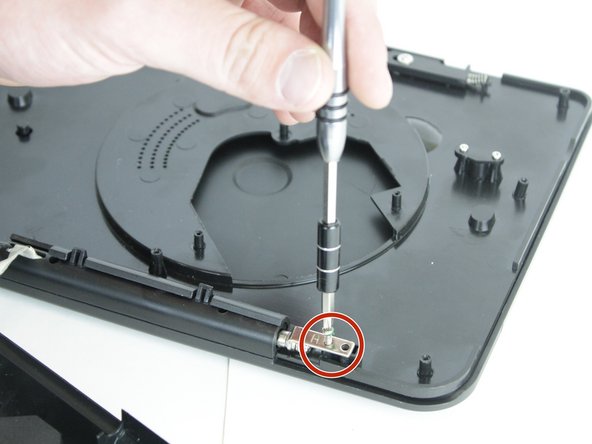
    • After the back is removed and the disk tray is loose from the bottom, locate the two, 3 mm screws that hold the tray to the hinge.

    • Unscrew them with the JIS #000 screwdriver.

  7. Insignia NS-DS9PDVD15  Screen Replacement: 7 단계, 이미지 1/1
    • Slide the tray up and off of the hinge completely.

  8. Insignia NS-DS9PDVD15  Screen Replacement, Screen: 8 단계, 이미지 1/1
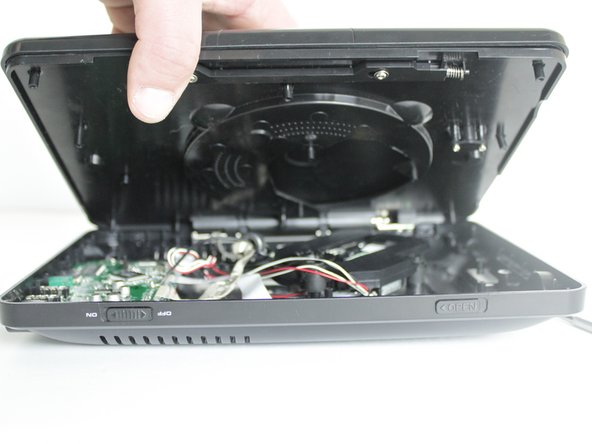
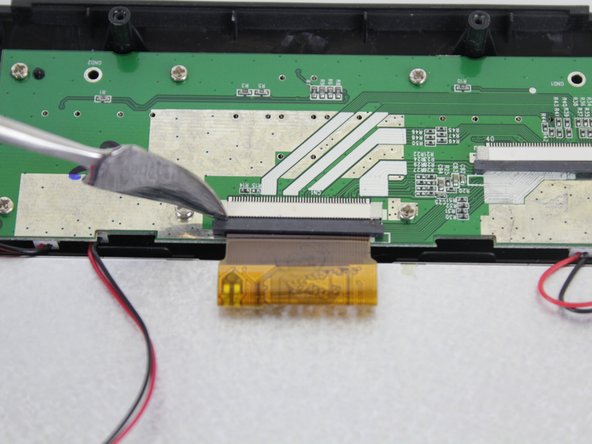
    • After the bottom cover and disk tray have been removed, remove the back panel from the top half.

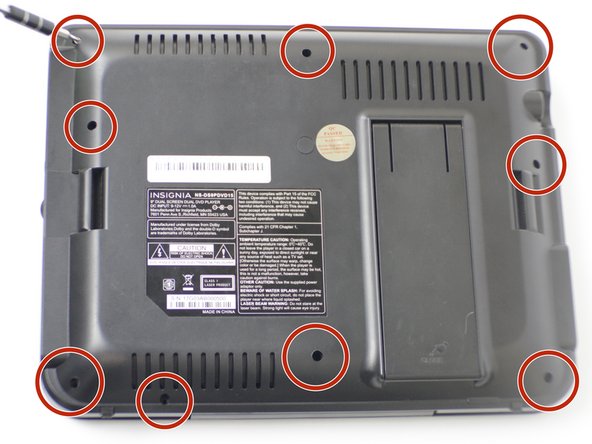
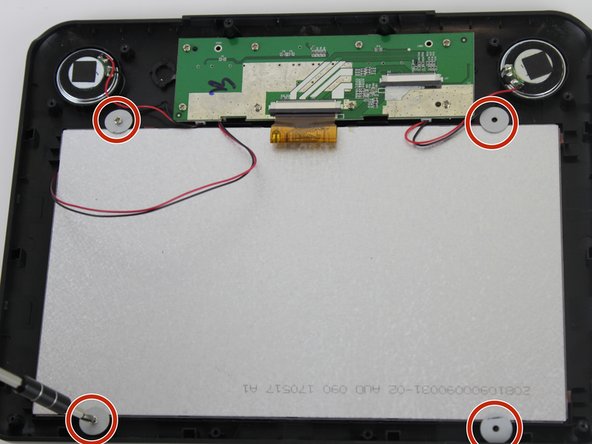
    • There are six, 9 mm screws on the bottom cover and 2 screws on the hinge. Remove them with the JIS #000 screwdriver.

  9. Insignia NS-DS9PDVD15  Screen Replacement: 9 단계, 이미지 1/2 Insignia NS-DS9PDVD15  Screen Replacement: 9 단계, 이미지 2/2
    • Once all the screws are removed, pry off the cover with the pry tool.

    • You'll see the PC board, back of the speakers, and the back of the screen.

  10. Insignia NS-DS9PDVD15  Screen Replacement: 10 단계, 이미지 1/2 Insignia NS-DS9PDVD15  Screen Replacement: 10 단계, 이미지 2/2
    • Remove the ribbon cable carefully with the pry tool.

    • First, push out the black portion.

  11. Insignia NS-DS9PDVD15  Screen Replacement: 11 단계, 이미지 1/2 Insignia NS-DS9PDVD15  Screen Replacement: 11 단계, 이미지 2/2
    • Next, push out the 'ribbon' with the pry tool.

  12. Insignia NS-DS9PDVD15  Screen Replacement: 12 단계, 이미지 1/2 Insignia NS-DS9PDVD15  Screen Replacement: 12 단계, 이미지 2/2
    • Unscrew the corners of screen with the JIS #000 screwdriver. There are four, 6 mm screws with washers.

  13. Insignia NS-DS9PDVD15  Screen Replacement: 13 단계, 이미지 1/2 Insignia NS-DS9PDVD15  Screen Replacement: 13 단계, 이미지 2/2
    • After the screws and washers are removed, you can lift the screen off with the pry tool.

결론

To reassemble your device, follow these instructions in reverse order.

Johnny Rozo

회원 가입일: 04/03/18

583 평판

안내서 4개 작성하였습니다

댓글 한 개

what is the model of the LCD Panel?

Justin Frost - 답글

댓글 쓰기

조회 통계:

24 시간 전: 0

7일 전: 3

30일 전: 5

전체 시간: 700