이 버전에는 잘못된 편집 사항이 있을 수 있습니다. 최신 확인된 스냅샷으로 전환하십시오.
필요한 것
-
이 단계는 번역되지 않았습니다. 번역을 도와주십시오
-
Remove the four 6.0 mm Phillips screws located below the rubber caps using the PH00 bit installed in the driver.
-
-
-
이 단계는 번역되지 않았습니다. 번역을 도와주십시오
-
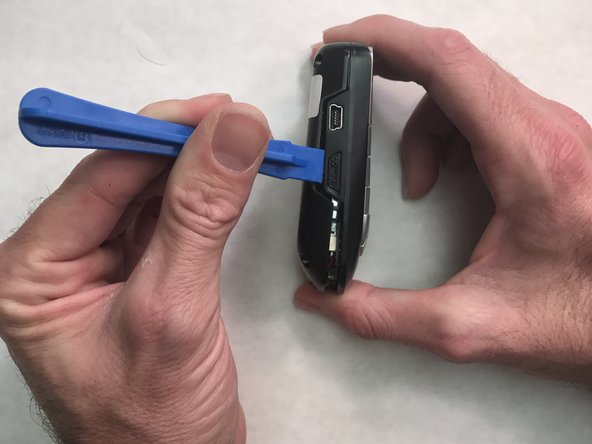
Use the plastic opening tool to pry open the back cover.
-
Slide the tool around the sides of the radio to gradually pry the back cover off. Do not remove the cover completely as there is still a cable connecting it to radio.
-
-
이 단계는 번역되지 않았습니다. 번역을 도와주십시오
-
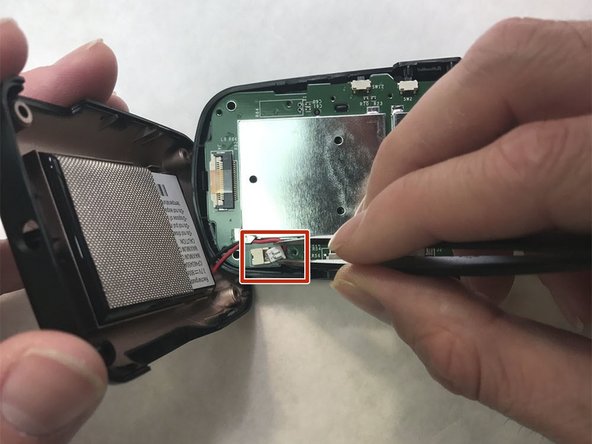
Use the blunt tweezers to unplug the battery cable from the PCB board. Grab the battery cable plug from the sides.
-
-
이 단계는 번역되지 않았습니다. 번역을 도와주십시오
-
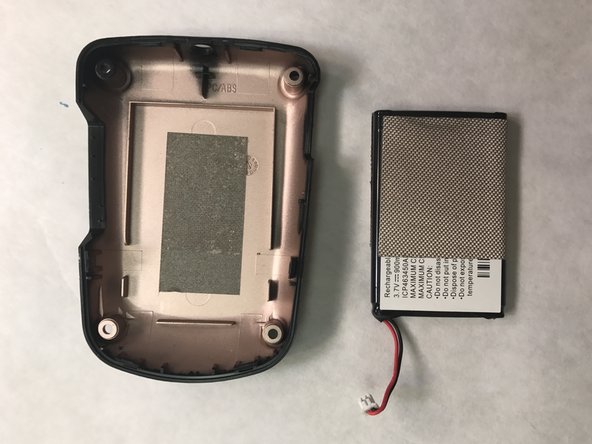
Use the flat side of the Spudger to pry the battery out of the back cover.
-
Insert the replacement battery into the back cover.
-
Reassemble the radio, making sure to reconnect the battery cable.
-


다른 2명이 해당 안내서를 완성하였습니다.
팀

IUPUI, Team 2-2, Wilson Fall 2016 IUPUI, Team 2-2, Wilson Fall 2016 회원
IUPUI-WILSON-F16S2G2
5 회원들
안내서 1개 작성하였습니다