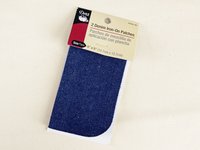
주요 콘텐츠로 건너뛰기

Installing an Iron-on Patch

필요한 것

  1. Installing an Iron-on Patch, Iron-on Patch: 1 단계, 이미지 1/2 Installing an Iron-on Patch, Iron-on Patch: 1 단계, 이미지 2/2
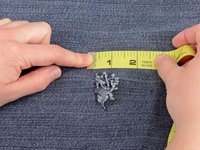
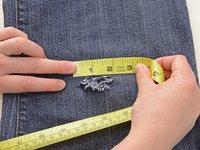
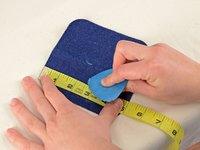
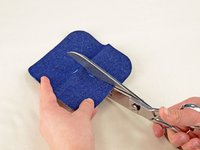
    • Examine the damage – cut off any long threads and clean off any debris.

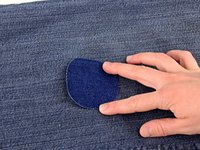
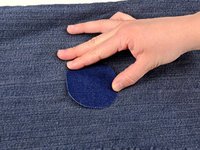
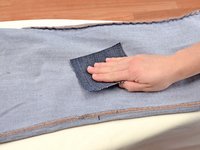
    • Grab your iron-on patch.

    • We are using a contrasting patch for visibility, but you may want something that matches with your jeans or a fun contrasting color.

  2. Installing an Iron-on Patch: 2 단계, 이미지 1/3 Installing an Iron-on Patch: 2 단계, 이미지 2/3 Installing an Iron-on Patch: 2 단계, 이미지 3/3
    • Preheat your iron according to the recommended settings found on the packaging information included with the patch.

    • Take a scrap of denim and place it inside the pant leg, beneath the hole.

    • This scrap material will keep your patch from sticking the front of your jeans to the back, which would effectively seal the leg opening shut (not a good thing...)

  3. Installing an Iron-on Patch: 3 단계, 이미지 1/2 Installing an Iron-on Patch: 3 단계, 이미지 2/2
    • Measure the length and width of the hole in your jeans, including any damaged area around the hole.

    • In our case the hole is about 1.5 inches by 2 inches.

  4. Installing an Iron-on Patch: 4 단계, 이미지 1/2 Installing an Iron-on Patch: 4 단계, 이미지 2/2
    • Add at least a half-inch in both directions to get your final patch measurements.

    • Mark your final patch measurements on the patch with tailor’s chalk.

  5. Installing an Iron-on Patch: 5 단계, 이미지 1/2 Installing an Iron-on Patch: 5 단계, 이미지 2/2
    • Cut the patch along your marks.

    • Round the corners of the patch, to prevent them from peeling up.

  6. Installing an Iron-on Patch: 6 단계, 이미지 1/3 Installing an Iron-on Patch: 6 단계, 이미지 2/3 Installing an Iron-on Patch: 6 단계, 이미지 3/3
    • Lay your cut patch over the hole and position it where you want it.

  7. Installing an Iron-on Patch: 7 단계, 이미지 1/2 Installing an Iron-on Patch: 7 단계, 이미지 2/2
    • Iron the patch according to the package instructions, usually from between 30-45 seconds. Keep the iron moving and try to apply even heat to the whole patch.

  8. Installing an Iron-on Patch: 8 단계, 이미지 1/2 Installing an Iron-on Patch: 8 단계, 이미지 2/2
    • Run your finger around the edge of the patch to ensure that all the edges are completely bonded to your jeans.

  9. Installing an Iron-on Patch: 9 단계, 이미지 1/3 Installing an Iron-on Patch: 9 단계, 이미지 2/3 Installing an Iron-on Patch: 9 단계, 이미지 3/3
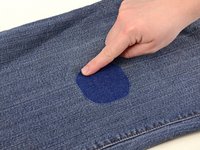
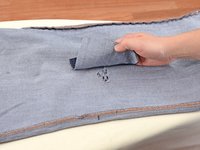
    • Turn the pant leg inside out.

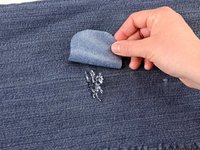
    • Gently try and lift the scrap of fabric from the inside of the pant leg.

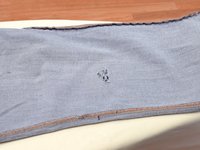
    • If the scrap comes off, you no longer need it.

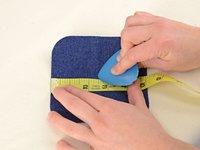
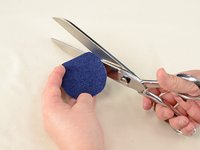
    • If the scrap is held firmly in place by the patch, simply trim away the excess fabric from where the scrap is adhered with your scissors, leaving the remaining scrap in place.
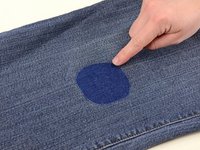
결론

Admire your work!

다른 19명이 해당 안내서를 완성하였습니다.

Brittany McCrigler

회원 가입일: 03/05/12

89,011 평판

안내서 131개 작성하였습니다

iFixit iFixit 회원

Staff

135 회원들

안내서 16,732개 작성하였습니다

댓글 5개

This is useful, but I hope we can see more. In particular, my kids have many holes in polar fleece pants that they love. You can't do an iron-on patch with fleece (the synthetic fiber can't take the heat), and sewing on a patch doesn't seem like a great idea since the material is stretchier than the patch. Does Patagonia have advice on how to repair these?

Raphael Sperry - 답글

Just a little video I put together how your your step by step procedure in video formats is done Hope it helps https://m.youtube.com/watch?v=T9iCnIr5Su...

ristuccia.daniel - 답글

what we men need is some way to fix pockets….. that flimsy stuff wears through in no time…

abrogard - 답글

Instead of a scrap piece of denim, I put another patch on the inside and iron them together.

Ken Eisman - 답글

Nice instructions for patching jeans, but need a video on how to patch a hole in a fleece jacket. Guessing we can't just put a denim patch on fleece material, as ironing would melt the fleece. Would love suggestions.

Thanks!

leslie.herrmann1@gmail.com - 답글

댓글 쓰기

조회 통계:

24 시간 전: 35

7일 전: 283

30일 전: 1,417

전체 시간: 212,144