주요 콘텐츠로 건너뛰기

JBL Charge 4 Battery Replacement

필요한 것

  1. JBL Charge 4 Battery Replacement, Speaker Grill: 1 단계, 이미지 1/1
    • Flip your speaker over and insert the plastic opening tool into the slit on the grille.

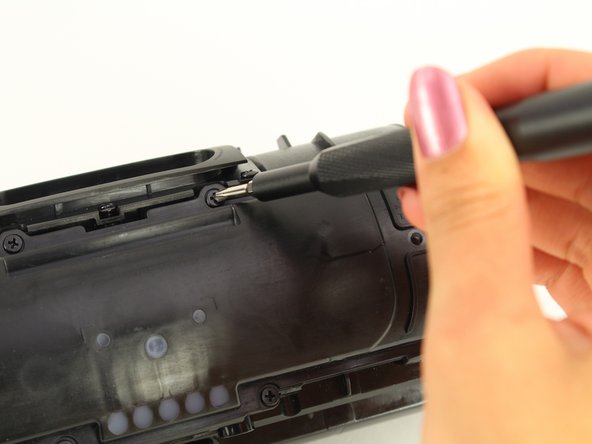
    • Pry away from yourself towards the back of the speaker to release the clip.

    • Repeat this process for the clip on the other side.

  2. JBL Charge 4 Battery Replacement: 2 단계, 이미지 1/2 JBL Charge 4 Battery Replacement: 2 단계, 이미지 2/2
    • Remove the two 8mm Phillips #0 screws from the other edge of the grille.

  3. JBL Charge 4 Battery Replacement: 3 단계, 이미지 1/1
    • Pull apart both sides of the grille.

    • Lift the cover off of the speaker.

  4. JBL Charge 4 Battery Replacement, Passive Bass Radiators: 4 단계, 이미지 1/2 JBL Charge 4 Battery Replacement, Passive Bass Radiators: 4 단계, 이미지 2/2
    • Using the plastic opening tool, lift the tab on top of the speaker to release the radiator from the clips.

    • Repeat this process on the other clips around the radiator to release it from the frame.

  5. JBL Charge 4 Battery Replacement: 5 단계, 이미지 1/2 JBL Charge 4 Battery Replacement: 5 단계, 이미지 2/2
    • Push the radiator off of the frame of the device.

    • Repeat on the other side.

    • The passive bass radiators seal out water from inside the device. Removing them multiple times may compromise the waterproof nature of the speaker.

  6. JBL Charge 4 Battery Replacement, Battery: 6 단계, 이미지 1/2 JBL Charge 4 Battery Replacement, Battery: 6 단계, 이미지 2/2
    • Remove the two 6mm Phillips #0 screws on the front side of the port bay cover.

  7. JBL Charge 4 Battery Replacement: 7 단계, 이미지 1/1
    • Gently slide the cover back and off the hooks.

    • Remove the port bay cover.

  8. JBL Charge 4 Battery Replacement: 8 단계, 이미지 1/3 JBL Charge 4 Battery Replacement: 8 단계, 이미지 2/3 JBL Charge 4 Battery Replacement: 8 단계, 이미지 3/3
    • Remove the two 6mm Phillips #0 screws.

    • Remove the four 8mm Phillips #0 screws.

  9. JBL Charge 4 Battery Replacement: 9 단계, 이미지 1/1
    • Lift up the battery cover.

  10. JBL Charge 4 Battery Replacement: 10 단계, 이미지 1/3 JBL Charge 4 Battery Replacement: 10 단계, 이미지 2/3 JBL Charge 4 Battery Replacement: 10 단계, 이미지 3/3
    • Remove the sticky tape to expose the white ribbon cable ZIF connector.

    • Flip up the black locking flap on the ZIF connector with the tip of a spudger or your fingernail to release the cable.

    • Remove the white ribbon cable from the battery cover and place the cover to the side.

  11. JBL Charge 4 Battery Replacement: 11 단계, 이미지 1/2 JBL Charge 4 Battery Replacement: 11 단계, 이미지 2/2
    • Remove the battery from the battery socket by gently pulling on it.

  12. JBL Charge 4 Battery Replacement: 12 단계, 이미지 1/3 JBL Charge 4 Battery Replacement: 12 단계, 이미지 2/3 JBL Charge 4 Battery Replacement: 12 단계, 이미지 3/3
    • Pull out the battery enough to expose the battery's wire connector.

    • Push down on the white tab and gently pull out the battery-device connector.

결론

To reassemble your device, follow these instructions in reverse order.

다른 20명이 해당 안내서를 완성하였습니다.

Sydney Seto

회원 가입일: 01/24/19

753 평판

안내서 1개 작성함

Cal Poly, Team S1-G1, White Winter 2019 Cal Poly, Team S1-G1, White Winter 2019 회원

CPSU-WHITE-W19S1G1

4 회원들

안내서 26개 작성하였습니다

댓글 15개

Where do you buy a battery for a jbl Charge 4 ??

Matt hempel - 답글

Probably just cut open the blue foil around the batteries and replace them by re-soldering the electronics onto new 18650 batteries.

correct me if I’m wrong here.

Brendon Reijnders -

If you know how to handle them and have experience with soldering them that's a yes if not those batteries are really dangerous if you don't know how to do it correctly.

Hart80 -

Where in the !&&* do i get a battery for a bluetooth speaker. What happened to the jbl charge 4 that it even goes out???

Shani Sanders - 답글

My JBL charge 4 battery dead too. 9nly uses it for three months

osborne buhere - 답글

댓글 쓰기

조회 통계:

24 시간 전: 34

7일 전: 269

30일 전: 1,226

전체 시간: 61,478