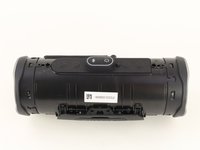
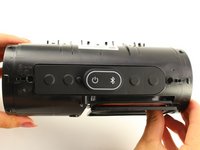
주요 콘텐츠로 건너뛰기

JBL Charge 4 Buttons Replacement

필요한 것

  1. JBL Charge 4 Buttons Replacement, Speaker Grill: 1 단계, 이미지 1/1
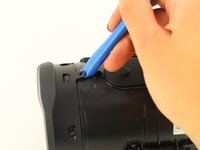
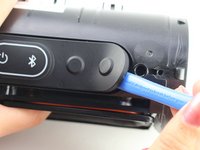
    • Flip your speaker over and insert the plastic opening tool into the slit on the grille.

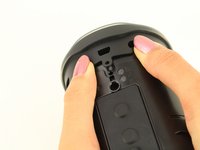
    • Pry away from yourself towards the back of the speaker to release the clip.

    • Repeat this process for the clip on the other side.

  2. JBL Charge 4 Buttons Replacement: 2 단계, 이미지 1/2 JBL Charge 4 Buttons Replacement: 2 단계, 이미지 2/2
    • Remove the two 8mm Phillips #0 screws from the other edge of the grille.

  3. JBL Charge 4 Buttons Replacement: 3 단계, 이미지 1/1
    • Pull apart both sides of the grille.

    • Lift the cover off of the speaker.

  4. JBL Charge 4 Buttons Replacement, Passive Bass Radiators: 4 단계, 이미지 1/2 JBL Charge 4 Buttons Replacement, Passive Bass Radiators: 4 단계, 이미지 2/2
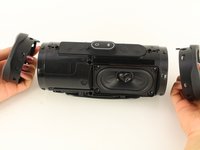
    • Using the plastic opening tool, lift the tab on top of the speaker to release the radiator from the clips.

    • Repeat this process on the other clips around the radiator to release it from the frame.

  5. JBL Charge 4 Buttons Replacement: 5 단계, 이미지 1/2 JBL Charge 4 Buttons Replacement: 5 단계, 이미지 2/2
    • Push the radiator off of the frame of the device.

    • Repeat on the other side.

    • The passive bass radiators seal out water from inside the device. Removing them multiple times may compromise the waterproof nature of the speaker.

  6. JBL Charge 4 Buttons Replacement, Buttons: 6 단계, 이미지 1/3 JBL Charge 4 Buttons Replacement, Buttons: 6 단계, 이미지 2/3 JBL Charge 4 Buttons Replacement, Buttons: 6 단계, 이미지 3/3
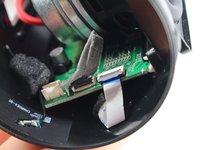
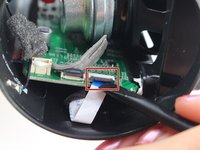
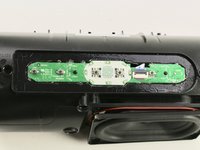
    • Lift up the tape covering the button control board ZIF connector on the left side of the motherboard.

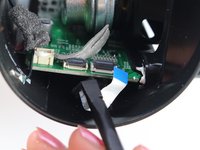
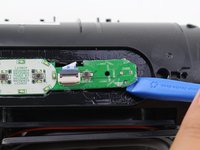
    • Flip up the black locking flap on the ZIF connector with the tip of the spudger or your fingernail to release the white ribbon cable.

  7. JBL Charge 4 Buttons Replacement: 7 단계, 이미지 1/2 JBL Charge 4 Buttons Replacement: 7 단계, 이미지 2/2
    • Flip the speaker over so the buttons are on the top.

    • Using the plastic opening tool, pry up the rubber covering the button control board from the adhesive.

    • Remove the cover and set to the side.

    • By removing the rubber cover and the control board you are breaking adhesives that may result in the speaker no longer being waterproof.

  8. JBL Charge 4 Buttons Replacement: 8 단계, 이미지 1/3 JBL Charge 4 Buttons Replacement: 8 단계, 이미지 2/3 JBL Charge 4 Buttons Replacement: 8 단계, 이미지 3/3
    • Using the plastic opening tool, pry up the button control board from the adhesive.

    • This will require cutting the adhesive surrounding the board.

    • Gently lift off the button control board feeding the ribbon cable through the slot.

    • When installing a new button control board, make sure to clean all the adhesive residue left by the old board.

결론

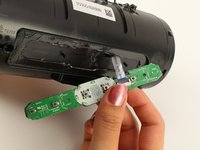
To reassemble your device, follow these instructions in reverse order.

다른 13명이 해당 안내서를 완성하였습니다.

Zachary Colwell

회원 가입일: 01/24/19

1,905 평판

안내서 5개 작성하였습니다

Cal Poly, Team S1-G1, White Winter 2019 Cal Poly, Team S1-G1, White Winter 2019 회원

CPSU-WHITE-W19S1G1

4 회원들

안내서 26개 작성하였습니다

댓글 2개

Hi - where can I buy the button control board?

Rahman Sayeed - 답글

How do I boot up JBL CHARGE 4

sashajankovic527 - 답글

댓글 쓰기

조회 통계:

24 시간 전: 8

7일 전: 45

30일 전: 204

전체 시간: 22,560